【CV】使用 matplotlib.pyplot 绘制统计图、坐标系原点在不同的位置和添加辅助点和辅助线
发布时间:2024年01月18日
1. 数据
这里使用模拟数据
import random
import matplotlib.pyplot as plt


values = [i * random.random() for i in range(100)]
values

[0.0,
 0.2596417433881839,
 1.0607353016866907,
...
 89.24287458194097,
 78.48300255421442]
2.坐标原点-左下角
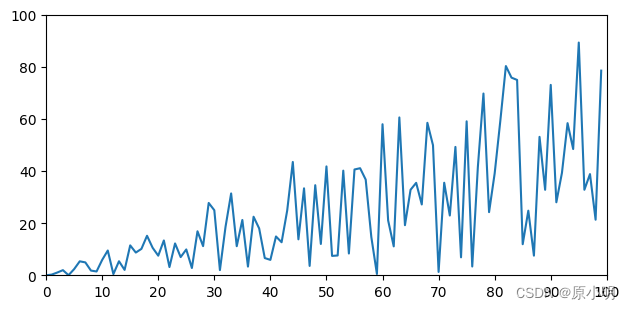
坐标系原点在左下角,正常坐标系
def plot_normal(values):
    """
    1. 正常坐标系
    """
    plt.figure(figsize=(6.4, 3.2), dpi=100)
    # 画图
    plt.plot(values)
    # 坐标轴范围
    plt.axis((0, 100, 0, 100))
    # 坐标轴区间: x 为 10 , y 为 20
    plt.xticks([i * 10 for i in range(11)])
    plt.yticks([i * 20 for i in range(6)])
    plt.tight_layout()
    plt.show()


plot_normal(values)
3.坐标原点-左上角
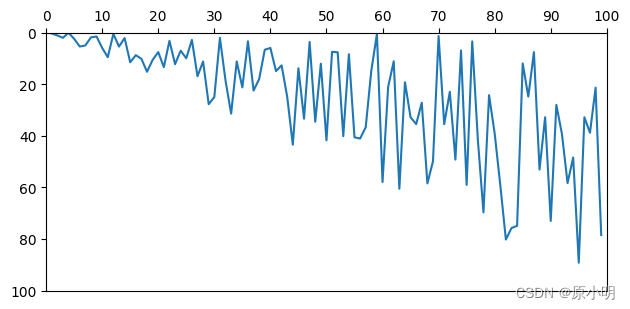
坐标系原点在左上角-图像坐标
def plot_origin_left_top(values):
    """
    2. 坐标原点在左上角
    """
    plt.figure(figsize=(6.4, 3.2), dpi=100)
    ax = plt.subplot()
    ax.plot(values)
    # 坐标轴范围
    ax.axis((0, 100, 0, 100))
    # 坐标轴区间: x 为 10 , y 为 20
    ax.set_xticks([i * 10 for i in range(11)])
    ax.set_yticks([i * 20 for i in range(6)])
    # 坐标原点在左上角
    ax.xaxis.set_ticks_position("top")
    ax.invert_yaxis()
    # 显示
    plt.tight_layout()
    plt.show()

plot_origin_left_top(values)
4.坐标原点-在中间
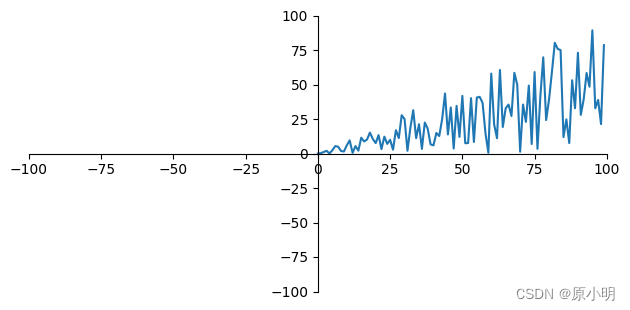
坐标系原点在中间位置
def plot_origin_center(values):
    """
    3. 坐标原点在中间
    """
    plt.figure(figsize=(6.4, 3.2), dpi=100)
    ax = plt.subplot()
    ax.plot(values)
    # 坐标轴范围
    ax.axis((-100, 100, -100, 100))
    # 坐标轴原点在中间
    ax.spines["top"].set_color("none")
    ax.spines["left"].set_position("zero")
    ax.spines["right"].set_color("none")
    ax.spines["bottom"].set_position("zero")
    # 显示
    plt.tight_layout()
    plt.show()

plot_origin_center(values)
5.坐标系-辅助点
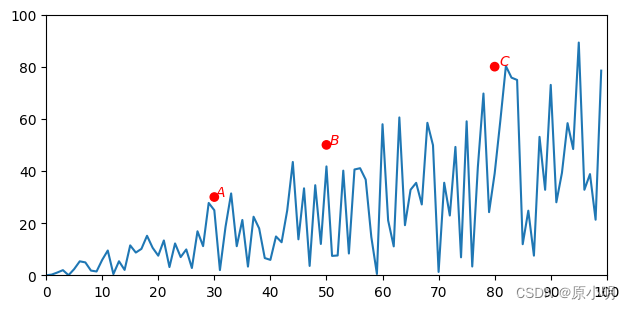
坐标系,添加辅助点和并标记点文字信息
def plot_point_and_text(values, points):
    """
    4. 绘制辅助点和辅助点文字
    """
    plt.figure(figsize=(6.4, 3.2), dpi=100)
    ax = plt.subplot()
    ax.plot(values)
    # 辅助点
    point_xx = [point[0] for point in points]
    point_yy = [point[1] for point in points]
    point_cc = ["r" for i in range(len(points))]
    point_labels = ["A", "B", "C", "D"]
    ax.scatter(x=point_xx, y=point_yy, c=point_cc)
    for index, point in enumerate(points):
        ax.text(
            x=point[0] * 1.01,
            y=point[1] *1.01,
            s=point_labels[index],
            fontsize=10,
            color="r",
            style="italic",
            weight="light",
        )
    # 坐标轴范围
    ax.axis((0, 100, 0, 100))
    # 坐标轴区间: x 为 10 , y 为 20
    ax.set_xticks([i * 10 for i in range(11)])
    ax.set_yticks([i * 20 for i in range(6)])
    # 显示
    plt.tight_layout()
    plt.show()


points = [[30, 30], [50, 50], [80, 80]]
plot_point_and_text(values, points)
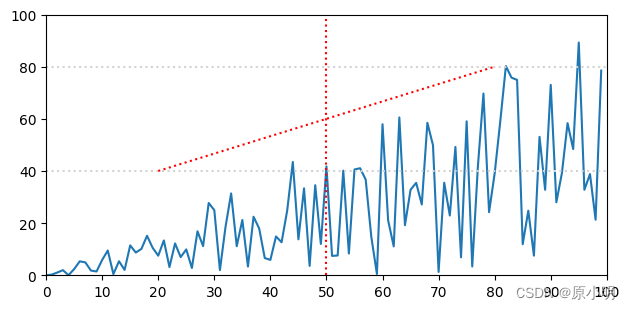
6.坐标系-辅助线
坐标系,添加横向和纵向辅助参考线
def plot_hline(values, lines):
    """
    5. 绘制辅助线
    """
    plt.figure(figsize=(6.4, 3.2), dpi=100)
    ax = plt.subplot()
    ax.plot(values)
    # 方式1: 基于坐标轴的辅助线
    ax.axhline(y=40, c="lightgrey", ls="dotted")
    ax.axhline(y=80, c="lightgrey", ls="dotted")
    # 方式2: 画线
    for line in lines:
        line_xx = [point[0] for point in line]
        line_yy = [point[1] for point in line]
        ax.plot(line_xx, line_yy, c="r", ls="dotted")
    # 坐标轴范围
    ax.axis((0, 100, 0, 100))
    # 坐标轴区间: x 为 10 , y 为 20
    ax.set_xticks([i * 10 for i in range(11)])
    ax.set_yticks([i * 20 for i in range(6)])
    # 显示
    plt.tight_layout()
    plt.show()


lines = [([50, 0], [50, 100]),([20, 40], [80, 80])]
plot_hline(values, lines)
- 灰色为方式一,添加的灰色辅助线
- 红色为方式二,添加的红色辅助线
文章来源:https://blog.csdn.net/LABLENET/article/details/135678056
本文来自互联网用户投稿,该文观点仅代表作者本人,不代表本站立场。本站仅提供信息存储空间服务,不拥有所有权,不承担相关法律责任。 如若内容造成侵权/违法违规/事实不符,请联系我的编程经验分享网邮箱:chenni525@qq.com进行投诉反馈,一经查实,立即删除!
本文来自互联网用户投稿,该文观点仅代表作者本人,不代表本站立场。本站仅提供信息存储空间服务,不拥有所有权,不承担相关法律责任。 如若内容造成侵权/违法违规/事实不符,请联系我的编程经验分享网邮箱:chenni525@qq.com进行投诉反馈,一经查实,立即删除!
最新文章
- Python教程
- 深入理解 MySQL 中的 HAVING 关键字和聚合函数
- Qt之QChar编码(1)
- MyBatis入门基础篇
- 用Python脚本实现FFmpeg批量转换
- 案例093:基于微信小程序的南宁周边乡村游设计与实现
- 【Docker】Docker基础教程
- Spring-IOC-xml方式
- Intel? Enclave Exiting Events(四)
- 盖子的c++小课堂:第二十六讲:双向链表
- Cortex-M3/M4内核NVIC及HAL库函数详解(4):使用HAL库配置外部中断
- Java-第一章 枚举的用法详解及练习
- linux的一些典型面试题解读
- Spring缓存注解@Cacheable、@CachePut、@CacheEvict
- C++:类和对象(1)