gin中使用swagger生成接口文档
发布时间:2024年01月24日
想要使用gin-swagger为你的代码自动生成接口文档,一般需要下面三个步骤:
- 按照swagger要求给接口代码添加声明式注释,具体参照声明式注释格式。
- 使用swag工具扫描代码自动生成API接口文档数据
- 使用gin-swagger渲染在线接口文档页面
第一步:添加注释
在程序入口main函数上以注释的方式写下项目相关介绍信息。
package main

// @title 这里写标题
// @version 1.0
// @description 这里写描述信息
// @termsOfService http://swagger.io/terms/

// @contact.name 这里写联系人信息
// @contact.url http://www.swagger.io/support
// @contact.email support@swagger.io

// @license.name Apache 2.0
// @license.url http://www.apache.org/licenses/LICENSE-2.0.html

// @host 这里写接口服务的host
// @BasePath 这里写base path
func main() {
	r := gin.New()

	// liwenzhou.com ...

	r.Run()
}
在你代码中处理请求的接口函数(通常位于controller层)按如下方式写上注释:
// GetPostListHandler2 升级版帖子列表接口
// @Summary 升级版帖子列表接口
// @Description 可按社区按时间或分数排序查询帖子列表接口
// @Tags 帖子相关接口
// @Accept application/json
// @Produce application/json
// @Param Authorization header string false "Bearer 用户令牌"
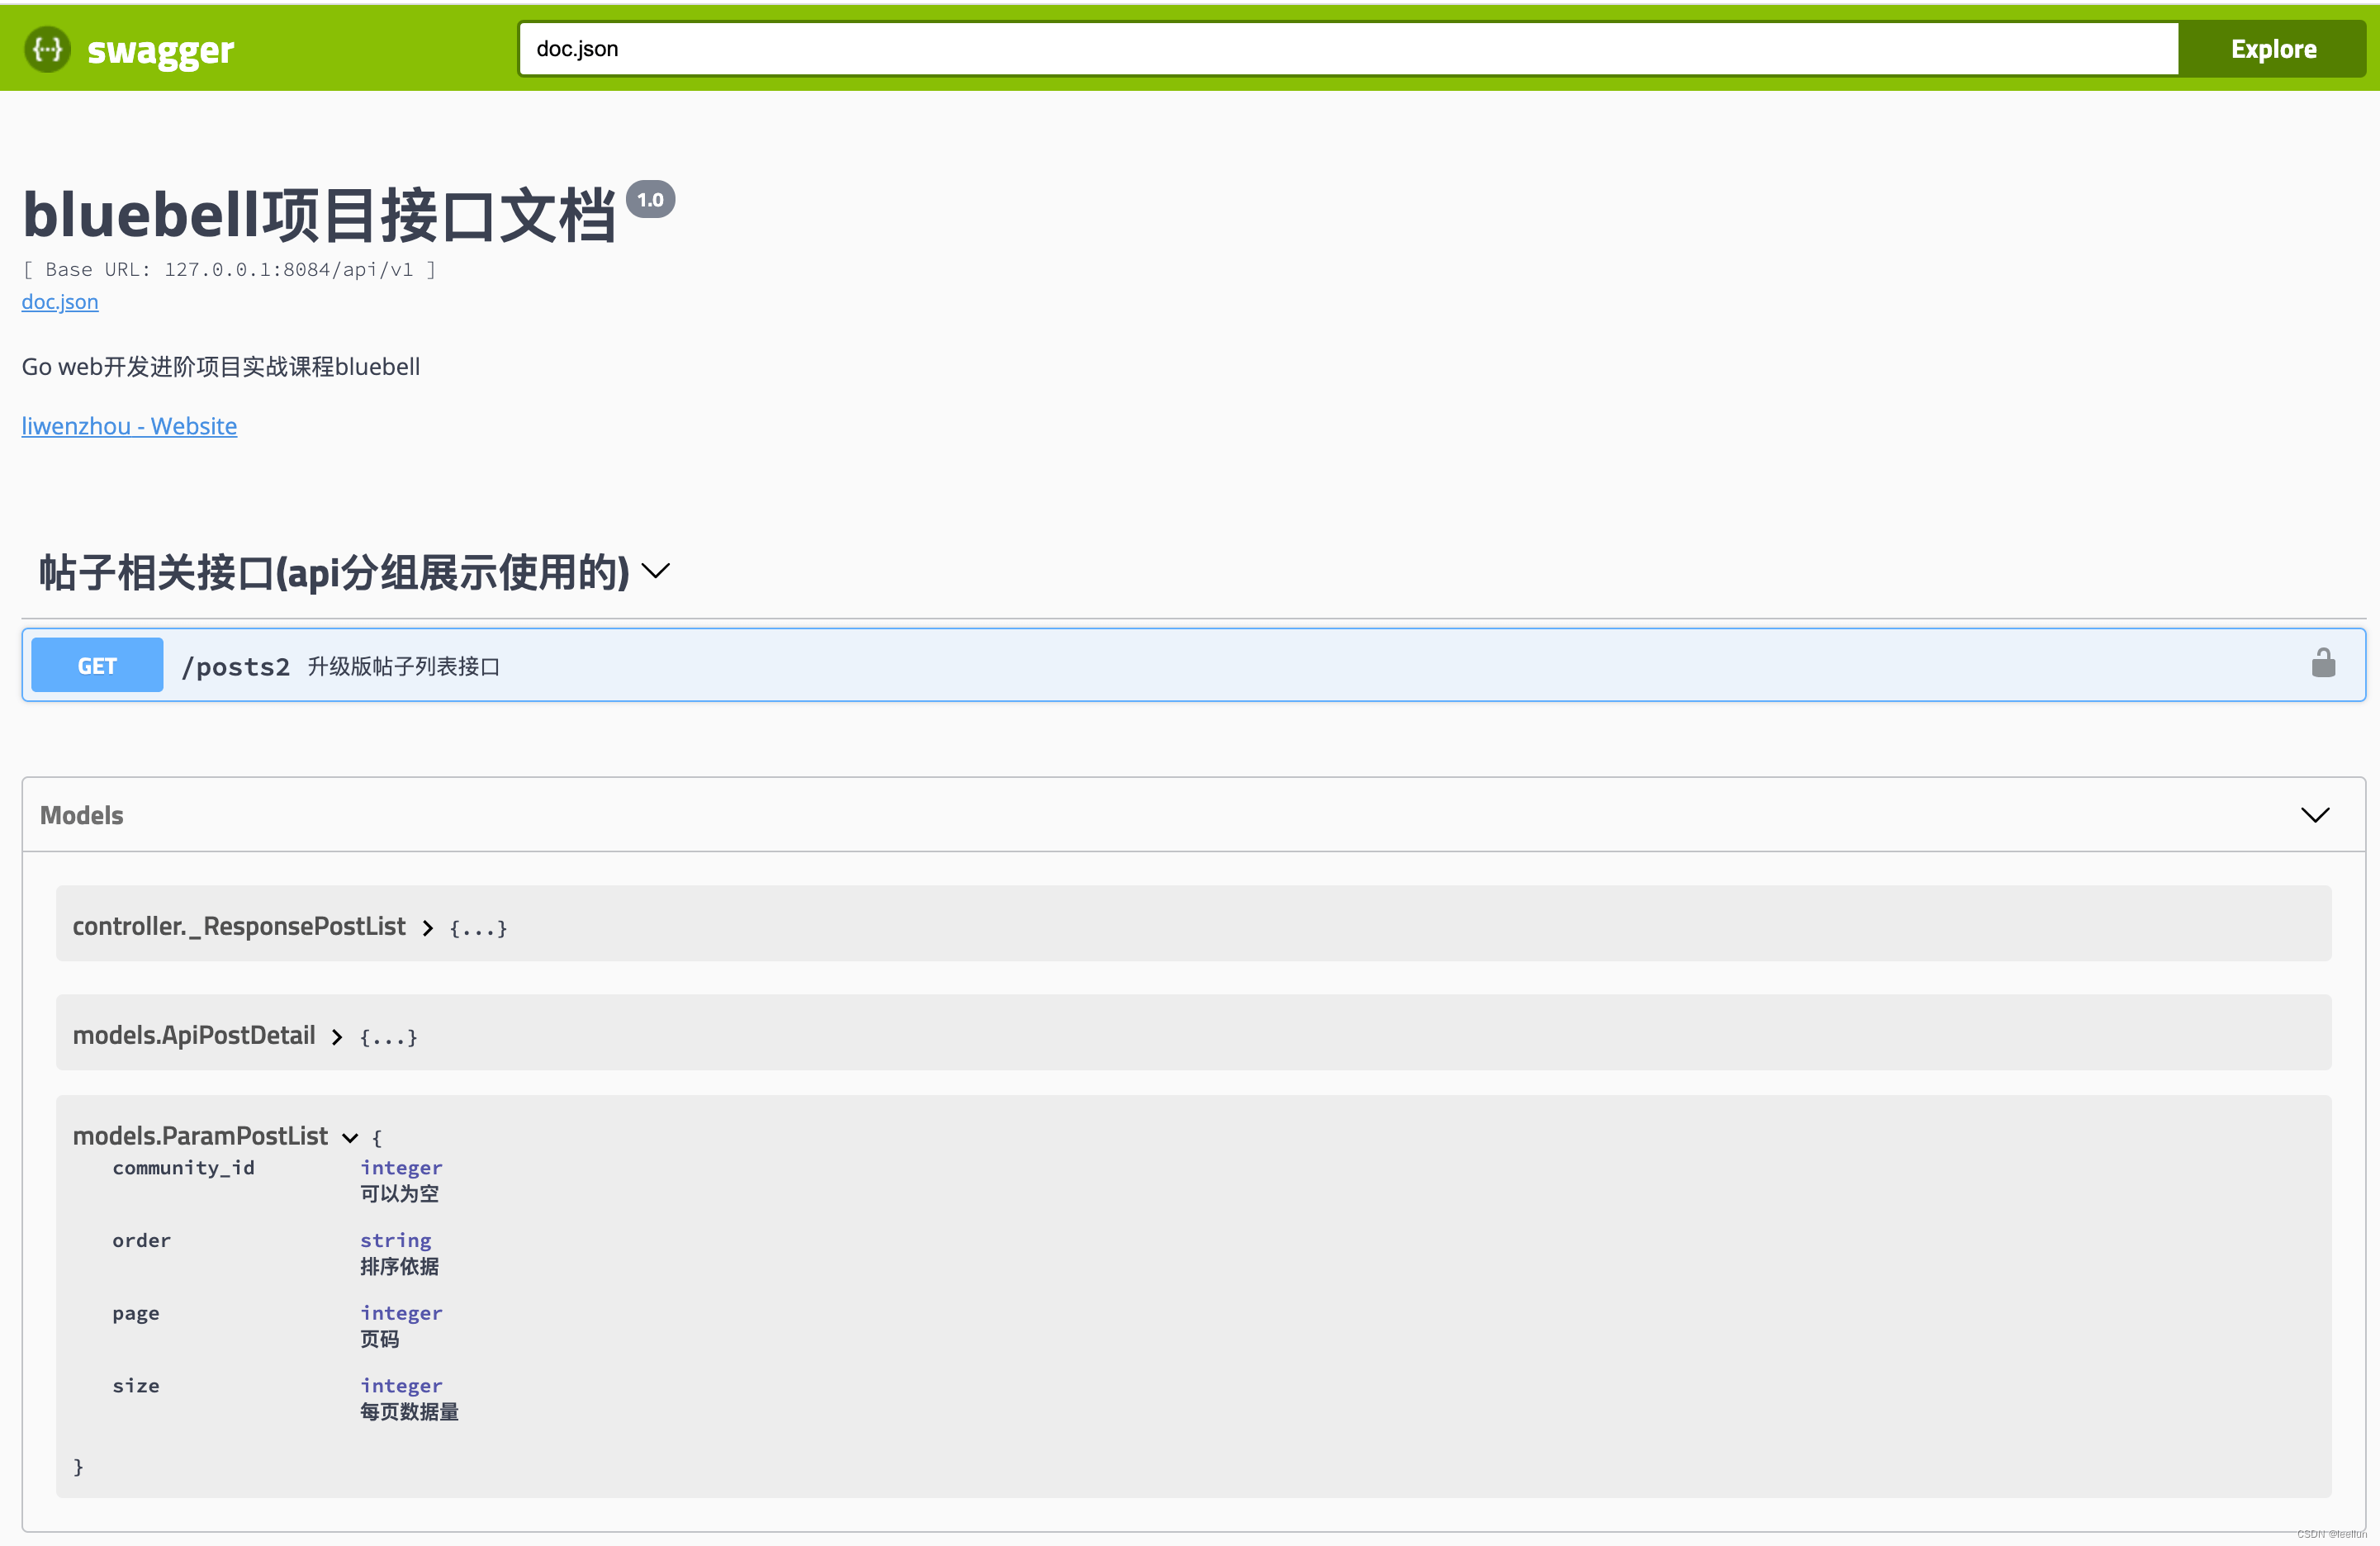
// @Param object query models.ParamPostList false "查询参数"
// @Security ApiKeyAuth
// @Success 200 {object} _ResponsePostList
// @Router /posts2 [get]
func GetPostListHandler2(c *gin.Context) {
	// GET请求参数(query string):/api/v1/posts2?page=1&size=10&order=time
	// 初始化结构体时指定初始参数
	p := &models.ParamPostList{
		Page:  1,
		Size:  10,
		Order: models.OrderTime,
	}

	if err := c.ShouldBindQuery(p); err != nil {
		zap.L().Error("GetPostListHandler2 with invalid params", zap.Error(err))
		ResponseError(c, CodeInvalidParam)
		return
	}
	data, err := logic.GetPostListNew(p)
	// 获取数据
	if err != nil {
		zap.L().Error("logic.GetPostList() failed", zap.Error(err))
		ResponseError(c, CodeServerBusy)
		return
	}
	ResponseSuccess(c, data)
	// 返回响应
}
上面注释中参数类型使用了object,models.ParamPostList具体定义如下:
// bluebell/models/params.go

// ParamPostList 获取帖子列表query string参数
type ParamPostList struct {
	CommunityID int64  `json:"community_id" form:"community_id"`   // 可以为空
	Page        int64  `json:"page" form:"page" example:"1"`       // 页码
	Size        int64  `json:"size" form:"size" example:"10"`      // 每页数据量
	Order       string `json:"order" form:"order" example:"score"` // 排序依据
}
响应数据类型也使用的object,我个人习惯在controller层专门定义一个docs_models.go文件来存储文档中使用的响应数据model。
// bluebell/controller/docs_models.go

// _ResponsePostList 帖子列表接口响应数据
type _ResponsePostList struct {
	Code    ResCode                 `json:"code"`    // 业务响应状态码
	Message string                  `json:"message"` // 提示信息
	Data    []*models.ApiPostDetail `json:"data"`    // 数据
}
第二步:生成接口文档数据
编写完注释后,使用以下命令安装swag工具:
go get -u github.com/swaggo/swag/cmd/swag
在项目根目录执行以下命令,使用swag工具生成接口文档数据。
swag init
执行完上述命令后,如果你写的注释格式没问题,此时你的项目根目录下会多出一个docs文件夹。
./docs
├── docs.go
├── swagger.json
└── swagger.yaml
第三步:引入gin-swagger渲染文档数据
然后在项目代码中注册路由的地方按如下方式引入gin-swagger相关内容:
import (
	// liwenzhou.com ...

	_ "bluebell/docs"  // 千万不要忘了导入把你上一步生成的docs

	gs "github.com/swaggo/gin-swagger"
	"github.com/swaggo/gin-swagger/swaggerFiles"

	"github.com/gin-gonic/gin"
)
注册swagger api相关路由
r.GET("/swagger/*any", gs.WrapHandler(swaggerFiles.Handler))
把你的项目程序运行起来,打开浏览器访问http://localhost:8080/swagger/index.html就能看到Swagger 2.0 Api文档了。

gin-swagger同时还提供了DisablingWrapHandler函数,方便我们通过设置某些环境变量来禁用Swagger。例如:
r.GET("/swagger/*any", gs.DisablingWrapHandler(swaggerFiles.Handler, "NAME_OF_ENV_VARIABLE"))
此时如果将环境变量NAME_OF_ENV_VARIABLE设置为任意值,则/swagger/*any将返回404响应,就像未指定路由时一样。
文章来源:https://blog.csdn.net/liu289747235/article/details/135819323
本文来自互联网用户投稿,该文观点仅代表作者本人,不代表本站立场。本站仅提供信息存储空间服务,不拥有所有权,不承担相关法律责任。 如若内容造成侵权/违法违规/事实不符,请联系我的编程经验分享网邮箱:chenni525@qq.com进行投诉反馈,一经查实,立即删除!
本文来自互联网用户投稿,该文观点仅代表作者本人,不代表本站立场。本站仅提供信息存储空间服务,不拥有所有权,不承担相关法律责任。 如若内容造成侵权/违法违规/事实不符,请联系我的编程经验分享网邮箱:chenni525@qq.com进行投诉反馈,一经查实,立即删除!
最新文章
- Python教程
- 深入理解 MySQL 中的 HAVING 关键字和聚合函数
- Qt之QChar编码(1)
- MyBatis入门基础篇
- 用Python脚本实现FFmpeg批量转换
- transbigdata 笔记: 官方文档示例3:车辆轨迹数据处理
- Java反射获取实例并填充注解值
- 【PostgreSQL】数据查询-表的表达式
- 基于web的山东红色旅游信息管理系统的设计与实现论文
- 【python小知识】关于DataFrame
- iOS 位运算符浅析:与、或、异或、取反、左移、右移
- 编程笔记 html5&css&js 024 HTML表单元素
- 调试python程序(pdb)
- JavaScript:解构
- RHEL8安装Oracle 19c软件runInstaller报错