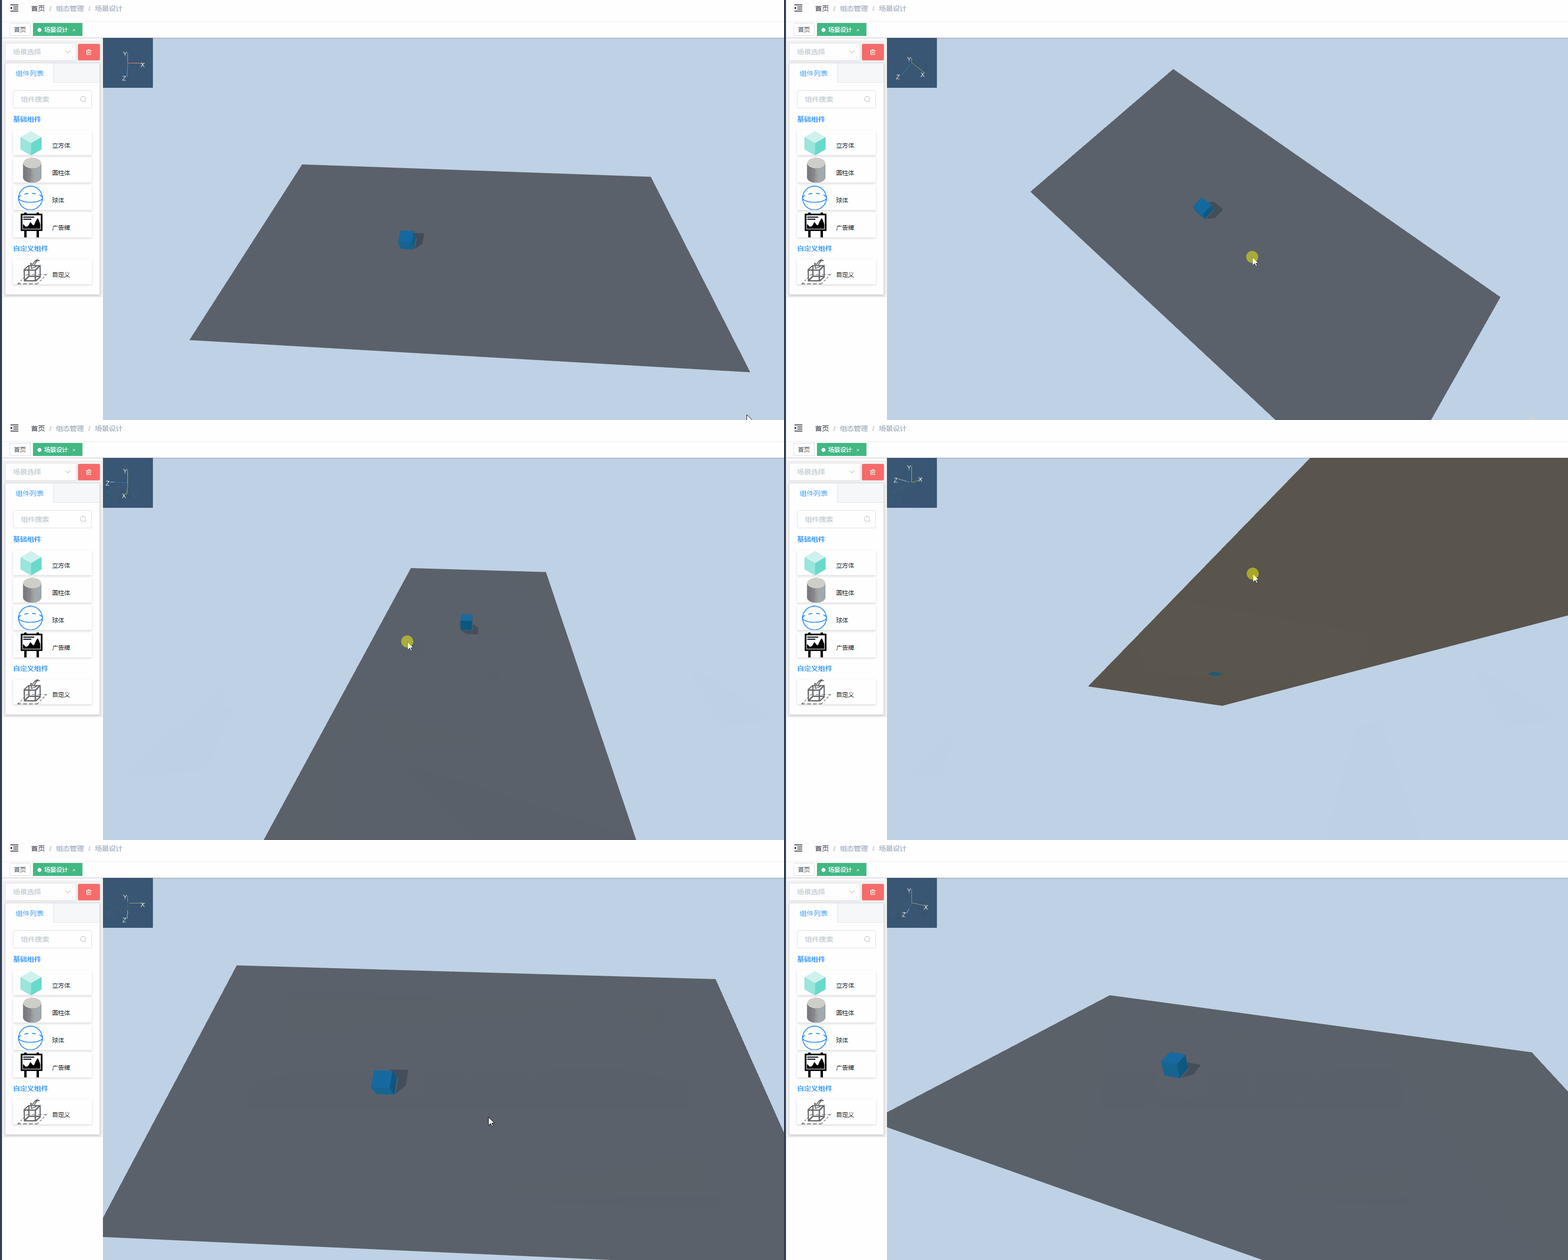
three.js场景设计器-小地图的视角参考功能

three.js实现场景方向的左上角小地图
思路
1:创建单独场景
2.添加辅助线
3.添加坐标轴的XYZ文字-使用sprite实现
4.旋转主视图时同步相机位置到小地图。
<template>
? ? <div ref="miniMapContainer" class="mini-map"></div>
</template>
<script>
import * as THREE from 'three';
import createHelper from './createHelper';
export default {
? ? name: 'miniMap',
? ? data() {
? ? ? ? return {
? ? ? ? ? ? width: 100,
? ? ? ? ? ? height: 100,
? ? ? ? ? ? renderer: null,
? ? ? ? ? ? sprites: [],
? ? ? ? ? ? scene: null,
? ? ? ? ? ? camera: null,
? ? ? ? ? ? axesHelper: null
? ? ? ? };
? ? },
? ? mounted() {
? ? ? ? this.initThree();
? ? },
? ? methods: {
? ? ? ? updatePosition(mainCamera) {
? ? ? ? ? ? // 复制主地图的视角
? ? ? ? ? ?
? ? ? ? ? ? this.camera.position.copy(mainCamera.position);
? ? ? ? ? ? // if( this.camera.position.y>0&& this.camera.position.y<35){
? ? ? ? ? ? // ? ? this.camera.position.y=35;
? ? ? ? ? ? // }
? ? ? ? ? ? this.camera.rotation.copy(mainCamera.rotation);
? ? ? ? ? ? this.camera.lookAt(new THREE.Vector3(0, 0, 0));
? ? ? ? },
? ? ? ? initThree() {
? ? ? ? ? ? // 创建渲染器
? ? ? ? ? ? this.renderer = new THREE.WebGLRenderer({ alpha: true });
? ? ? ? ? ? this.renderer.setClearColor(0x000000, 0); // the default ?
? ? ? ? ? ? this.renderer.setSize(this.width, this.height);
? ? ? ? ? ? // this.renderer.setClearColor(0x000000, 0.1);
? ? ? ? ? ? // 将渲染器的dom元素加入Vue组件的容器中
? ? ? ? ? ? this.$refs.miniMapContainer.appendChild(this.renderer.domElement);
? ? ? ? ? ? // 创建场景
? ? ? ? ? ? this.scene = new THREE.Scene();
? ? ? ? ? ? this.scene.background = new THREE.Color(0x002244);
? ? ? ? ? ? // 创建相机
? ? ? ? ? ? // this. camera = new THREE.PerspectiveCamera(70, this. width / ?this.height, 0.01, 10);
? ? ? ? ? ? this.camera = new THREE.OrthographicCamera(
? ? ? ? ? ? ? ? this.width / - 2, this.width / 2, this.height / 2, this.height / - 2, 1, 1000
? ? ? ? ? ? );
? ? ? ? ? ? this.camera.position.z = 5;
? ? ? ? ? ? this.scene.add(this.camera);
? ? ? ? ? ? // 创建XYZ辅助线并加入场景
? ? ? ? ? ? const axesHelper = new THREE.AxesHelper(35);
? ? ? ? ? ? this.scene.add(axesHelper);
? ? ? ? ? ? // 加载一个Sprite材质,Sprite的尺寸、颜色由材质控制
? ? ? ? ? ? const matLite = new THREE.SpriteMaterial({
? ? ? ? ? ? ? ? color: 0xffffff,
? ? ? ? ? ? ? ? transparent: true,
? ? ? ? ? ? ? ? opacity: 0.8
? ? ? ? ? ? });
? ? ? ? ? ? ['X', 'Y', 'Z'].forEach((axis, i) => {
? ? ? ? ? ? ?
? ? ? ? ? ? ? ? const sprite = createHelper.createTextureBySprite({
? ? ? ? ? ? ? ? ? title:axis,
? ? ? ? ? ? ? ? ? textcolor:'#fffefa',
? ? ? ? ? ? ? ? })
? ? ? ? ? ? ? ? sprite.position.set(i === 0 ? 35 : 0, i === 1 ? 35 : 0, i === 2 ? 35 : 0);
? ? ? ? ? ? ? ? ?sprite.scale.set(20, 20, 20);
? ? ? ? ? ? ? ? this.sprites.push(sprite);
? ? ? ? ? ? ? ? this.scene.add(sprite);
? ? ? ? ? ? ? ?
? ? ? ? ? ? })
? ? ? ? ? ? // 定义渲染函数
? ? ? ? ? ? const animate = () => {
? ? ? ? ? ? ? ? requestAnimationFrame(animate);
? ? ? ? ? ? ? ? // this.sprites.forEach(sprite => {
? ? ? ? ? ? ? ? // ? ? sprite.lookAt(this.camera.position)
? ? ? ? ? ? ? ? // })
? ? ? ? ? ? ?
? ? ? ? ? ? ? ? this.renderer.render(this.scene, this.camera);
? ? ? ? ? ? };
? ? ? ? ? ? animate(); // 开始渲染
? ? ? ? },
? ? },
};
</script>
<style scoped>
.mini-map {
? ? position: absolute;
? ? top: 0;
? ? left: 0;
? ? opacity: 0.7;
}
</style>
本文来自互联网用户投稿,该文观点仅代表作者本人,不代表本站立场。本站仅提供信息存储空间服务,不拥有所有权,不承担相关法律责任。 如若内容造成侵权/违法违规/事实不符,请联系我的编程经验分享网邮箱:chenni525@qq.com进行投诉反馈,一经查实,立即删除!
- Python教程
- 深入理解 MySQL 中的 HAVING 关键字和聚合函数
- Qt之QChar编码(1)
- MyBatis入门基础篇
- 用Python脚本实现FFmpeg批量转换
- 单片机中MCU跑RTOS相比裸机的优势
- Sepolia 和 Holesky 测试网对比
- YOLOv8加入AIFI模块,附带项目源码链接
- Pycharm 远程连接docker进行远程调试,ssh测试可连接,但是sftp连接不上的问题
- 热爱与坚持才是最好的老师:中国人民大学与加拿大女王大学金融硕士项目的力量
- 【小沐学Unity3d】3ds Max 减面工具汇总
- 《动态规划》刷题训练
- 前端 Node 项目迁徙为桌面 Electron 应用笔记
- 如何制作一本电子版时尚杂志
- 链表--简单学习