BEVFusion-mit复现与实践(nuscenes-mini数据集)
一、CUDA版本11.1
二、创建虚拟环境并激活
conda create -n bevfusion python=3.8
conda activate bevfusion
三、安装pytorch
1、下载cuda对应版本的torch和torchvision到本地文件夹
下载地址:https://download.pytorch.org/whl/torch_stable.html
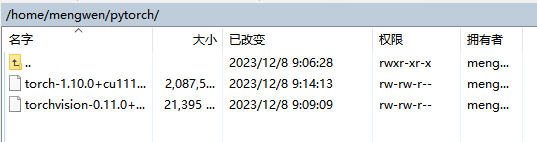
2、进入安装包文件夹安装:
pip install torch-1.10.0+cu111-cp38-cp38-linux_x86_64.whl
pip install torchvision-0.11.0+cu111-cp38-cp38-linux_x86_64.whl
3、验证:
python
import torch
print(torch.__version__)
#1.10.0+cu111
import torchvision
print(torchvision.__version__)
#0.11.0+cu111
四、安装openmpi
1、下载安装:
wget https://download.open-mpi.org/release/open-mpi/v4.1/openmpi-4.1.4.tar.gz
tar zxf openmpi-4.1.4.tar.gz

cd openmpi-4.1.4
./configure --prefix=/usr/local/openmpi
make -j8
sudo make install
2、 配置环境~/.bashrc
MPI_HOME=/usr/local/openmpi
OMPI_MCA_opal_cuda_support=true
export PATH=${MPI_HOME}/bin:$PATH
export LD_LIBRARY_PATH=${MPI_HOME}/lib:$LD_LIBRARY_PATH
export MANPATH=${MPI_HOME}/share/man:$MANPATH
3、测试
cd openmpi-4.1.4/examples
make
mpirun -np 4 hello_c
出现以下:

五、安装功能包
conda 虚拟环境下
pip install mmcv-full==1.4.0 -f https://download.openmmlab.com/mmcv/dist/cu111/torch1.10.0/index.html
pip install mmdet==2.20.0
conda install openmpi
conda install mpi4py
pip install Pillow==8.4.0
pip install tqdm
pip install torchpack
pip install nuscenes-devkit
pip install ninja
pip install numpy==1.19
pip install numba==0.48.0
pip install shapely==1.8.0
六、源码下载
源码下载地址:https://github.com/mit-han-lab/bevfusion
git clone https://github.com/mit-han-lab/bevfusion.git
七、参数修改与编译
1、更改indice_cuda.cu
在mmdet3d/ops/spconv/src/indice_cuda.cu下,将里面的4096都改成256,否则会爆显存
2、更改目录的setup.py
需要把显卡算力改成自己对应的,其余的注释掉。例如我的3090是86(具体的算力对应大家可以查查)
"-D__CUDA_NO_HALF_OPERATORS__",
"-D__CUDA_NO_HALF_CONVERSIONS__",
"-D__CUDA_NO_HALF2_OPERATORS__",
"-gencode=arch=compute_70,code=sm_70",
"-gencode=arch=compute_80,code=sm_80",
"-gencode=arch=compute_86,code=sm_86",
3、当前目录下编译
python setup.py develop
八、配置nuscenes-mini
1、下载nuScenes数据集
下载地址:https://www.nuscenes.org/nuscenes
2、文件夹结构
bevfusion
├── tools
├── configs
├── data
│   ├── nuscenes
│   │   ├── maps
│   │   ├── samples
│   │   ├── sweeps
│   │   ├── v1.0-mini
3、运行数据转换的脚本
python tools/create_data.py nuscenes --root-path ./data/nuscenes/ --version v1.0-mini --out-dir data/nuscenes/ --extra-tag nuscenes
报错1:ImportError: cannot import name ‘feature_decorator_ext’ from partially initialized module ‘mmdet3d.ops.feature_decorator’ (most likely due to a circular import) (/home/mengwen/bevfusion/mmdet3d/ops/feature_decorator/init.py)
解决:
(1)注释掉 mmdet3d/ops/init.py 中的 from .feature_decorator import feature_decorator
报错2:FileNotFoundError: NuScenesDataset: [Errno 2] No such file or directory: ‘data/nuscenes//nuscenes_infos_train.pkl’
解决:更改tools/data_converter/nuscenes_converter.py 中第95~100行
info_path = osp.join(root_path,
'{}_infos_train.pkl'.format(info_prefix))
info_val_path = osp.join(root_path,
'{}_infos_val.pkl'.format(info_prefix))

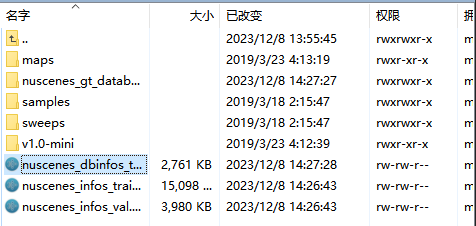
转换之后nuscenes文件夹:
九、复现
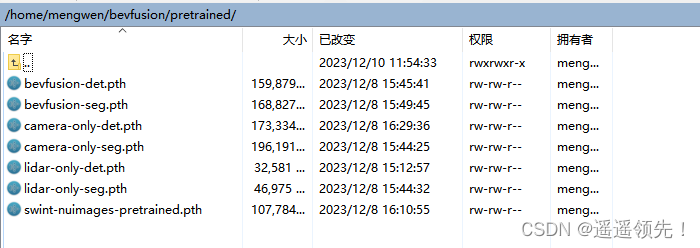
1、下载预训练权重
下载地址:http://drive.google.com/drive/folders/1Jru7VTfgvFF949DlP1oDfriP3wrmOd3c
2、训练
(1)修改参数
- 设置训练轮数:configs/default.yaml中修改epoch:max_epochs: 6
- 测试环境是否正确时:configs/nuscenes/det/centerhead/lssfpn/camera/256x704/swint/default.yaml文件中,建议设置samples_per_gpu: 1
- 显存溢出:configs/nuscenes/default.yaml中workers_per_gpu 参数修改为0:workers_per_gpu: 0,samples_per_gpu: 1
(2)开始训练
原文readme里-np后面是8,这里要改成1(因为我们PC上跑是单GPU),不然会卡住不动
torchpack dist-run -np 1 python tools/train.py configs/nuscenes/det/transfusion/secfpn/camera+lidar/swint_v0p075/convfuser.yaml --model.encoders.camera.backbone.init_cfg.checkpoint pretrained/swint-nuimages-pretrained.pth --load_from pretrained/lidar-only-det.pth
报错1:TypeError: FormatCode() got an unexpected keyword argument ‘verify’
解决:yapf包的版本问题,我原来yapf包的0.40.2,降低为yapf==0.40.1
pip install yapf==0.40.1
报错2:AttributeError: module ‘distutils’ has no attribute ‘version’
解决:setuptools版本过高导致的问题
pip install setuptools==58.0.4
报错3:RuntimeError: Given groups=1, weight of size [8, 1, 1, 1], expected input[24, 6, 256, 704] to have 1 channels, but got 6 channels instead
解决:将 mmdet3d/models/vtransforms/base 中第38行: add_depth_features=True 改为 False ,37行也改为 False
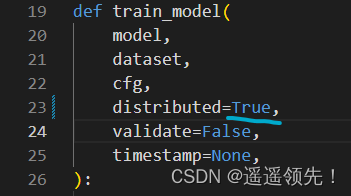
报错4:RuntimeError: CUDA out of memory. Tried to allocate 168.00 MiB (GPU 0; 23.70 GiB total capacity; 2.41 GiB already allocated; 96.50 MiB free; 2.43 GiB reserved in total by PyTorch) If reserved memory i
解决:单卡gpu不能满足,采用分布式训练,在mmdet3d/apis/train.py文件中把distributed参数设置为True,直接vs-code全局搜索找到distributed
(3)训练结束:
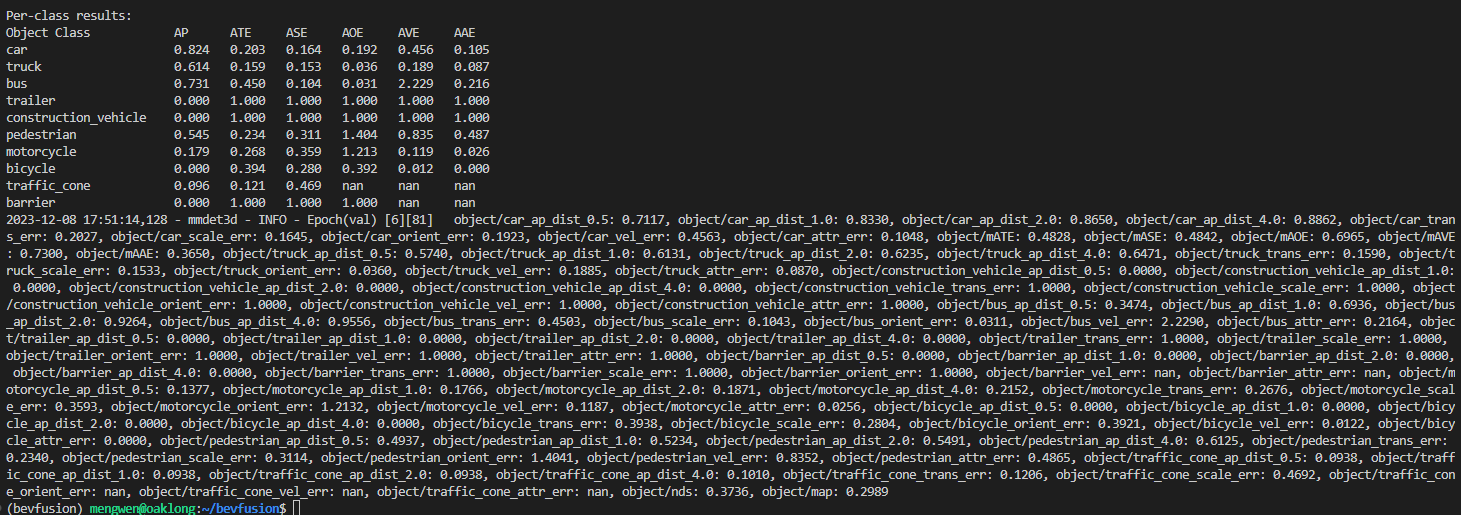 3、测试
3、测试
torchpack dist-run -np 1 python tools/test.py configs/nuscenes/det/transfusion/secfpn/camera+lidar/swint_v0p075/convfuser.yaml pretrained/bevfusion-det.pth --eval bbox
- 测试完成:

十、实践
1、训练
多卡在前面加上:CUDA_VISIBLE_DEVICES=‘3,2,1,0’
CUDA_VISIBLE_DEVICES='3,2,1,0' torchpack dist-run -np 2 python tools/train.py configs/nuscenes/det/transfusion/secfpn/camera+lidar/swint_v0p075/convfuser.yaml --model.encoders.camera.backbone.init_cfg.checkpoint pretrained/swint-nuimages-pretrained.pth --run-dir train_result
训练完成后会在train_result目录下生成下面文件 结构如下:
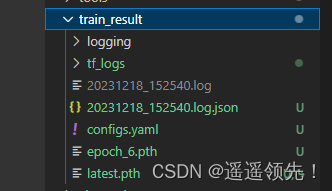
configs.yaml和latest.pth在测试和可视化需要使用
2、测试
#生成box.pkl文档
#使用训练权重文件
torchpack dist-run -np 1 python tools/test.py train_result/configs.yaml train_result/latest.pth --eval bbox --out box.pkl
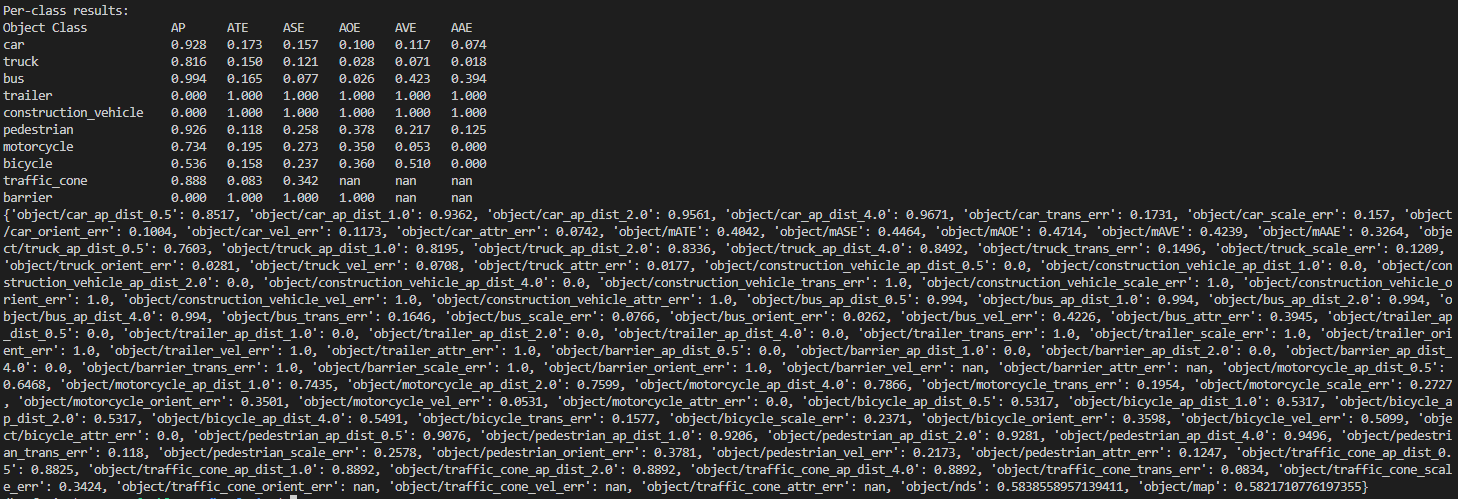
测试完成:
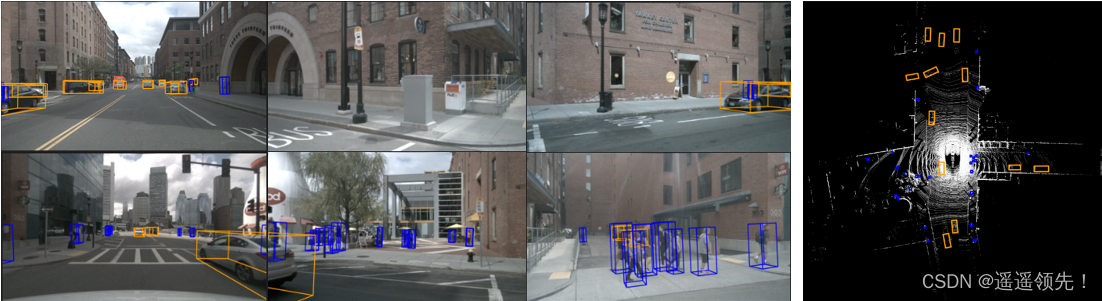
3、生成可视化
torchpack dist-run -np 1 python tools/visualize.py train_result/configs.yaml --mode gt --checkpoint train_result/latest.pth --bbox-score 0.5 --out-dir vis_result
报错1:ModuleNotFoundError: No module named ‘torchpack.utils.tqdm’
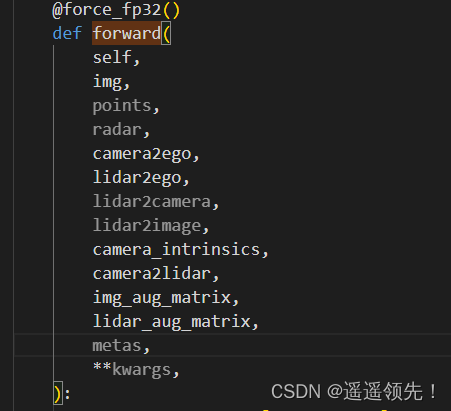
解决:把tools/visualize.py文件中from torchpack.utils.tqdm import tqdm改成from tqdm import tqdm
解决:在mmdet3d/models/vtransforms/base.py中2个forward函数的参数都加上metas变量,加到**kwargs前
4、查看结果
在vis_result下生成可视化文件

可视化结果:
参考:
1、复现BEVFusion遇到过的坎儿
2、BEVFusion(mit)最强环境安装,部署复现
3、BEV Fusion (MIT) 环境配置
4、BEVFusion代码复现实践
本文来自互联网用户投稿,该文观点仅代表作者本人,不代表本站立场。本站仅提供信息存储空间服务,不拥有所有权,不承担相关法律责任。 如若内容造成侵权/违法违规/事实不符,请联系我的编程经验分享网邮箱:chenni525@qq.com进行投诉反馈,一经查实,立即删除!
- Python教程
- 深入理解 MySQL 中的 HAVING 关键字和聚合函数
- Qt之QChar编码(1)
- MyBatis入门基础篇
- 用Python脚本实现FFmpeg批量转换
- Java final、finally、finalize 有什么区别?
- 04 思维导图的方式回顾ospf
- K9、希喂、SC猫咪主食冻干哪款适合全体质猫咪?深入对比,真实测评报告
- 多特征变量序列预测(一)——CNN-LSTM风速预测模型
- Linux包的管理(RPM和YUM)
- GD32烧录第一盏灯
- 【家庭教育】阿伦森效应激发孩子快速成长
- 西南科技大学计算机网络实验二 (IP协议分析与以太网协议分析)
- Qt GUI 优化方案详解
- 汇编指令学习