yarn创建vitevue3,安装vue-router
发布时间:2024年01月17日
1.安装项目
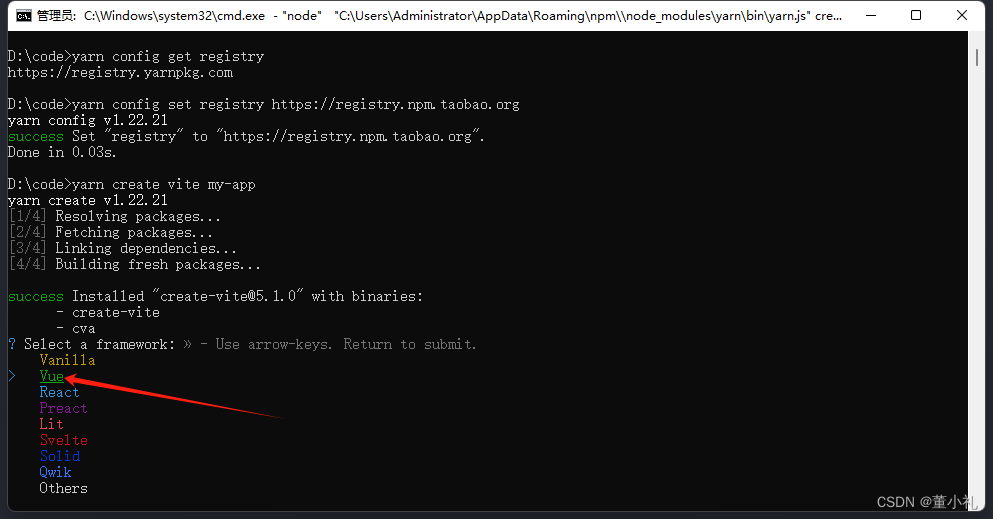
yarn create vite my-app选择环境这里我们选择Vue
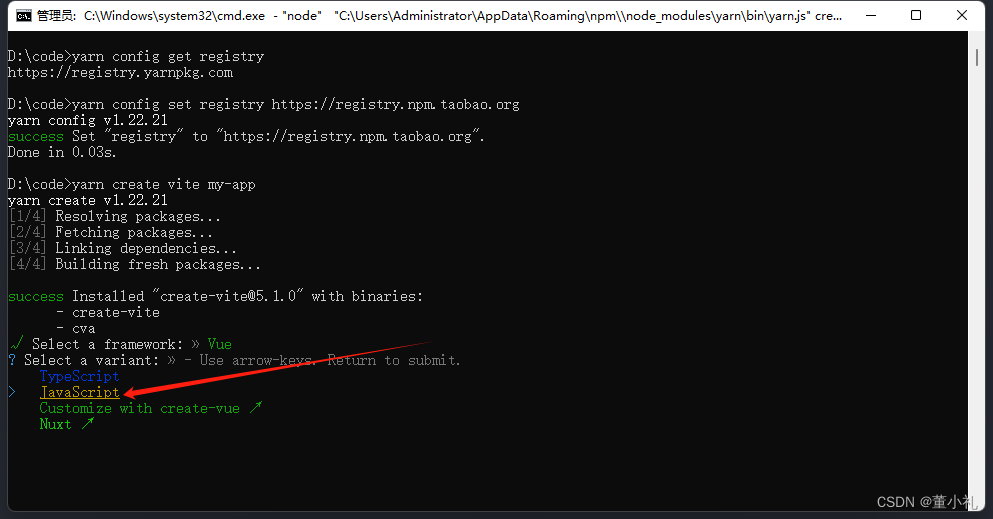
我们用的javaScript
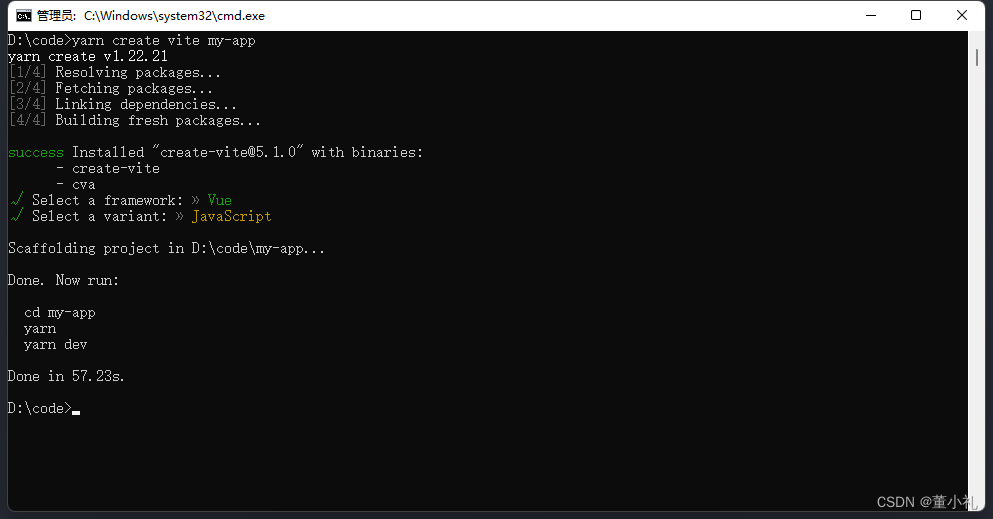
安装完毕
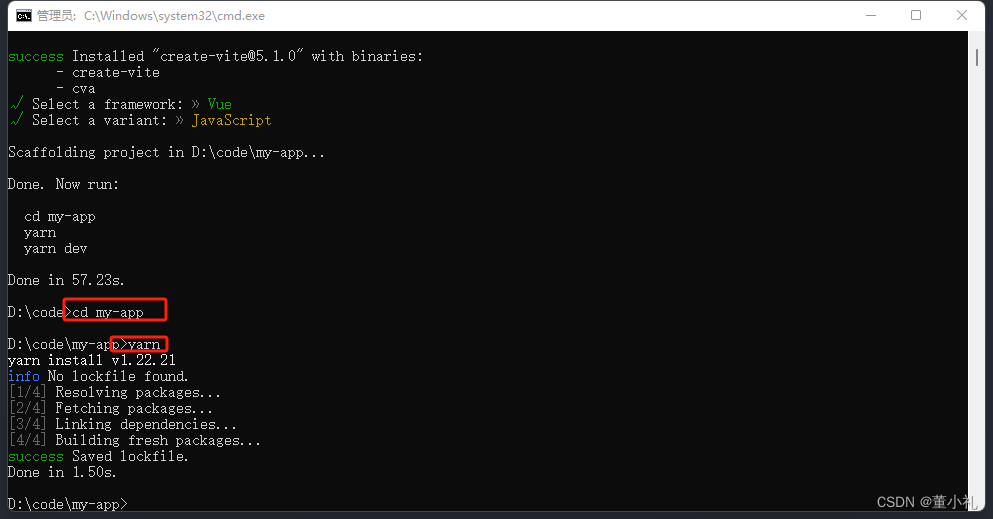
cd项目,然后安装依赖
2.运行项目
yarn run dev3.安装路由
yarn add vue-router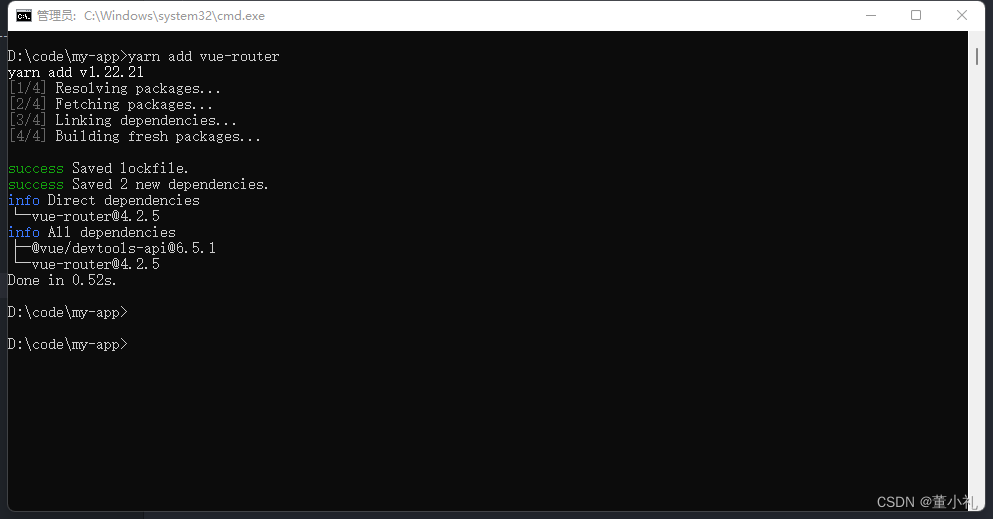
4.配置路由文件
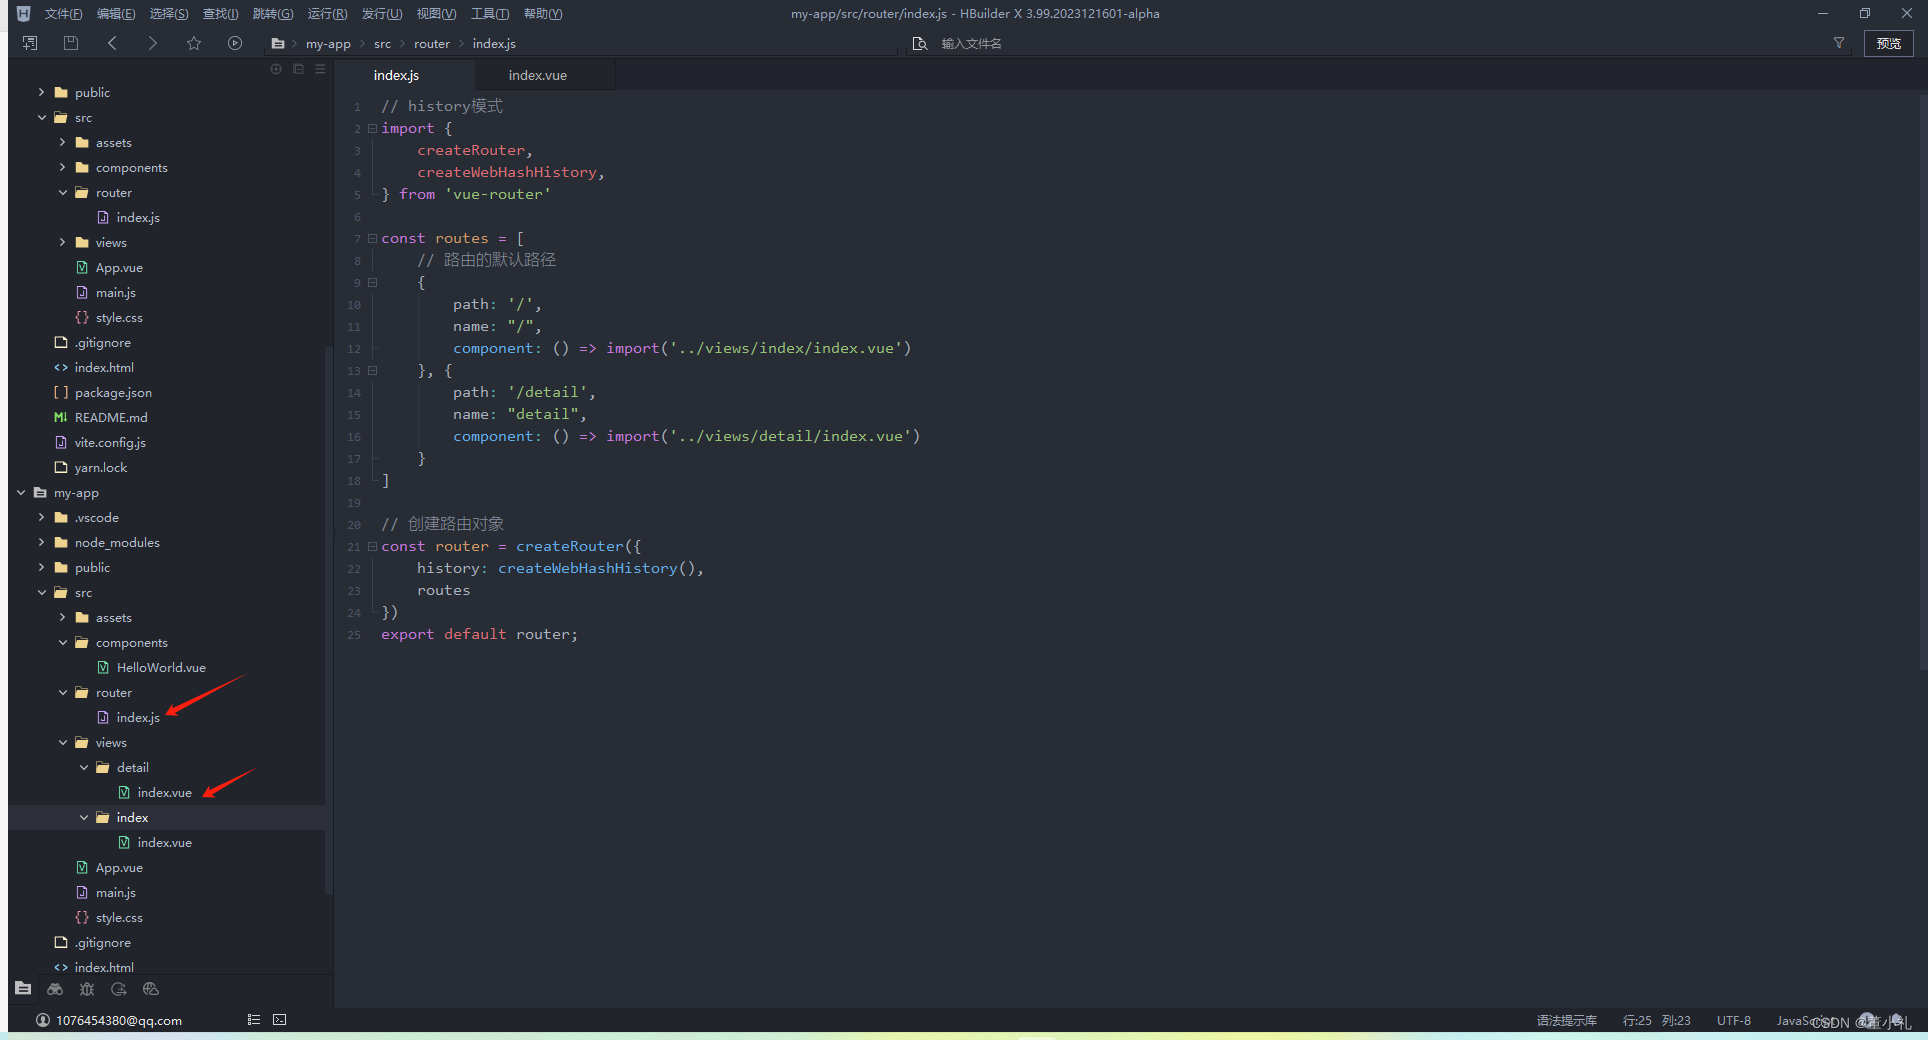
// history模式
import {
	createRouter,
	createWebHashHistory,
} from 'vue-router'

const routes = [
	// 路由的默认路径
	{
		path: '/',
		name: "/",
		component: () => import('../views/index/index.vue')
	}, {
		path: '/detail',
		name: "detail",
		component: () => import('../views/detail/index.vue')
	}
]

// 创建路由对象
const router = createRouter({
	history: createWebHashHistory(),
	routes
})
export default router;
5.入口main.js使用路由
import { createApp } from 'vue'
import './style.css'
import App from './App.vue'

import router from './router'

createApp(App).use(router).mount('#app')
6.修改app.vue
<script setup>

</script>

<template>
	<router-view></router-view>
</template>

<style scoped>

</style>
7.安装scss
yarn add sass8.修改vite.config.js
export default defineConfig({
  plugins: [vue()],
  resolve: {
    alias: {
      '@': fileURLToPath(new URL('./src', import.meta.url))
    }
  },
  // 上面是默认已存在的


  css: {
    // css预处理器
    preprocessorOptions: {
      scss: {
        // 引入 mixin.scss 这样就可以在全局中使用 mixin.scss中预定义的变量了
        // 给导入的路径最后加上 ;
        additionalData: '@import "@/assets/style/mixin.scss";'
      }
    }
  }

})
文章来源:https://blog.csdn.net/qq_39588818/article/details/135642424
本文来自互联网用户投稿,该文观点仅代表作者本人,不代表本站立场。本站仅提供信息存储空间服务,不拥有所有权,不承担相关法律责任。 如若内容造成侵权/违法违规/事实不符,请联系我的编程经验分享网邮箱:chenni525@qq.com进行投诉反馈,一经查实,立即删除!
本文来自互联网用户投稿,该文观点仅代表作者本人,不代表本站立场。本站仅提供信息存储空间服务,不拥有所有权,不承担相关法律责任。 如若内容造成侵权/违法违规/事实不符,请联系我的编程经验分享网邮箱:chenni525@qq.com进行投诉反馈,一经查实,立即删除!
最新文章
- Python教程
- 深入理解 MySQL 中的 HAVING 关键字和聚合函数
- Qt之QChar编码(1)
- MyBatis入门基础篇
- 用Python脚本实现FFmpeg批量转换
- day07
- 设计模式——23种
- linux信号处理机制
- 一文全面了解 LSM BPF (含实战,强烈建议收藏)
- vue黑马之小兔鲜首页组件案例
- 【扩散模型】9、Imagen | 借用语言模型的能力来实现文生图(NIPS2022 Oral)
- 不开心的小朋友 - 华为OD统一考试
- Android Media3 ExoPlayer 如何正确设置缓存大小
- 计算机毕设ssm中国服饰文献资料管理平台x94569【附源码】
- SQL分类