vector类
?> 作者简介:?旧言~,目前大二,现在学习Java,c,c++,Python等
> 座右铭:松树千年终是朽,槿花一日自为荣。> 目标:熟悉vector库
> 毒鸡汤:从人生低谷走上人生巅峰是一条很漫长,一开始会很累,但是慢慢就会习惯这种感觉,这说明你在不断的成长。
> 望小伙伴们点赞👍收藏?加关注哟💕💕?

🌟前言
????????相信看完博主的string类CSDN,学习vector会很轻松的🤭🤭,咱们依旧参考c++的官网:cplusplus.com - The C++ Resources Network

??主体
? ? ? ? 这里就需要浅谈一下什么vector,基于在数组的问题,当我们创建一个数组时,此时元素的类型已经锁定,而vector就可以很好的解决这个问题。当然vector不仅仅是这些用法,那咱们就看看vector有啥子东西值得我们学习。
????????咱们的主题部分还是按照官网的分类来,具体分为下面这些板块:Member functions(成员函数),Iterators(迭代器),Capacity(容量),Element access(元素访问),Modifiers(修改器),Non-member function (非成员函数)??????。

🌙Member functions(成员函数)
每一个接口的成员函数都很重要,无论是拷贝构造还是赋值运算重载,都贯彻c++。

💫constructor(构造函数)
根据使用的构造函数版本初始化其值。
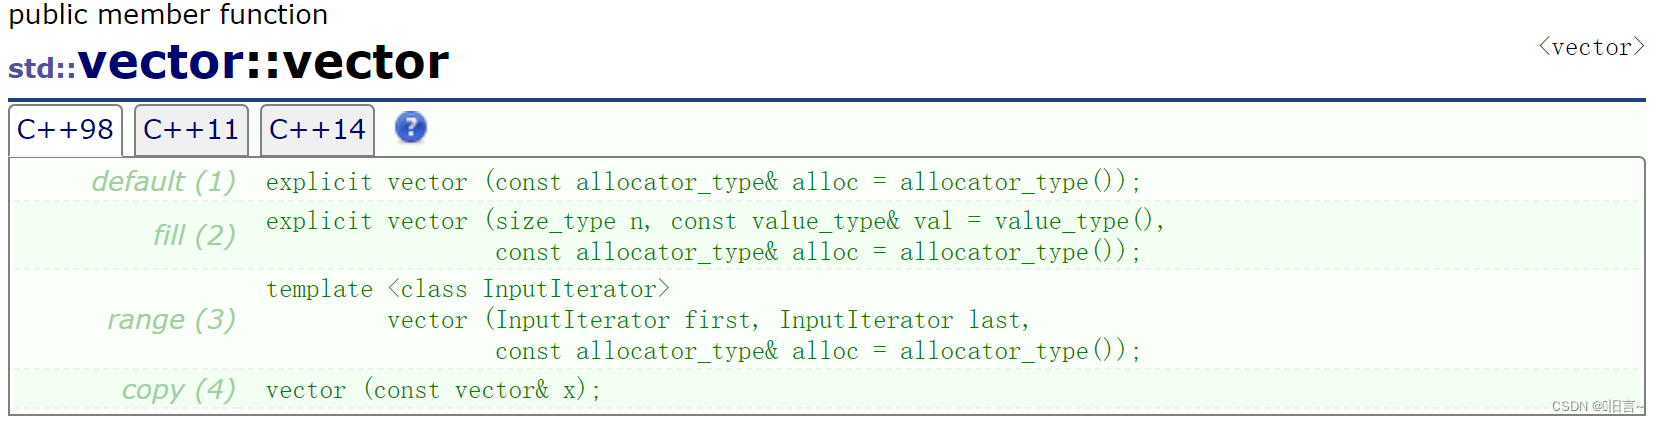
在vector的构造函数中有许多的模板,那我们看看到底有哪些类型模板🧐🧐。
1??
这种构造函数本质上是提供一种无参构造
default (1) explicit vector (const allocator_type& alloc = allocator_type());咱们看看它的使用:
#include<iostream>
#include<vector>
using namespace std;
int main()
{
	vector<char> v1;
	for (auto ch : v1)
	{
		cout << ch << endl;
	}
	return 0;
}
运行结果:

?2??
这种构造函数本质上是提供一个类模板
fill (2)
explicit vector (size_type n, const value_type& val = value_type(),
                 const allocator_type& alloc = allocator_type());
- 💦size_type n:无符号整形
- 💦const value_type& val = value_type():模板参数类型
- 💦const allocator_type& alloc = allocator_type():const分配器类型
第三个参数咱们不讲解,只需懂得前面两个参数就行。
咱们看看它的使用:
#include<iostream>
#include<vector>
using namespace std;
int main()
{
	int a = int();
	double b = double();
	char c = char();
	cout << a << endl;
	cout << b << endl;
	printf("%d", c);
	return 0;
}
运行结果:

解析:
在c++当中给每个自定义类型也创建了对应的默认构造函数,其构造的默认结果为0。
3??
这种构造函数本质上是提供一个迭代器
range (3)
template <class InputIterator>
         vector (InputIterator first, InputIterator last,
                 const allocator_type& alloc = allocator_type());
- 💦第一个参数迭代器开始的地方
- 💦第二个参数就是迭代器结束的地方
- 💦第三个参数const分配器类型
第三个参数咱们不讲解,只需懂得前面两个参数就行。
咱们看看它的使用:
#include<iostream>
#include<vector>
using namespace std;
int main()
{
	vector<int> v{ 1, 2, 3,4 };
	vector<int> v1(v.begin(), v.end());
	for (auto ch : v1)
	{
		cout << ch << endl;
	}
	return 0;
}
运行结果:

?4??
这种构造函数本质上就是拷贝构造,创建一个对象的时候将另外一个对象的内容初始化给新创建的对象。
copy (4) vector (const vector& x);咱们看看它的使用:
#include<iostream>
#include<vector>
using namespace std;
int main()
{
	vector<int> v1{ 1,2,3,4,5 };
	vector<int>v2(v1);
	for (auto ch : v2)
	{
		cout << ch << endl;
	}
	return 0;
}
运行结果:

💫operator(赋值重载)
这个就是赋值重载,将一个vector对象的内容赋值给另一个vector对象

?咱们看看它的使用:
#include <iostream>
#include <vector>
using namespace std;
int main()
{
	vector<int> v1{ 1,2,3,4,5 };
	vector<int>v2(v1);

	v2 = v1;
	for (auto ch : v2)
	{
		cout << ch << endl;
	}
	return 0;
}
运行结果:
🌙Iterators(迭代器)
? ? ? ? 我们已经在string类中讲解这个迭代器,在vector中使用迭代器基本和string类一样,这里我们就加加速,搞快点😏😏。
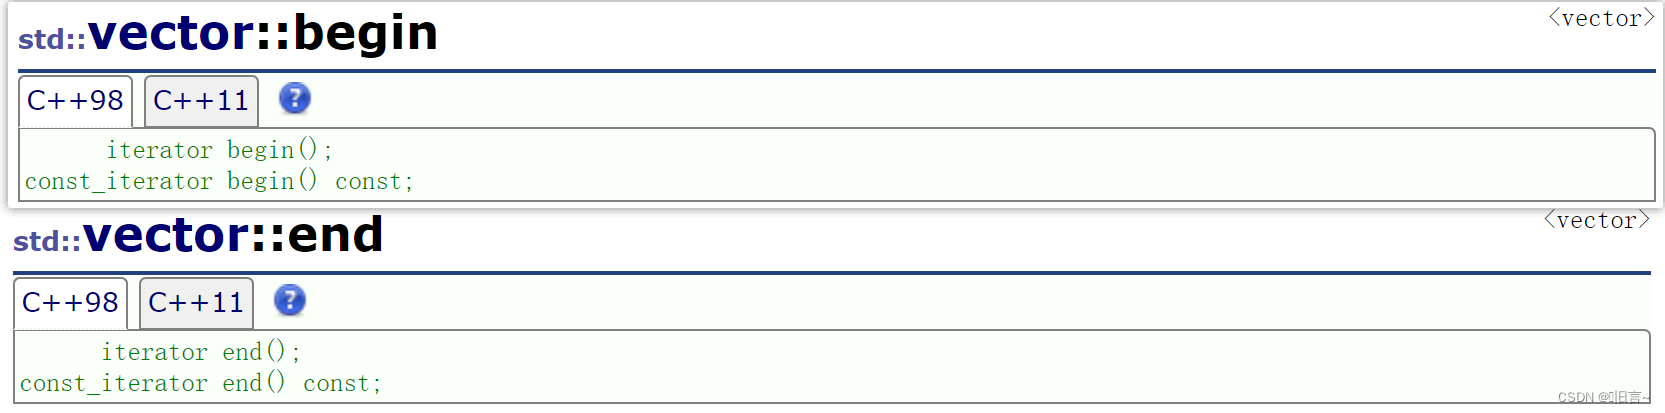
?💫利用begin和end实现迭代器
- begin()函数返回的是vector的首位置
- end()函数返回的是vector最后一个位置(即最后一个元素的下一个位置)
咱看看代码:
#include <iostream>
#include <vector>

using namespace std;

int main()
{
    vector<int> v1{ 1,2,3,4,5 };
    vector<int>::iterator it = v1.begin();

    while (it != v1.end())
    {
        cout << *it;
        ++it;
    }

    cout << endl;
    return 0;
}
运行结果:

?💫范围for实现迭代器
不知道小伙伴还记得auto关键字不,auto可以推导出元素属性(int,char)
咱们看看代码:
#include <iostream>
#include <vector>

using namespace std;

int main()
{
    vector<int> v1{ 1,2,3,4,5 };
    for (auto ch : v1)
    {
        cout << ch;
    }
    cout << endl;
    return 0;
}
运行结果:

?💫反向迭代器
这里需要介绍一下rbegin()和rend()这两个函数,这两个函数是用来配合反向迭代器使用的。
- rbegin()函数返回的是vector的最后一个有效元素
- rend()函数返回的是vector的第一个元素的前一个位置。

咱们看看代码:
#include <iostream>
#include <vector>

using namespace std;

int main()
{
    vector<int> v1{ 1,2,3,4,5 };
    vector<int>::reverse_iterator rit = v1.rbegin();
    while (rit != v1.rend())
    {
        cout << *rit;
        rit++;
    }
    cout << endl;
    return 0;
}
运行结果:

💫const修饰的迭代器
const修饰的迭代器是不可以改变的(只能读不能写)
咱们看看代码:
#include <iostream>
#include <vector>

using namespace std;
void Func(const vector<int> v)
{
    vector<int>::const_iterator cit = v.begin();
    // 读操作
    while (cit != v.end())
    {
        cout << *cit;
        cit++;
    }
    cout << endl;

    // 不能进行写操作,会报错
    // cit = s.begin();
    // while (cit != s.end())
    // {
    //     (*cit) += 1;
    //     cout << *cit;
    //     cit++;
    // }
}
🌙Capacity(容量)
学习这个板块还是比较简单的,也运用比较广泛的一个板块。

💫size
size函数计算元素总个数的。

咱们看看代码:
#include <iostream>
#include <vector>

using namespace std;

int main()
{
    vector<int> v1{ 1,2,3,4,5 };
    cout << v1.size() << endl;
    cout << v1.capacity() << endl;
    return 0;
}
运行结果:

?💫max_size
size函数计算该对象最多容乃多少个元素

咱们看看代码:
#include <iostream>
#include <vector>

using namespace std;

int main()
{
	vector<int> v;
	cout << "该对象最多容乃多少个元素" << endl;
	cout << v.max_size() << endl;
	return 0;
}
运行结果:

?💫capacity
capacity函数作用是查看该对象的容量

咱们看看代码:
#include <iostream>
#include <vector>

using namespace std;

int main()
{
    vector<int> v1{ 1,2,3,4,5 };
    cout << "size:" << v1.size() << endl;
    cout << "capacity:" << v1.capacity() << endl;
    cout << endl;
    return 0;
}
运行结果:

💫reserve和resize
reserve函数是扩容函数,可以增大capacity的值。
resize其实也是扩容函数,但resize改变的是size的值,当size的值增大时自动触发vector的扩容机制从而也增大了capacity的值。
resize在增带size值的时候还会对没有元素的位置初始化,如果没有指定初始化内容就默认初始化为空,而reserve不会进行初始化。

咱们看看代码:
#include <iostream>
#include <vector>

using namespace std;

int main()
{
    vector<int> v1{ 1,2,3,4,5 };
    cout << "size:" << v1.size() << endl;
    cout << "capacity:" << v1.capacity() << endl;
    cout << endl;

    v1.reserve(25);
    cout << "size:" << v1.size() << endl;
    cout << "capacity:" << v1.capacity() << endl;
    cout << endl;

    v1.resize(50);
    cout << "size:" << v1.size() << endl;
    cout << "capacity:" << v1.capacity() << endl;
    cout << endl;
    return 0;
}
运行结果:

?💫empty
empty函数作用是查看该对象的内容是否为空
- 有元素返回为0
- 没有元素返回为1

咱们看看代码:
#include <iostream>
#include <vector>

using namespace std;

int main()
{
    vector<int> v1;
    cout << v1.empty() << endl;
    vector<int> v2{ 1 };
    cout << v2.empty() << endl;
    return 0;
}
运行结果:

🌙Element access(元素访问)
这个板块还是比较重要的,vector作用之一就是元素访问。
?💫operator[ ]
在vector中我们将操作符[ ]进行了重载,使其[ ]可以像数组那样通过下标来获取对应的元素和修改对应的元素。

?💫at函数
返回位置pos处的元素的引用。本质上还是一种遍历。

唯一与operator的区别就在于对于不合法的下标at会抛异常不会报错而[ ]会报错
咱们看看代码:
#include <iostream>
#include <vector>

int main()
{
    std::vector<int> v1{ 1,2,3,4,5 };
    for (unsigned i = 0; i < v1.size(); ++i)
    {
        std::cout << v1.at(i);
    }
    return 0;
}
运行结果:

🌙Modifiers(修改器)
在vector中修改器是十分重要的,大家务必多多练习,多多查看官网。

?💫assign函数
这个函数可以改变vector的容量和长度。

咱们看看代码:
#include <iostream>
#include <vector>

int main()
{
	std::vector<int> first;
	std::vector<int> second;
	std::vector<int> third;

	first.assign(7, 100);

	std::vector<int>::iterator it;
	it = first.begin() + 1;

	second.assign(it, first.end() - 1);

	int myints[] = { 1776,7,4 };
	third.assign(myints, myints + 3);
	std::cout << "Size of first: " << int(first.size()) << '\n';
	std::cout << "Size of second: " << int(second.size()) << '\n';
	std::cout << "Size of third: " << int(third.size()) << '\n';
	return 0;
}
运行结果:

?💫push_back插入操作
将元素c追加到vector的末尾,使其长度增加一,也就是说push_back函数只能够尾插入一个元素,不能插入多个元素。

咱们看看代码:
#include <iostream>
#include <vector>

using namespace std;

int main()
{
    vector<int> v1{ 1,2,3,4,5 };

    // 插入一个元素
    v1.push_back(10);
    for (auto ch : v1)
    {
        cout << ch<< " ";
    }
    return 0;
}
运行结果:

?💫pop_back删除操作
擦除vector的最后一个元素,有效地将其长度减少一个,本质上可以实现vector对象的尾删操作。

?咱们看看代码:
#include <iostream>
#include <vector>

using namespace std;

int main()
{
    vector<int> v1{ 1,2,3,4,5 };
    v1.pop_back();
    for (auto ch : v1)
    {
        cout << ch<< " ";
    }
    return 0;
}?运行结果:

?💫insert插入操作
insert函数可以在任意的指定位置进行插入。

咱们看看代码:
#include <iostream>
#include <vector>

using namespace std;

int main()
{
    vector<int> v1{ 1,2,3,4,5 };
    for (auto ch : v1)
    {
        cout << ch<< " ";
    }
    cout << endl;

    // 在下标为0的位置插入一个10
    vector<int>::iterator it1 = v1.begin();
    v1.insert(it1, 10);
    for (auto ch : v1)
    {
        cout << ch << " ";
    }
    cout << endl;

    // 在下标为0的位置插入三个100
    vector<int>::iterator it2 = v1.begin() + 1;
    v1.insert(it2, 3, 100);
    for (auto ch : v1)
    {
        cout << ch << " ";
    }
    cout << endl;
    return 0;
}
运行结果:

??💫erase删除操作
erase函数则可以做到在vector对象中的任意位置删除指定元素或者删除一段区间的元素。

咱们看看代码:
#include <iostream>
#include <vector>

using namespace std;

int main()
{
    vector<int> v1{ 1,2,3,4,5,6,7,8,9};
    for (auto ch : v1)
    {
        cout << ch << " ";
    }
    cout << endl;

    // 删除一个元素
    vector<int>::iterator it1 = v1.begin();
    v1.erase(it1);
    for (auto ch : v1)
    {
        cout << ch << " ";
    }
    cout << endl;

    // 删除一段元素
    vector<int>::iterator it2 = v1.begin();
    v1.erase(it2 + 1, v1.end() - 1);
    for (auto ch : v1)
    {
        cout << ch << " ";
    }
    cout << endl;
    return 0;
}
运行结果:

?💫swap
clear函数是将全部的数据删除。

这里就不用代码演示了。
🌙Non-member function (非成员函数)
本来是不打算来讲解这块的,这里面只讲解swap,这个函数很容易搞混,在c++中有三个swap,每一个swap的作用都不一样,我们这里只讲解:

容器x的内容与y的内容交换。两个容器对象的类型必须相同(模板参数相同),但大小可能不同。

🌟结束语
? ? ? ?今天内容就到这里啦,时间过得很快,大家沉下心来好好学习,会有一定的收获的,大家多多坚持,嘻嘻,成功路上注定孤独,因为坚持的人不多。那请大家举起自己的小手给博主一键三连,有你们的支持是我最大的动力💞💞💞,回见。
?
本文来自互联网用户投稿,该文观点仅代表作者本人,不代表本站立场。本站仅提供信息存储空间服务,不拥有所有权,不承担相关法律责任。 如若内容造成侵权/违法违规/事实不符,请联系我的编程经验分享网邮箱:chenni525@qq.com进行投诉反馈,一经查实,立即删除!