Windows系统简易操作工具箱
Windows系统简易操作工具箱
目录
视频演示
SimpleToolBox使用情况及说明教程
前言
在日常使用Windows系统的过程中,经常会被同事或朋友请求修复电脑问题,于是心血来潮,根据这么多年来的使用体验和感悟,制作了这款免费可使用的简易小工具,同时也作为第一次接触C#学习成果的验收,于是一款基于.NET 的Windows系统简易操作工具箱应运而生。
提示:以下是本篇文章正文内容,下面案例仅供参考
一、发展过程
1.1 版本更新
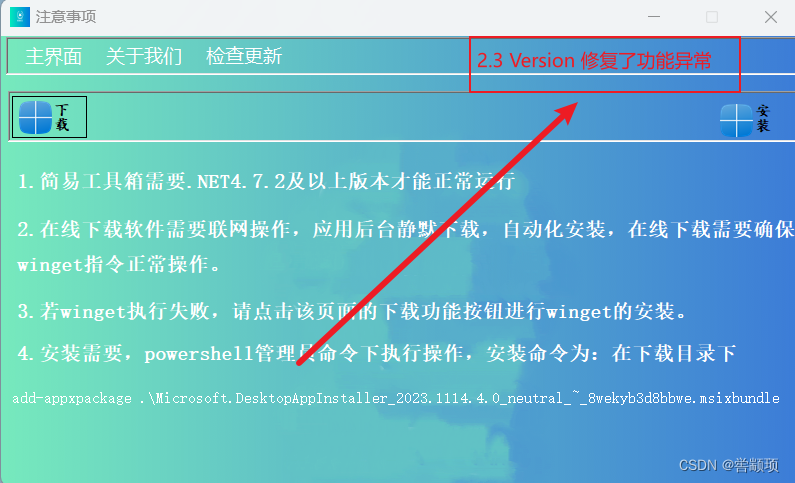
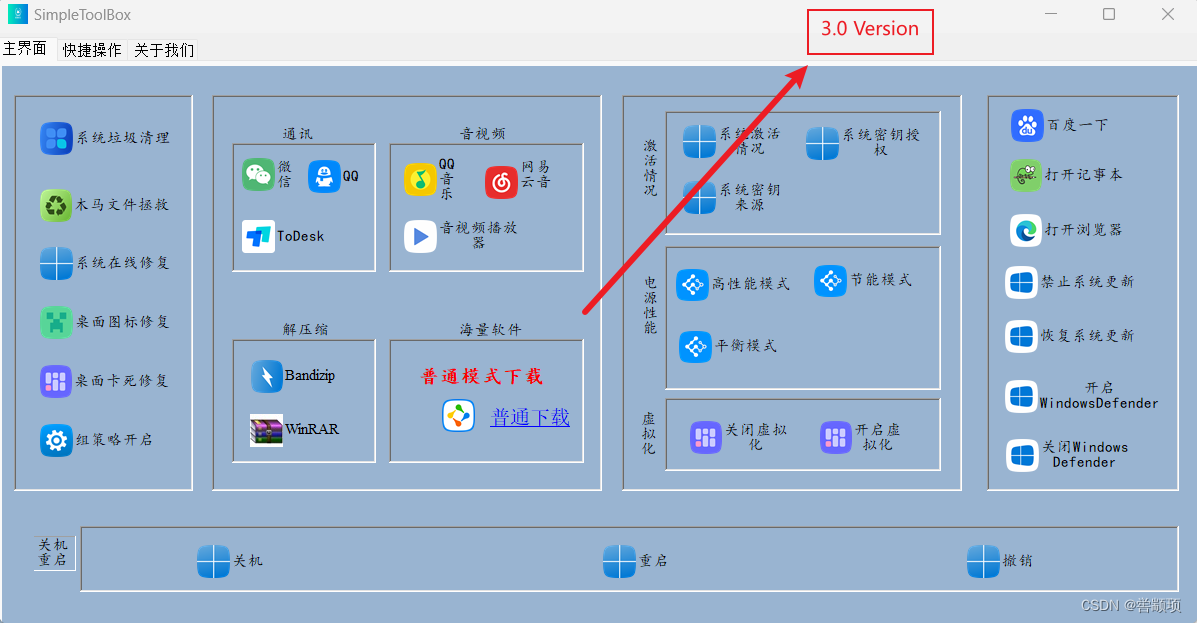
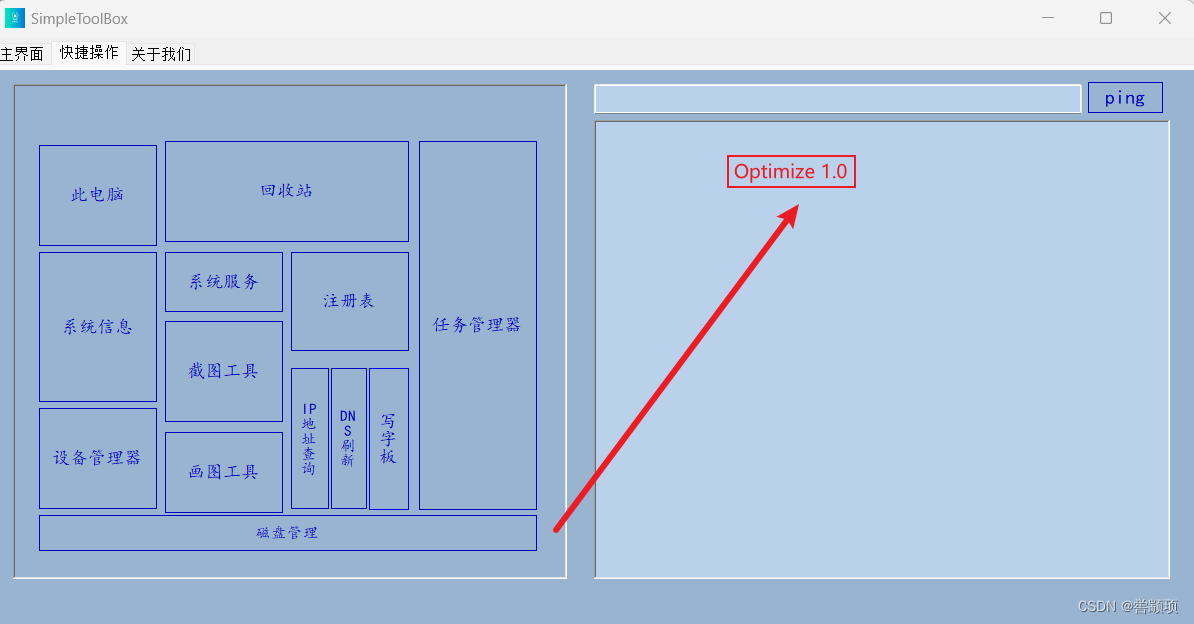
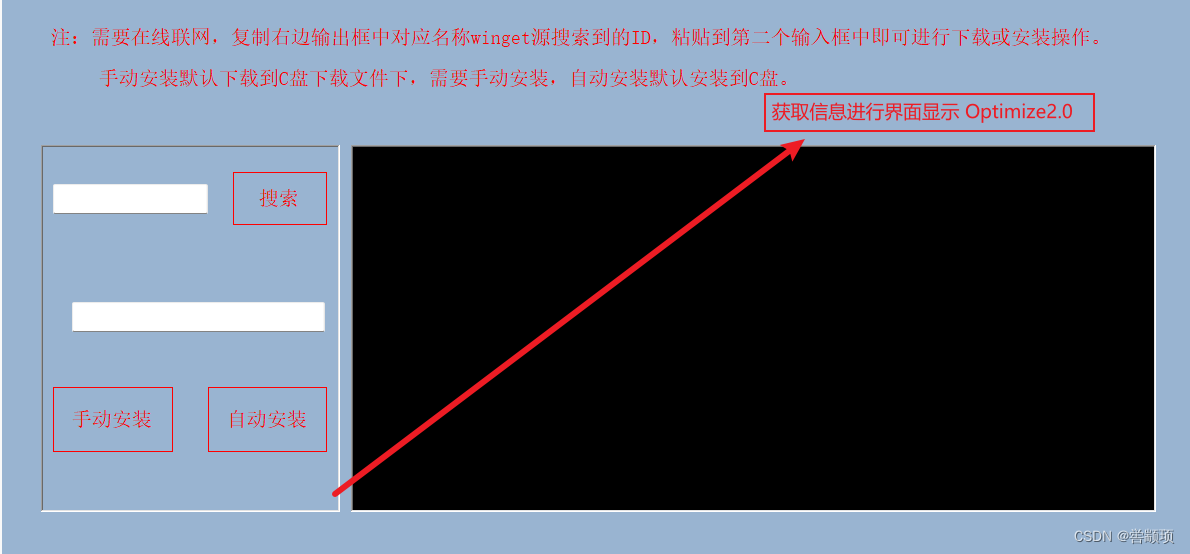
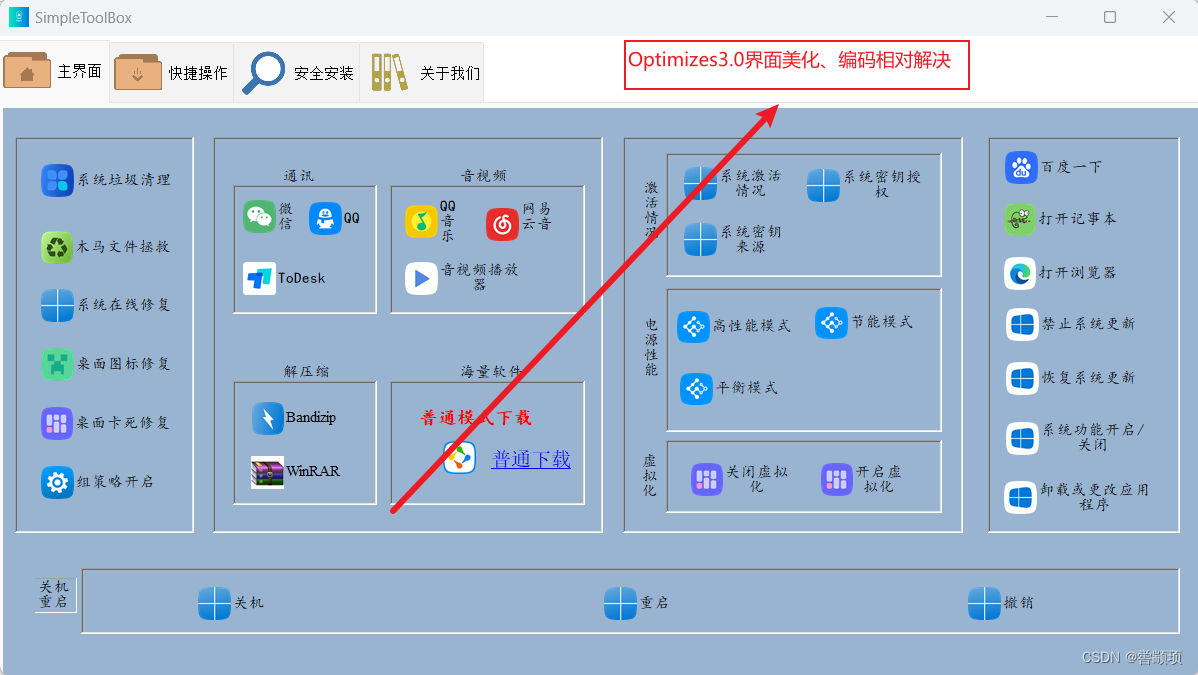
该软件的设计经历了从最初1.0版本的设计构想,到2.0版本的图形化GUI设计,从2.0版本的雍容和界面单一到3.0版本的界面统一,从3.0版本的界面统一到界面的进一步美化,同时版本进行了相应的漏洞修复,加入了数字自签名,添加了界面显示信息和自动清除,软件在线安全下载等功能,基本上解决了中文编码乱码问题。
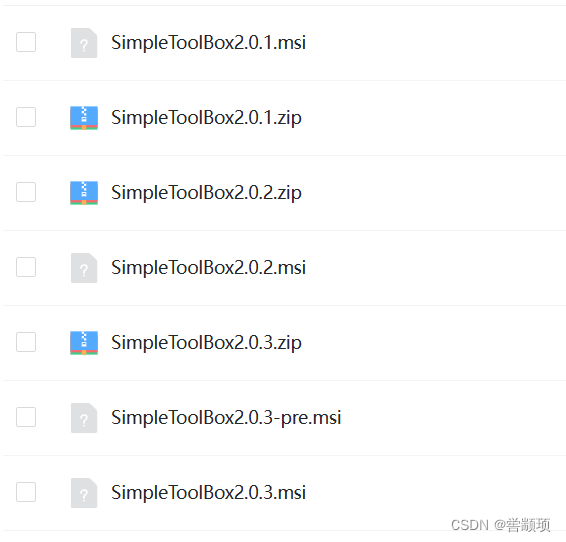
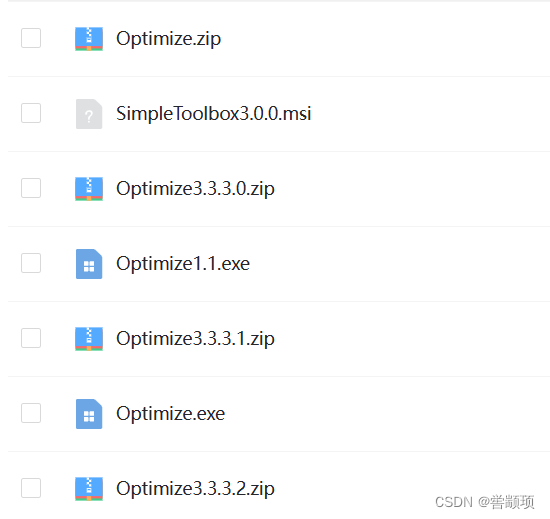
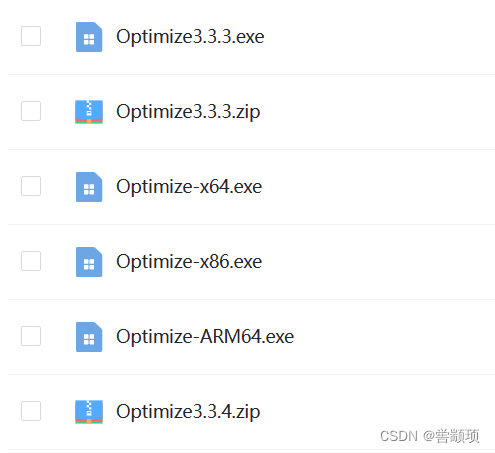
1.2功能开发
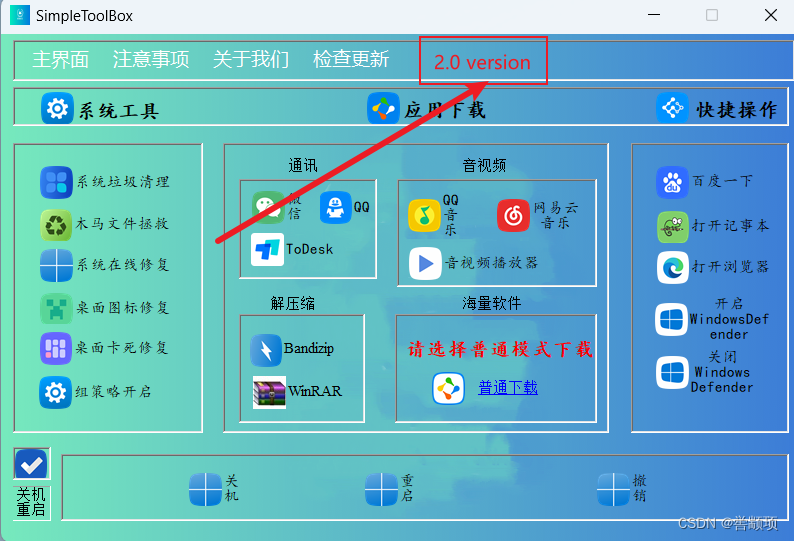
2.0版本只设计了一个主界面,只保证功能可以正常使用,其他界面不统一,界面不够美观。3.0版本逐步针对2.0版本边修复漏洞边添加新功能。3.2版本之后主要解决不同平台的适配问题,开发了针对X86,X64,ARM64平台的专用版本,3.3版本之后加入了数字签名,由于是自己制作的签名,所以需要用户手动安装,目的是防止Windows的安全防护无缘无故的报毒问题,同时给软件一个相应的身份证。
1.3版本展示
二、Windows简易工具箱设计
2.1登录界面
登录界面进行了输入隐藏显示,三次密码输入错误自动退出,错误提示弹窗自动等功能。

代码如下:
自动关闭弹窗提示
 // 查找窗口
 [System.Runtime.InteropServices.DllImport("user32.dll", SetLastError = true)]
 private static extern IntPtr FindWindow(string lpClassName, string lpWindowName);

 // 发送消息
 [System.Runtime.InteropServices.DllImport("user32.dll", CharSet = System.Runtime.InteropServices.CharSet.Auto)]
 private static extern IntPtr SendMessage(IntPtr hWnd, uint Msg, IntPtr wParam, IntPtr lParam);

 // 关闭消息
 private const uint WM_CLOSE = 0x0010;


 // 创建一个线程来执行倒计时操作

    .......


 // 查找并关闭MessageBox窗口
     private void CloseMessageBox()
 {

     IntPtr MMMX = FindWindow(null, "SimpleToolBox");
     if (MMMX != IntPtr.Zero)
     {
         SendMessage(MMMX, WM_CLOSE, IntPtr.Zero, IntPtr.Zero);
     }
 }
密码隐藏
     private void main_Load(object sender, EventArgs e)
     {
         //textBox1.ReadOnly = true;
         textBox1.UseSystemPasswordChar = true;
         //textBox2.ReadOnly = true;
         textBox2.UseSystemPasswordChar = true;
     }
开启相应的LostFocus和GotFocus功能
  // textBox2
  //
  this.textBox2.Location = new System.Drawing.Point(92, 18);
  this.textBox2.Margin = new System.Windows.Forms.Padding(2);
  this.textBox2.Name = "textBox2";
  this.textBox2.Size = new System.Drawing.Size(124, 25);
  this.textBox2.TabIndex = 1;
  this.textBox2.TextChanged += new System.EventHandler(this.textBox2_TextChanged_1);
  this.textBox2.GotFocus += new System.EventHandler(this.textBox2_GotFocus);
  this.textBox2.LostFocus += new System.EventHandler(this.textBox2_LostFocus);
  //

 // textBox1
 //
 this.textBox1.Location = new System.Drawing.Point(92, 24);
 this.textBox1.Margin = new System.Windows.Forms.Padding(2);
 this.textBox1.Name = "textBox1";
 this.textBox1.Size = new System.Drawing.Size(124, 25);
 this.textBox1.TabIndex = 1;
 this.textBox1.TextChanged += new System.EventHandler(this.textBox1_TextChanged);
 this.textBox1.GotFocus += new System.EventHandler(this.textBox1_GotFocus);
 this.textBox1.LostFocus += new System.EventHandler(this.textBox1_LostFocus);
 //
textBox代码
private void textBox1_LostFocus(object sender, EventArgs e)
{
    if (textBox1.Text == "")
    {
        textBox1.Text = "用户名已隐藏";
        textBox1.ForeColor = Color.Gray;
        //textBox1.ReadOnly = true;
        textBox1.UseSystemPasswordChar = true;
    }
    else
    {
        //textBox1.ReadOnly = true;
        textBox1.UseSystemPasswordChar = true;
        textBox1.ForeColor = Color.Black;
    }
}
private void textBox1_GotFocus(object sender, EventArgs e)
{
    if (textBox1.Text == "用户名已隐藏")
    {
        textBox1.Text = "";
        // textBox1.ReadOnly = true;
        textBox1.UseSystemPasswordChar = true;
        textBox1.ForeColor = Color.Black;
    }
}
private void textBox2_LostFocus(object sender, EventArgs e)
{
    if (textBox2.Text == "")
    {
        textBox2.Text = "密码已隐藏";
        textBox2.ForeColor = Color.Gray;
        // textBox2.ReadOnly = true;
        textBox2.UseSystemPasswordChar = true;
    }
    else
    {
        //textBox2.ReadOnly = true;
        textBox2.UseSystemPasswordChar = true;
        textBox2.ForeColor = Color.Black;
    }
}
private void textBox2_GotFocus(object sender, EventArgs e)
{
    if (textBox2.Text == "密码已隐藏")
    {
        textBox2.Text = "";
        //textBox2.ReadOnly = true;
        textBox2.UseSystemPasswordChar = true;
        textBox2.ForeColor = Color.Black;
    }
}
2.2 窗体显示信息
执行处理的信息,返回给窗体,在窗体中显示,超过一定时间自动清除。
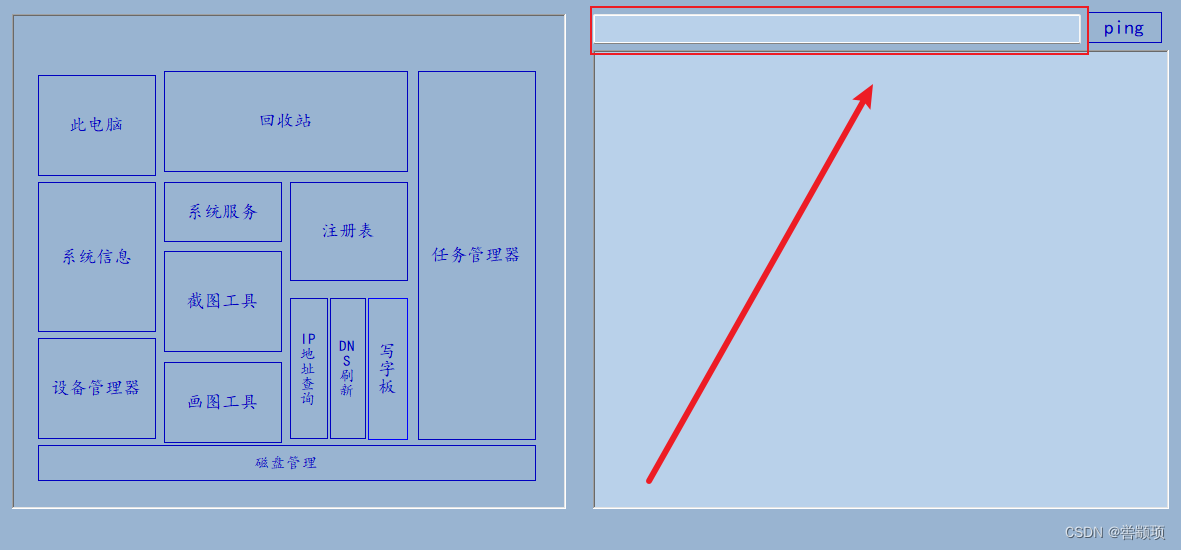
IP地址查询代码
 try
 {
     string ipAddress = textBox1.Text;
     // 创建ProcessStartInfo对象,设置要执行的命令及参数
     ProcessStartInfo startInfo = new ProcessStartInfo();
 startInfo.FileName = "ping.exe";//要执行的命令
 startInfo.Arguments = $"-n 1 {ipAddress}";
 startInfo.UseShellExecute = false;//不使用外壳程序执行
 startInfo.RedirectStandardOutput = true;//将输出重定向到Process.StandardOutput属性
 startInfo.CreateNoWindow = true;//不创建新的窗口
                                 //创建并启动进程
 using (Process process = new Process())
 {
     process.StartInfo = startInfo;
     process.Start();
     //读取进程的输出
     string output = process.StandardOutput.ReadToEnd();
     //在窗体中显示输出结果
     richTextBox1.Text = output;
     Console.ReadLine();
     richTextBox1.Text = output;

 }

 }
 catch (Exception ex)
 {
     MessageBox.Show("SimpleToolBox:" + ex.Message);
 }
2.3 窗体中文乱码
执行操作返回的数据编码一般为GBK编码,而RichTextBox编码为UTF-8编码,因为在接收信息时,会出现中文乱码情况。
缓和解决方案
    using (Process process = new Process())
    {
        process.StartInfo = startInfo;
        process.Start();
        //读取进程的输出
        string output = process.StandardOutput.ReadToEnd();
        byte[] gbkBytes = Encoding.GetEncoding("GBK").GetBytes(output);
        string utf8String = Encoding.UTF8.GetString(gbkBytes);
        //在窗体中显示输出结果
        richTextBox1.Text = utf8String;
        Console.ReadLine();
        richTextBox1.Text = utf8String;

    }
2.4 TabPage美化
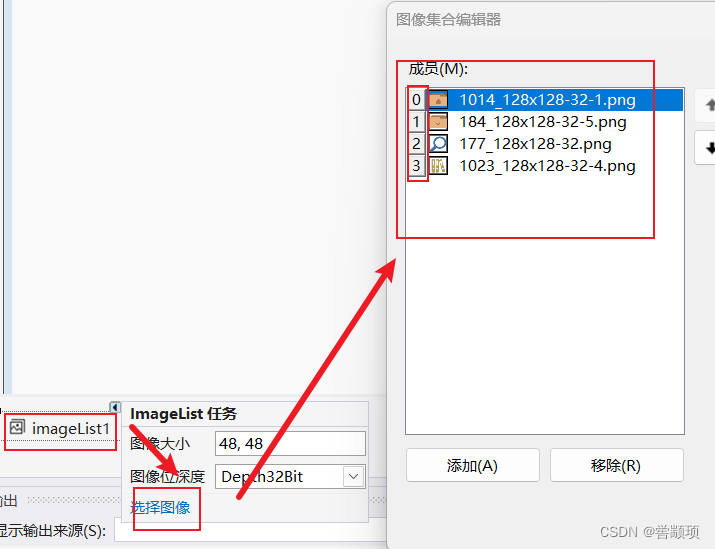
TabPage选项卡添加图标,显示字体大小。

代码如下:
 private void tabControl1_SelectedIndexChanged_1(object sender, EventArgs e)
 {
     if (s[tabControl1.SelectedIndex] == 0)
     {
         btnX_Click(sender, e);
     }
 }
private void btnX_Click(object sender, EventArgs e)
{
    string formClass = ((TabControl)sender).SelectedTab.Tag.ToString();

    GenerateForm(formClass, sender);
}

 //设置选项卡标签图标
 tabControl1.ImageList = imageList1;
 tabPage1.ImageIndex = 0;
 tabPage2.ImageIndex = 1;
 tabPage3.ImageIndex = 2;
 tabPage4.ImageIndex = 3;
imageList操作
2.5 界面统一化处理
界面统一化处理,整体一致,隔裂化不强。
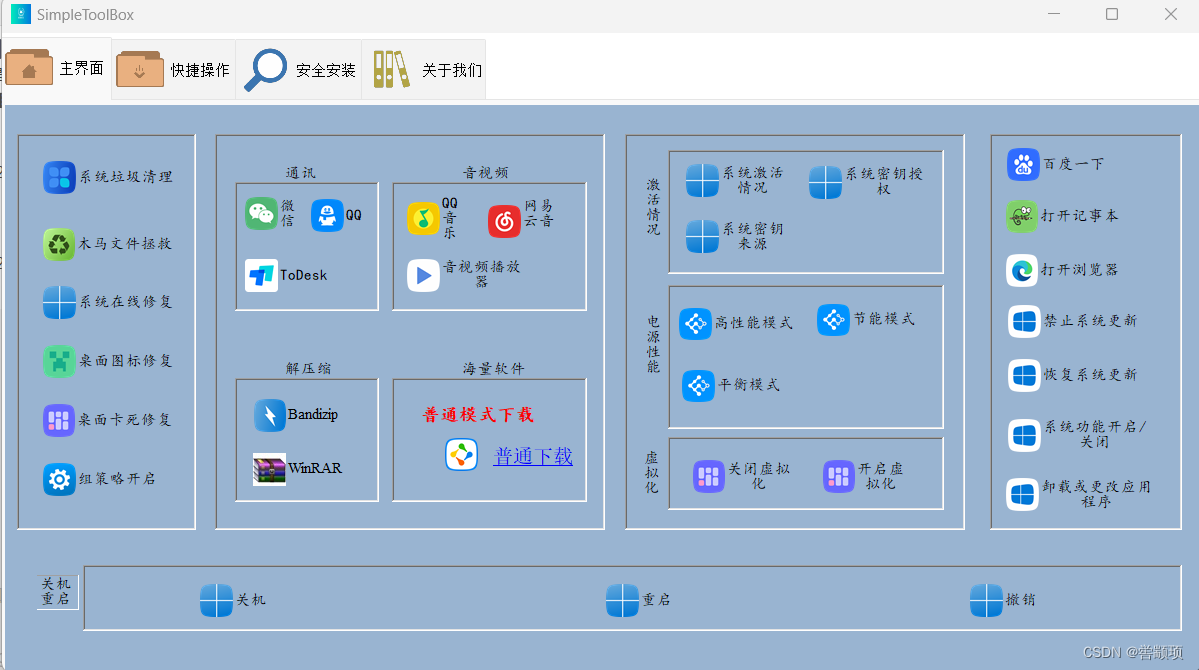
窗体反射处理
 //反射生成窗体
 Form fm = (Form)Assembly.GetExecutingAssembly().CreateInstance(form);
 //设置窗体没有边框,加入到选项卡中
 fm.FormBorderStyle = FormBorderStyle.None;
 fm.TopLevel = false;
 fm.Parent = ((TabControl)sender).SelectedTab;
 fm.ControlBox = false;
 fm.Dock = DockStyle.Fill;
 fm.Show();
 s[((TabControl)sender).SelectedIndex] = 1;
三、设计结果验证
64位测试
通过测试界面显示的IP地址信息,未出现中文乱码,且10秒后信息自动清除。
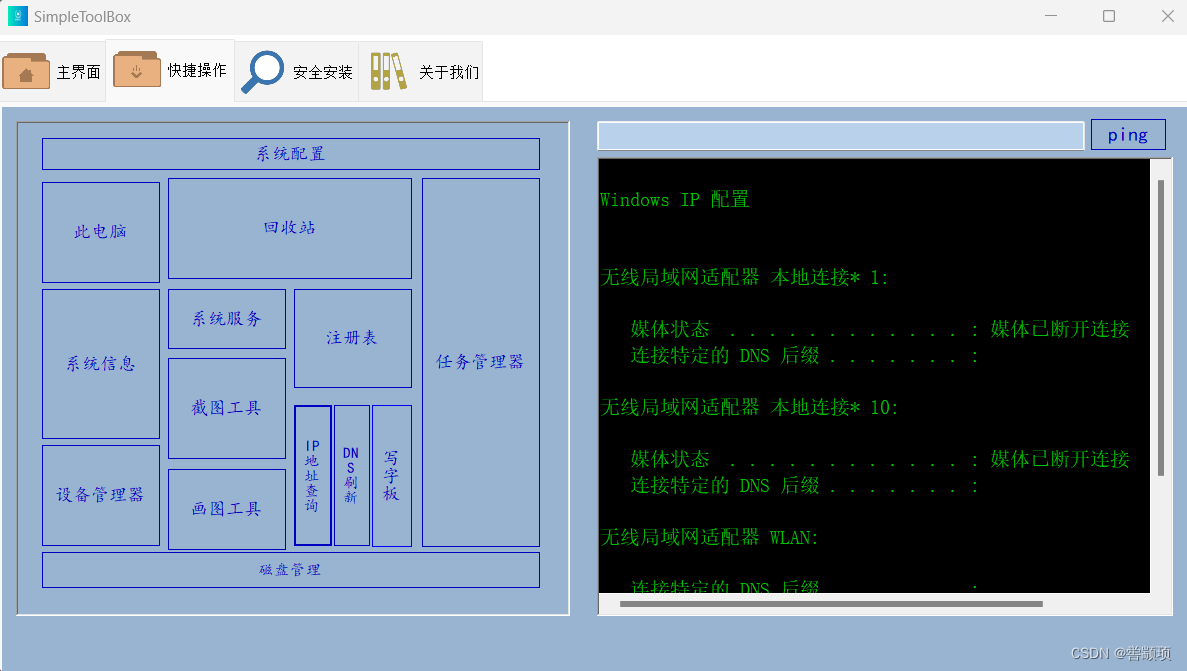
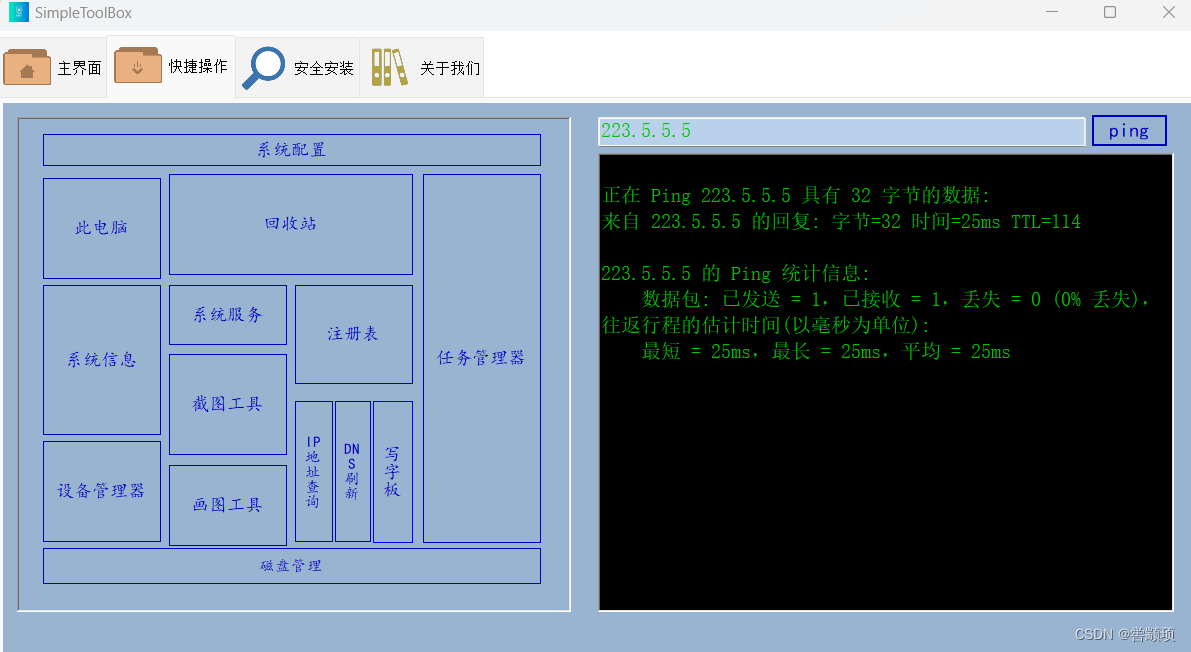
通过Ping IP地址操作,可以返回信息。
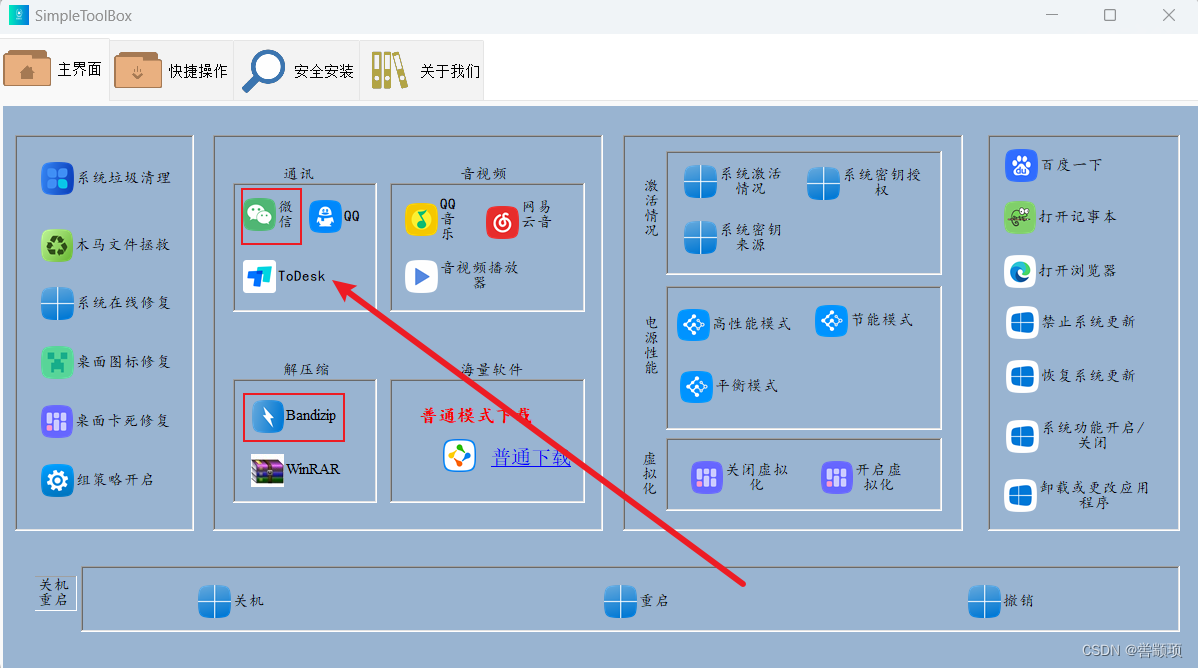
在应用安装程序具备时,软件可自动下载安装,受本地网络影响,下载速度不一样。
32位测试
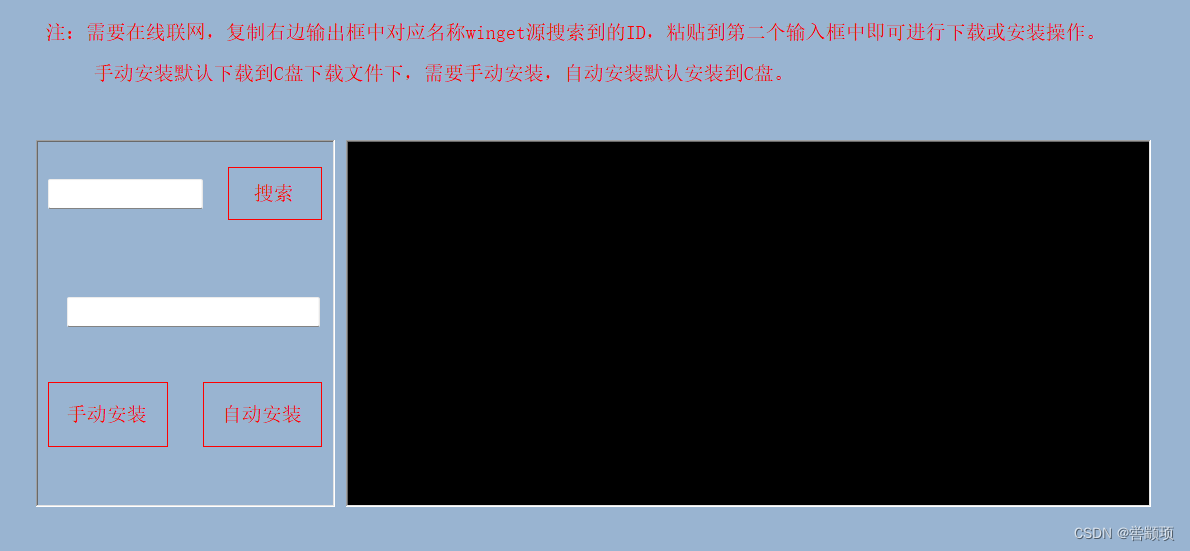
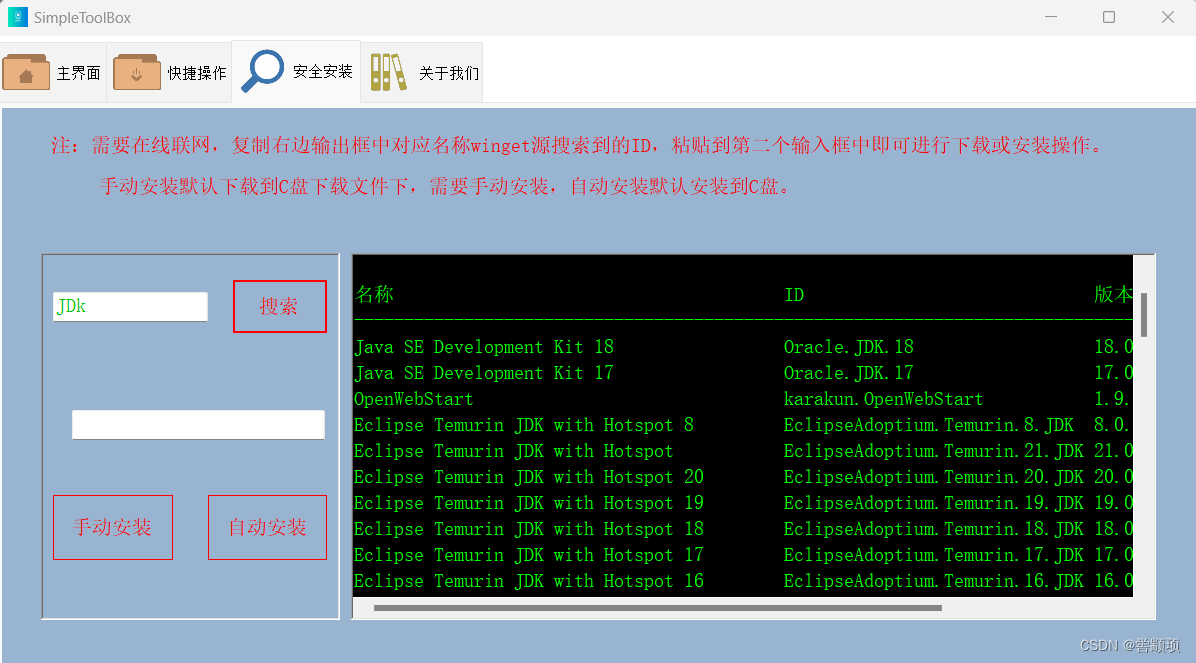
需要联网操作,软件可进行搜索,根据搜索后获取的ID,可执行自动安装或手动安装操作。
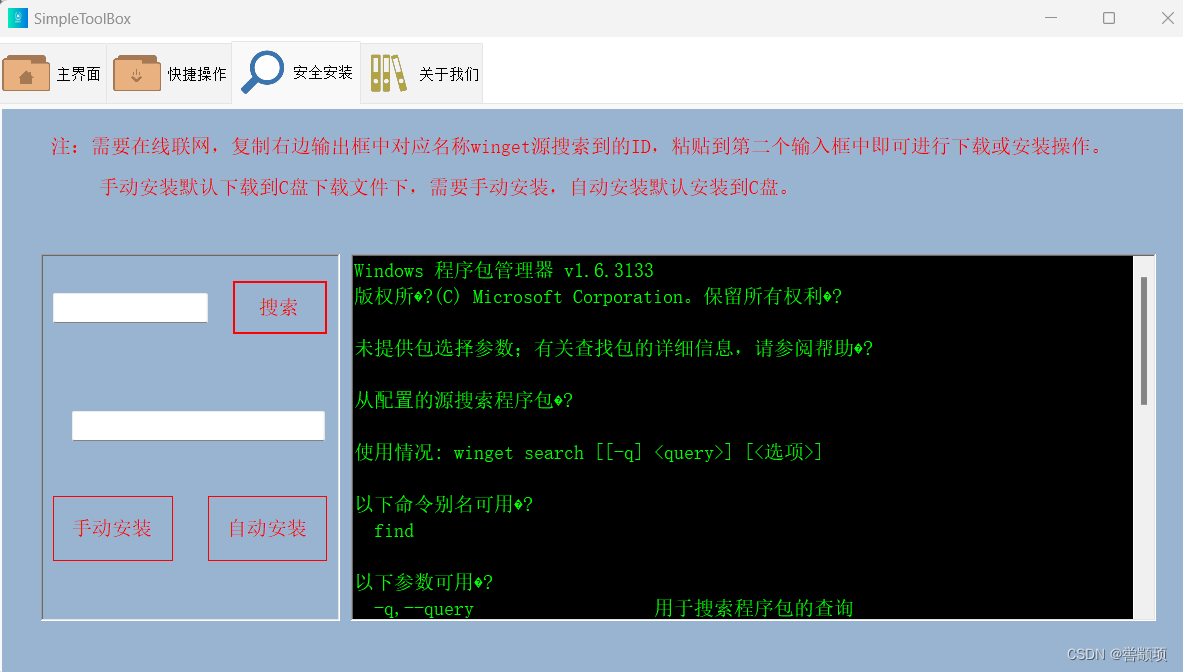
以搜索JDK为例,支持竖直和水平滚动。
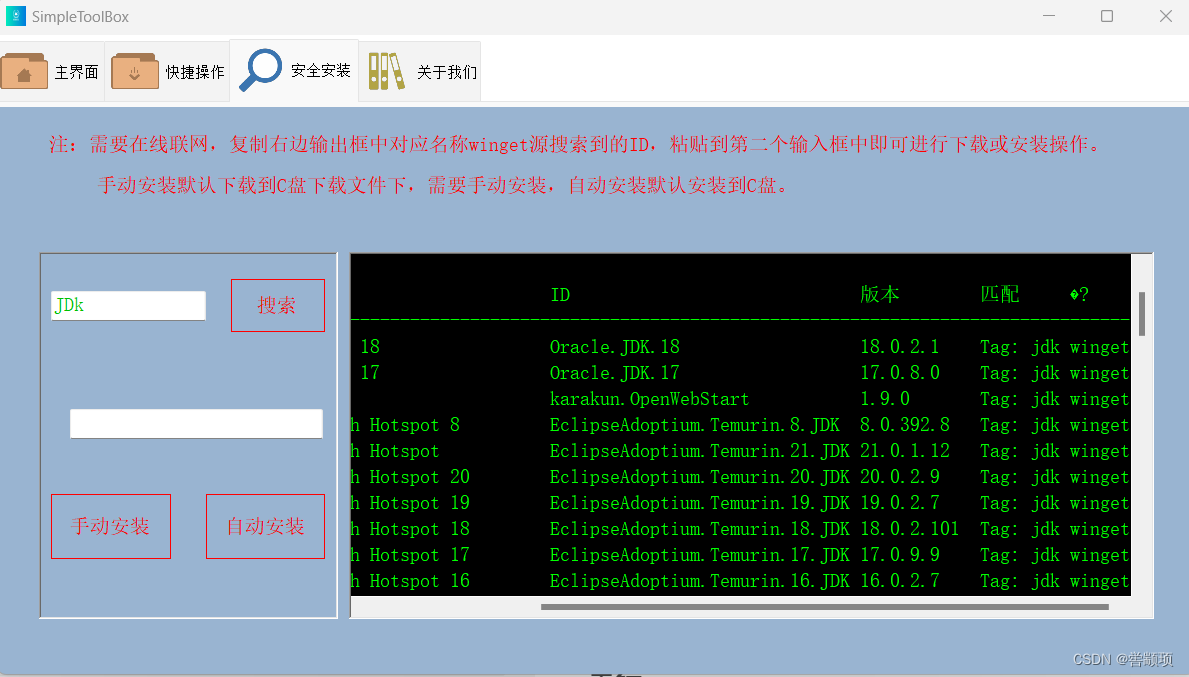
进行手动下载或自动安装操作时,受电脑性能影响,请稍后即可。
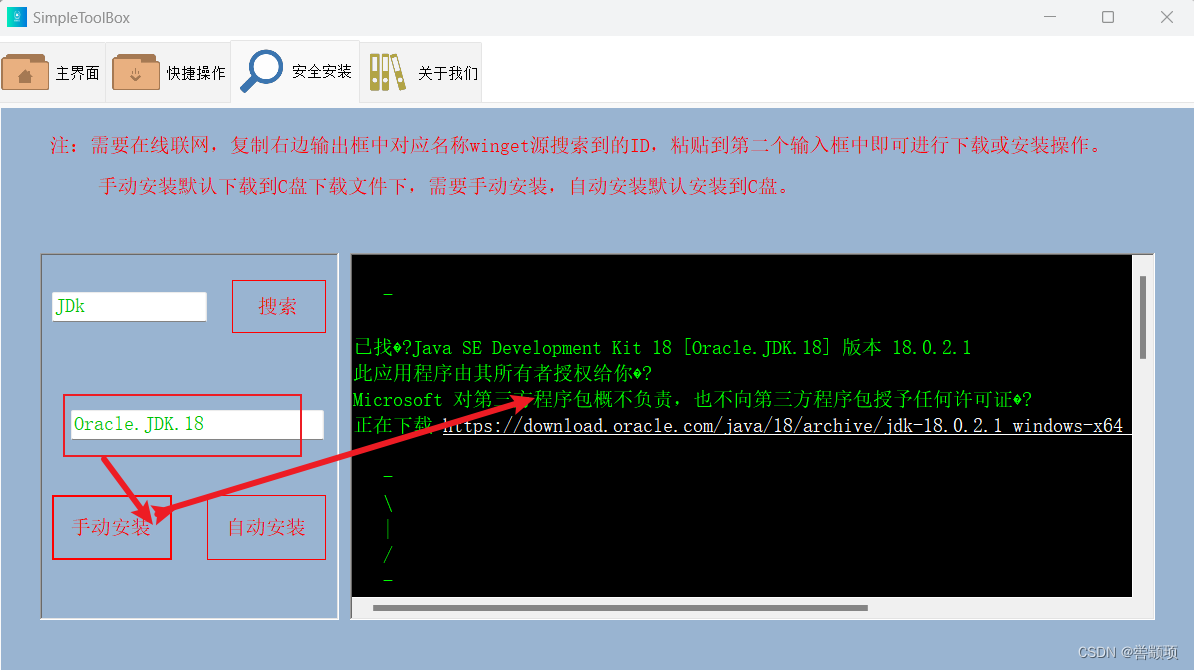
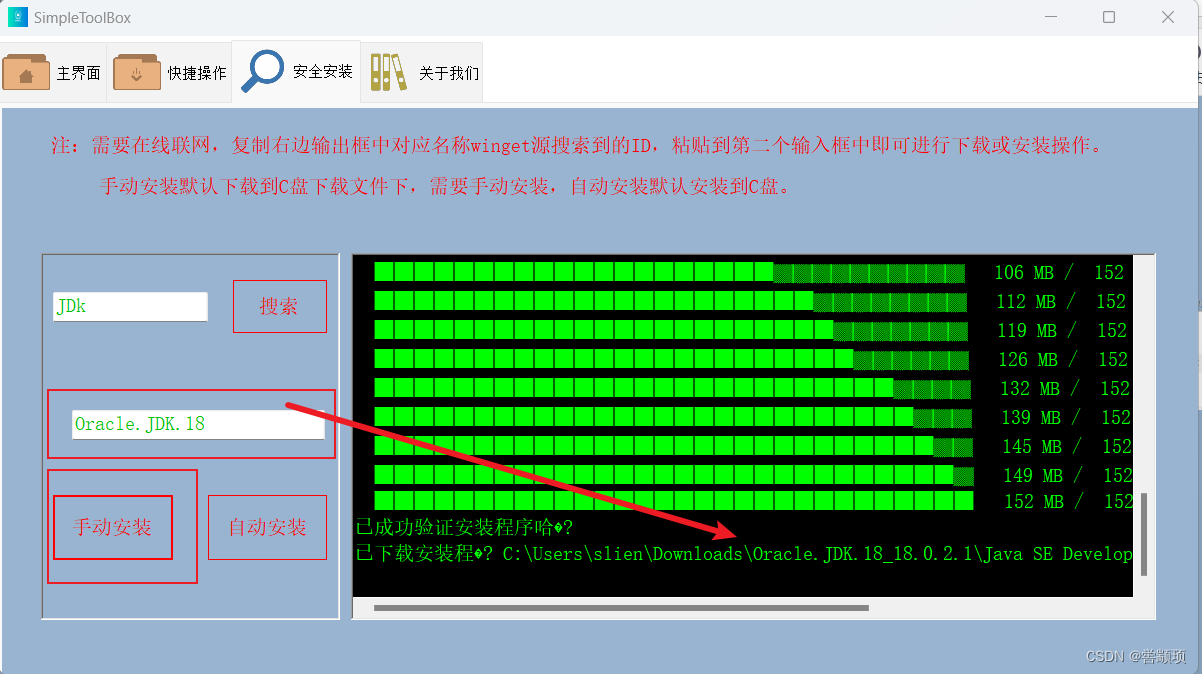
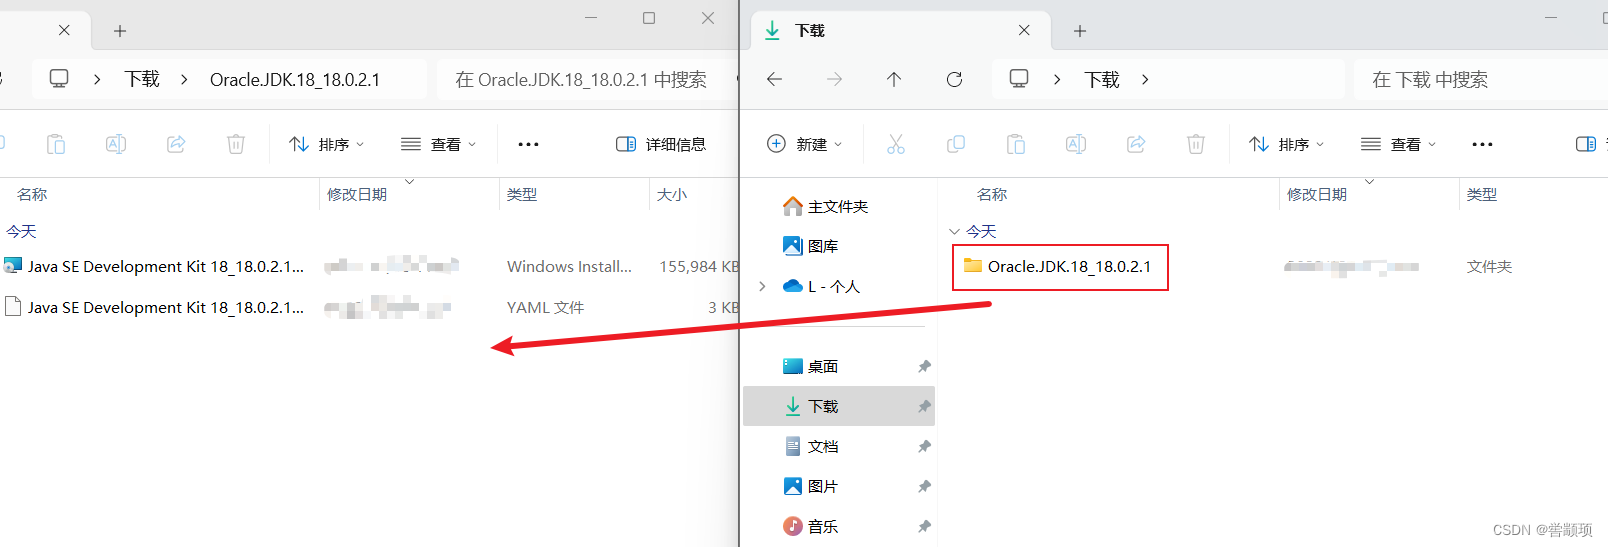
手动安装默认下载到C盘Downloads目录下,进行双击安装,自动安装下载完后无需用户操作自动安装,安装在C盘。
ARM64位测试
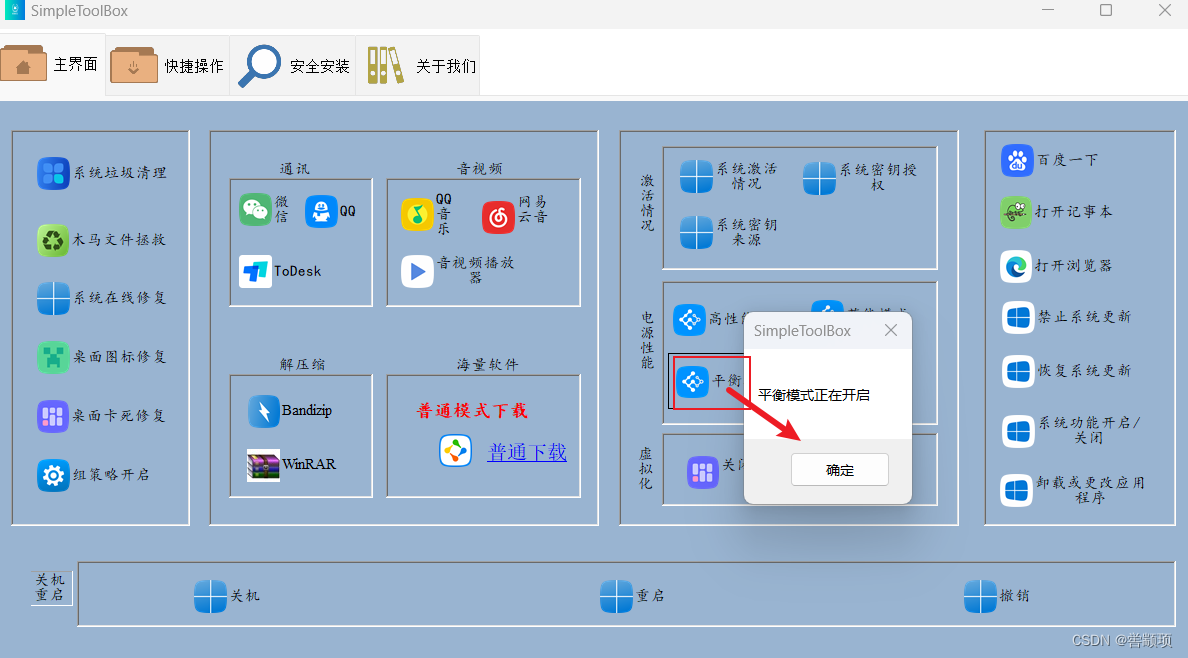
电脑将启动平衡模式,弹窗1秒后自动关闭。
禁止系统更新后,会提示重启操作,用户点击是,5秒后自动重启,点击否,在下一次开机时生效。
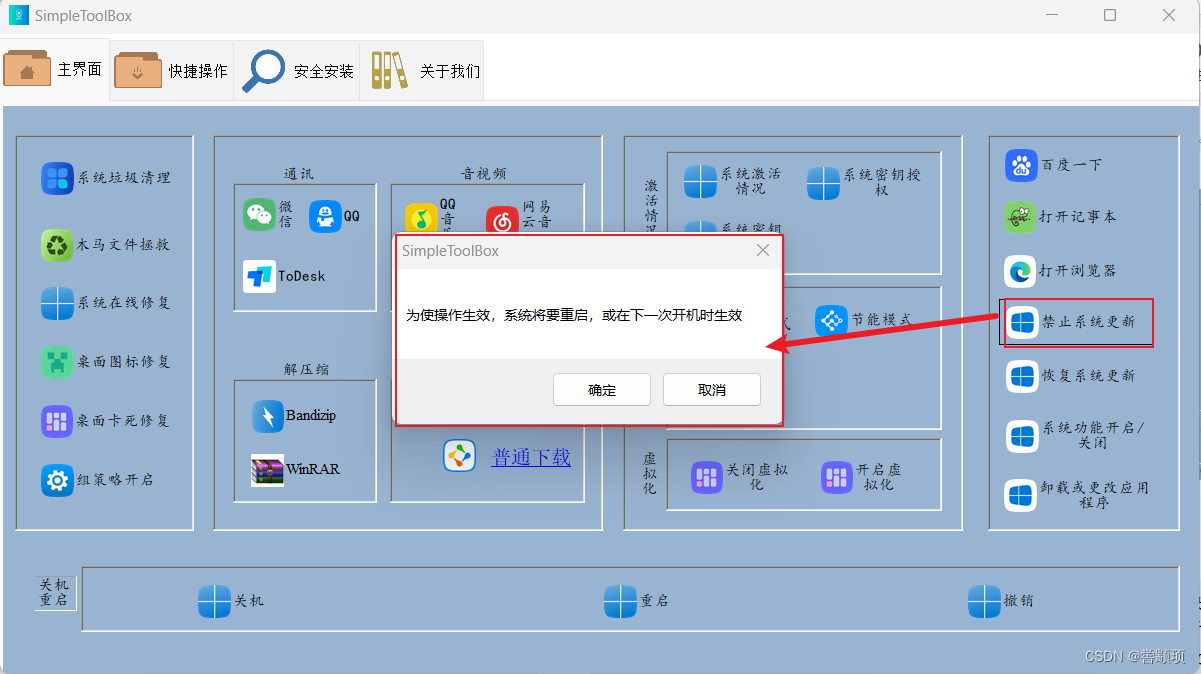
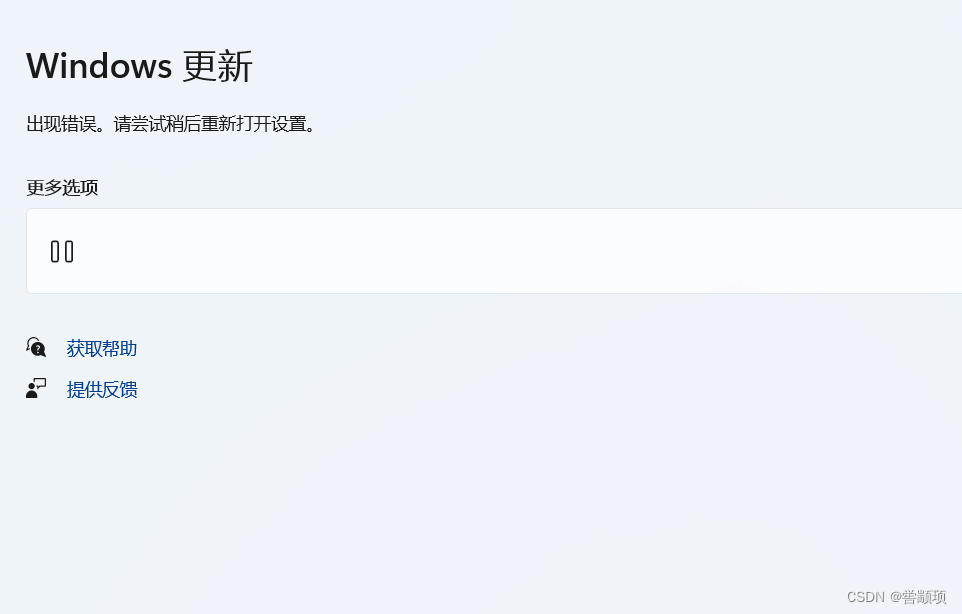
Windows已被禁止更新,点击恢复重启电脑可恢复更新,禁止系统更新默认会禁止,系统搜索、用户信息反馈与收集等服务。
总结
目前可以进行一些操作,解决一些生活中遇到的问题,相应的功能,后续在维护和更新中进行完善。软件可免费下载,免费使用,严禁第三方以付费等行为向用户收取费用。
本文来自互联网用户投稿,该文观点仅代表作者本人,不代表本站立场。本站仅提供信息存储空间服务,不拥有所有权,不承担相关法律责任。 如若内容造成侵权/违法违规/事实不符,请联系我的编程经验分享网邮箱:chenni525@qq.com进行投诉反馈,一经查实,立即删除!
- Python教程
- 深入理解 MySQL 中的 HAVING 关键字和聚合函数
- Qt之QChar编码(1)
- MyBatis入门基础篇
- 用Python脚本实现FFmpeg批量转换
- 接口测试用例设计(超详细总结)
- 点击按钮出现弹框,父子页面互相传参
- JavaScript系列——Promise
- 乙级 1090 危险品装箱
- 网络安全知识:严重漏洞可利用在内存中运行恶意代码
- “华为杯“第四届中国研究生数学建模竞赛-D题:邮政运输网络中的邮路规划和邮车调度(附MATLAB代码实现)
- 详细介绍进程、线程与协程
- 再不准备就错过了!2024年山西省高新技术企业申报补贴政策、认定条件
- c语言实现双向链表长整数相加
- DCNv4:对视觉应用的动态和稀疏算子的重新思考