laravel异步消息队列详细攻略Supervisor队列进程管理(实战)
发布时间:2024年01月15日
1、laravel配置开启队列
这里仅演示数据库队列
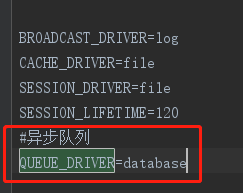
查看下面/config/queue.php,里面defult 对应的 env常量是 QUEUE_DRIVER,那就在 项目根目录下的.env文件修改 QUEUE_DRIVER=database
<?php

return [

    /*
    |--------------------------------------------------------------------------
    | Default Queue Connection Name
    |--------------------------------------------------------------------------
    |
    | Laravel's queue API supports an assortment of back-ends via a single
    | API, giving you convenient access to each back-end using the same
    | syntax for every one. Here you may define a default connection.
    |
    */

    'default' => env('QUEUE_DRIVER', 'sync'),

    /*
    |--------------------------------------------------------------------------
    | Queue Connections
    |--------------------------------------------------------------------------
    |
    | Here you may configure the connection information for each server that
    | is used by your application. A default configuration has been added
    | for each back-end shipped with Laravel. You are free to add more.
    |
    | Drivers: "sync", "database", "beanstalkd", "sqs", "redis", "null"
    |
    */

    'connections' => [

        'sync' => [
            'driver' => 'sync',
        ],

        'database' => [
            'driver' => 'database',
            'table' => 'jobs',
            'queue' => 'default',
            'retry_after' => 90,
        ],

        'beanstalkd' => [
            'driver' => 'beanstalkd',
            'host' => 'localhost',
            'queue' => 'default',
            'retry_after' => 90,
        ],

        'sqs' => [
            'driver' => 'sqs',
            'key' => env('SQS_KEY', 'your-public-key'),
            'secret' => env('SQS_SECRET', 'your-secret-key'),
            'prefix' => env('SQS_PREFIX', 'https://sqs.us-east-1.amazonaws.com/your-account-id'),
            'queue' => env('SQS_QUEUE', 'your-queue-name'),
            'region' => env('SQS_REGION', 'us-east-1'),
        ],

        'redis' => [
            'driver' => 'redis',
            'connection' => 'default',
            'queue' => 'default',
            'retry_after' => 90,
            'block_for' => null,
        ],

    ],

    /*
    |--------------------------------------------------------------------------
    | Failed Queue Jobs
    |--------------------------------------------------------------------------
    |
    | These options configure the behavior of failed queue job logging so you
    | can control which database and table are used to store the jobs that
    | have failed. You may change them to any database / table you wish.
    |
    */

    'failed' => [
        'database' => env('DB_CONNECTION', 'mysql'),
        'table' => 'failed_jobs',
    ],

];
.env文件

2、编写队列主文件,新建/app/Job/MessageJob.php
<?php
namespace App\Job;
use Illuminate\Bus\Queueable;
use Illuminate\Contracts\Queue\ShouldQueue;
use Illuminate\Foundation\Bus\Dispatchable;
use Illuminate\Queue\InteractsWithQueue;
use Illuminate\Queue\SerializesModels;
use Illuminate\Support\Facades\Log;
use App\Service\MessageJobService;
class MessageJob implements ShouldQueue
{
    use Dispatchable, InteractsWithQueue, Queueable, SerializesModels;
    private $content,$to;//这里可以添加队列需要的参数,以下对应传递到执行程序就好
    public function __construct($content,$to){
        $this->content=$content;
        $this->to=$to;
    }
    public function handle(){
        $res=false;
         try{
         ? ? $res=MessageService::send($this->content,$this->to);//这里可以写队列需要执行的逻辑程序
         }catch (\Exception $e){
             Log::error(date('Y-m-d h:i:s',time()).' send message error:'.$e->getMessage());
         }

        if($res===true){
            Log::info(date('Y-m-d h:i:s',time()).' send message success:');
        }
    }
}
新建/app/Service/MessageJobService.php封装文件
<?php
namespace App\Service;
use App\Job\MessageJob;
class MessageJobService
{
    public static function add($content,$to){
        $job=new MessageJob($content,$to);
        dispatch($job);
    }
}
3、编写队列逻辑文件,所有业务处理在这里写,新建App\Service\MessageService.php
public static function send($content, $to) {

   Log::info('异步队列执行------', ['content' => $content, 'content'=> $content]);

}
在需要添加的地方新增队列
public static function sendMessage() {
? ? ? ? //...
? ? ? ? //业务逻辑
? ? ? ? //...
? ? ? ? //添加异步队列
        MessageJobService::add(['content' => '需要传递的数据conent', 'to'=> '需要传递的数据too']);
        return $res;
}
新建队列数据表
# 新建队列主表,下面的 table 是占位符, /config/queue.php 里面的table对应是什么就是什么
php artisan queue:table
# 新建队列失败表
php artisan queue:failed-table

#执行了以上两句后 查看项目根目录下 /app/database/migrations/ 是否存在两个表create记录,然后执行下面添加数据表,你就能看到数据库多了两张表
php artisan migrate

监听队列
-
直接监听测试,在项目目录下执行以下命令
php artisan queue:listen安装supervisor
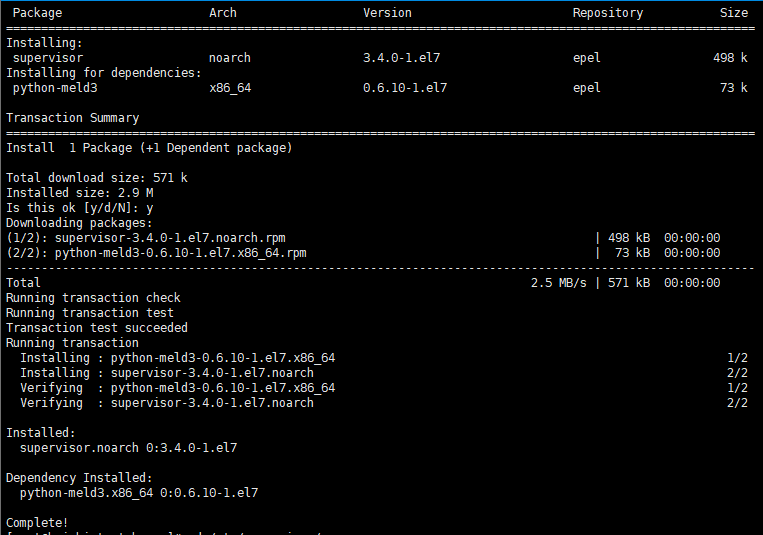
yum install supervisor
出现以上信息标识已安装成功
1、配置supervisord文件
/etc/supervisord.d/*.ini示例,在/etc/supervisord.d/下面? 新增 laravel-worker.ini:
[program:laravel-worker]                                                        ;进程名称,一般和文件名称一样
process_name=%(program_name)s_%(process_num)02d  ;进程名称,一般和文件名称一样
command= php  /www/laravel/artisan queue:work --queue=queue1 --tries=1   ; 指令,指定队列名为queue2
autostart=true                                                                         ;是否跟随supervisord的启动而启动
autorestart=true        ;程序退出后自动重启,可选值:[unexpected,true,false],默认为unexpected,表示进程意外杀死后才重启stopasgroup=true;进程被杀死时,是否向这个进程组发送stop信号,包括子进程
user=www                                                                                ;执行进程的用户
startsecs = 1                                                                           ;自动重启时间间隔(s)
numprocs=1                                   ;进程数
redirect_stderr=true                                                ;是否开启是否重定向错误日志至输出日志
stdout_logfile=/etc/supervisord.d/logs/laravelrabbit.log        ;日志路径
2、相关命令
#校验配置文件是否有修改
  supervisorctl reread

  #更新配置
  supervisorctl update

  #查看supervisor状态
  supervisorctl status

  #修改了job里面的东西后需要在项目下执行
  php artisan queue:restart

  # 开机自启动
  systemctl enable supervisord
  # 启动supervisord服务
  systemctl start supervisord
  # 查看supervisord服务状态
  systemctl status supervisord
  # 查看是否存在supervisord进程
  ps -ef | grep supervisord

  #给执行权限
  chmod -R +x /etc/supervisor/supervisord.conf
文章来源:https://blog.csdn.net/weixin_38730732/article/details/128634439
本文来自互联网用户投稿,该文观点仅代表作者本人,不代表本站立场。本站仅提供信息存储空间服务,不拥有所有权,不承担相关法律责任。 如若内容造成侵权/违法违规/事实不符,请联系我的编程经验分享网邮箱:chenni525@qq.com进行投诉反馈,一经查实,立即删除!
本文来自互联网用户投稿,该文观点仅代表作者本人,不代表本站立场。本站仅提供信息存储空间服务,不拥有所有权,不承担相关法律责任。 如若内容造成侵权/违法违规/事实不符,请联系我的编程经验分享网邮箱:chenni525@qq.com进行投诉反馈,一经查实,立即删除!
最新文章
- Python教程
- 深入理解 MySQL 中的 HAVING 关键字和聚合函数
- Qt之QChar编码(1)
- MyBatis入门基础篇
- 用Python脚本实现FFmpeg批量转换
- Windows10系统如何设置显示电脑文件后缀名?
- 前端需要学GraphQL 吗?
- 10分钟完成权限系统全流程开发
- 63权限提升-Linux脏牛内核漏洞&SUID&信息收集
- MySql必知必会
- 程序设计入门——C语言(翁凯版)第四周
- Day17- 二叉树part06
- 使用POI技术实现excel文件的导入
- 微信小程序与vue区别
- vue/uniapp - 返回上一页并onLoad/onShow刷新数据列表接口