【100个Cocos实例】还记得这个指哪打哪的游戏吗?

引言
Cocos中简易实现炉石目标选择箭头效果
23年1月24日0时,由网易代理的暴雪系列游戏在国内正式终止运营。
炉石传说,一个陪伴了笔者4年的游戏,传说、竞技场12胜历历在目。
转眼停服已经快1年,有小道消息称炉石即将回归国服,勾起满满的回忆。
咱们搞技术的,不会表达,做个类似的简易的目标选择效果看看!
本文将介绍一下Cocos中简易实现炉石目标选择箭头效果。
本文源工程可在文末阅读原文获取,小伙伴们自行前往。
1.目标选择效果

通常在游戏开发中,战斗或者其他场景,需要玩家去操作选择需要攻击的目标、需要移动到的点。
为了表现更明显的效果,会采用箭头指示的形式。
箭头一般从起点出发指向终点,期间还可以做一些动画,使得效果生动一点。
这里面有哪些知识点?
2.需求分析
原版附带箭头的形变,通过模型实现,我们暂时做个简易版本的,后续有时间再实现个3d版本。
要在Cocos中简易实现炉石目标选择箭头效果,可能需要以下知识点:
- 获取鼠标点击位置、实时获取鼠标位置。
- 箭头的跟随和指向。
- 箭头长度的控制。
- 箭头身体部位做一些简易的动画。
下面一起来简易实现炉石目标选择箭头效果。
3.简易实现炉石目标选择箭头效果
1.环境
引擎版本:Cocos Creator 3.8.1
编程语言:TypeScript
2.资源准备
从网络上找来熟悉的资源。简单拼接一下,由于箭头可以控制长短,我们分成2部分。
- 箭头部分
- 身体部分
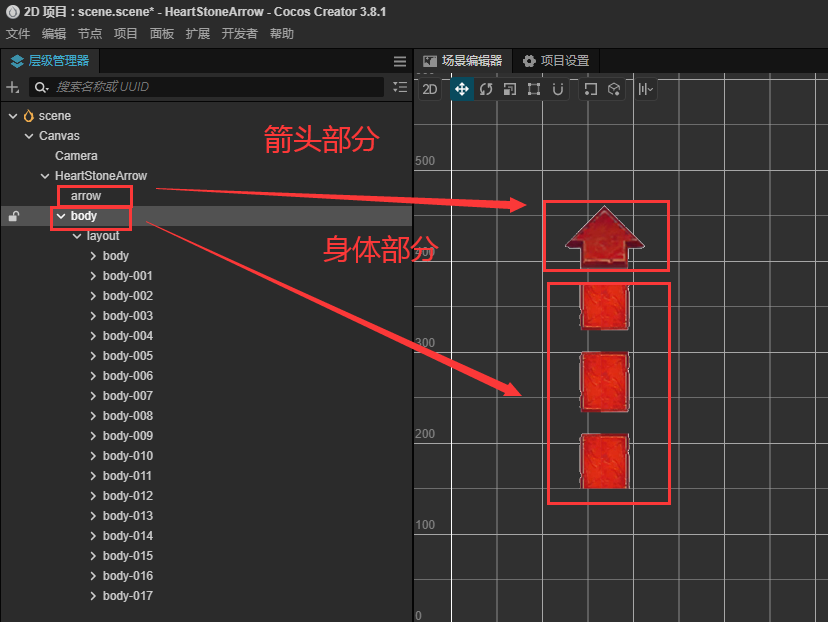
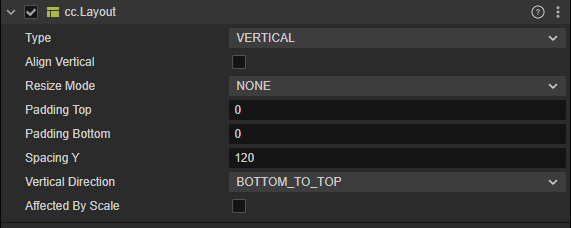
为了让身体的每一格排列整齐,我们添加一个垂直布局。
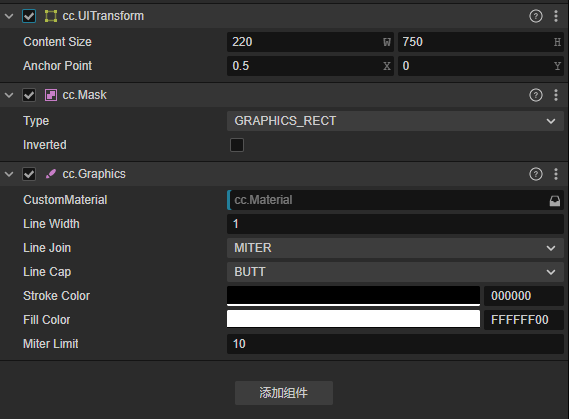
关于箭头长短的控制,我们使用Mask组件和UITransform组件实现。
下面一起来写代码。
3.编写代码
首先我们创建一个HeartStoneArrow组件并且添加到节点上。
import { _decorator, Component, EventMouse, find, misc, Node, NodeEventType, UI, UITransform, v2, v3, Vec2, Vec3 } from 'cc';
const { ccclass, property } = _decorator;

@ccclass('HeartStoneArrow')
export class HeartStoneArrow extends Component {
    arrow: Node;
    body: Node;
    bodyTrans: UITransform;
    criticalValue: number;
}
然后在start()方法中进行初始化。
start() {
    const canvas = find("Canvas");
    this.arrow = canvas.getChildByPath("HeartStoneArrow/arrow");
    this.arrow.active = false;
    this.body = canvas.getChildByPath("HeartStoneArrow/body");
    this.bodyTrans = this.body.getComponent(UITransform);
    const len = this.body.children[0].children.length;
    const lastChildren = this.body.children[0].children[len - 1];
    this.criticalValue = lastChildren.position.y + lastChildren.getComponent(UITransform).height;
    let startPos = null;
}
鼠标的点击位置通过NodeEventType.MOUSE_DOWN事件的getUILocation()获取。
canvas.on(NodeEventType.MOUSE_DOWN, (event: EventMouse) => {
    const pos = event.getUILocation();
    startPos = v3(pos.x, pos.y, 0);
    this.body.worldPosition = startPos;
    this.arrow.worldPosition = startPos;
}, this);
效果如下:
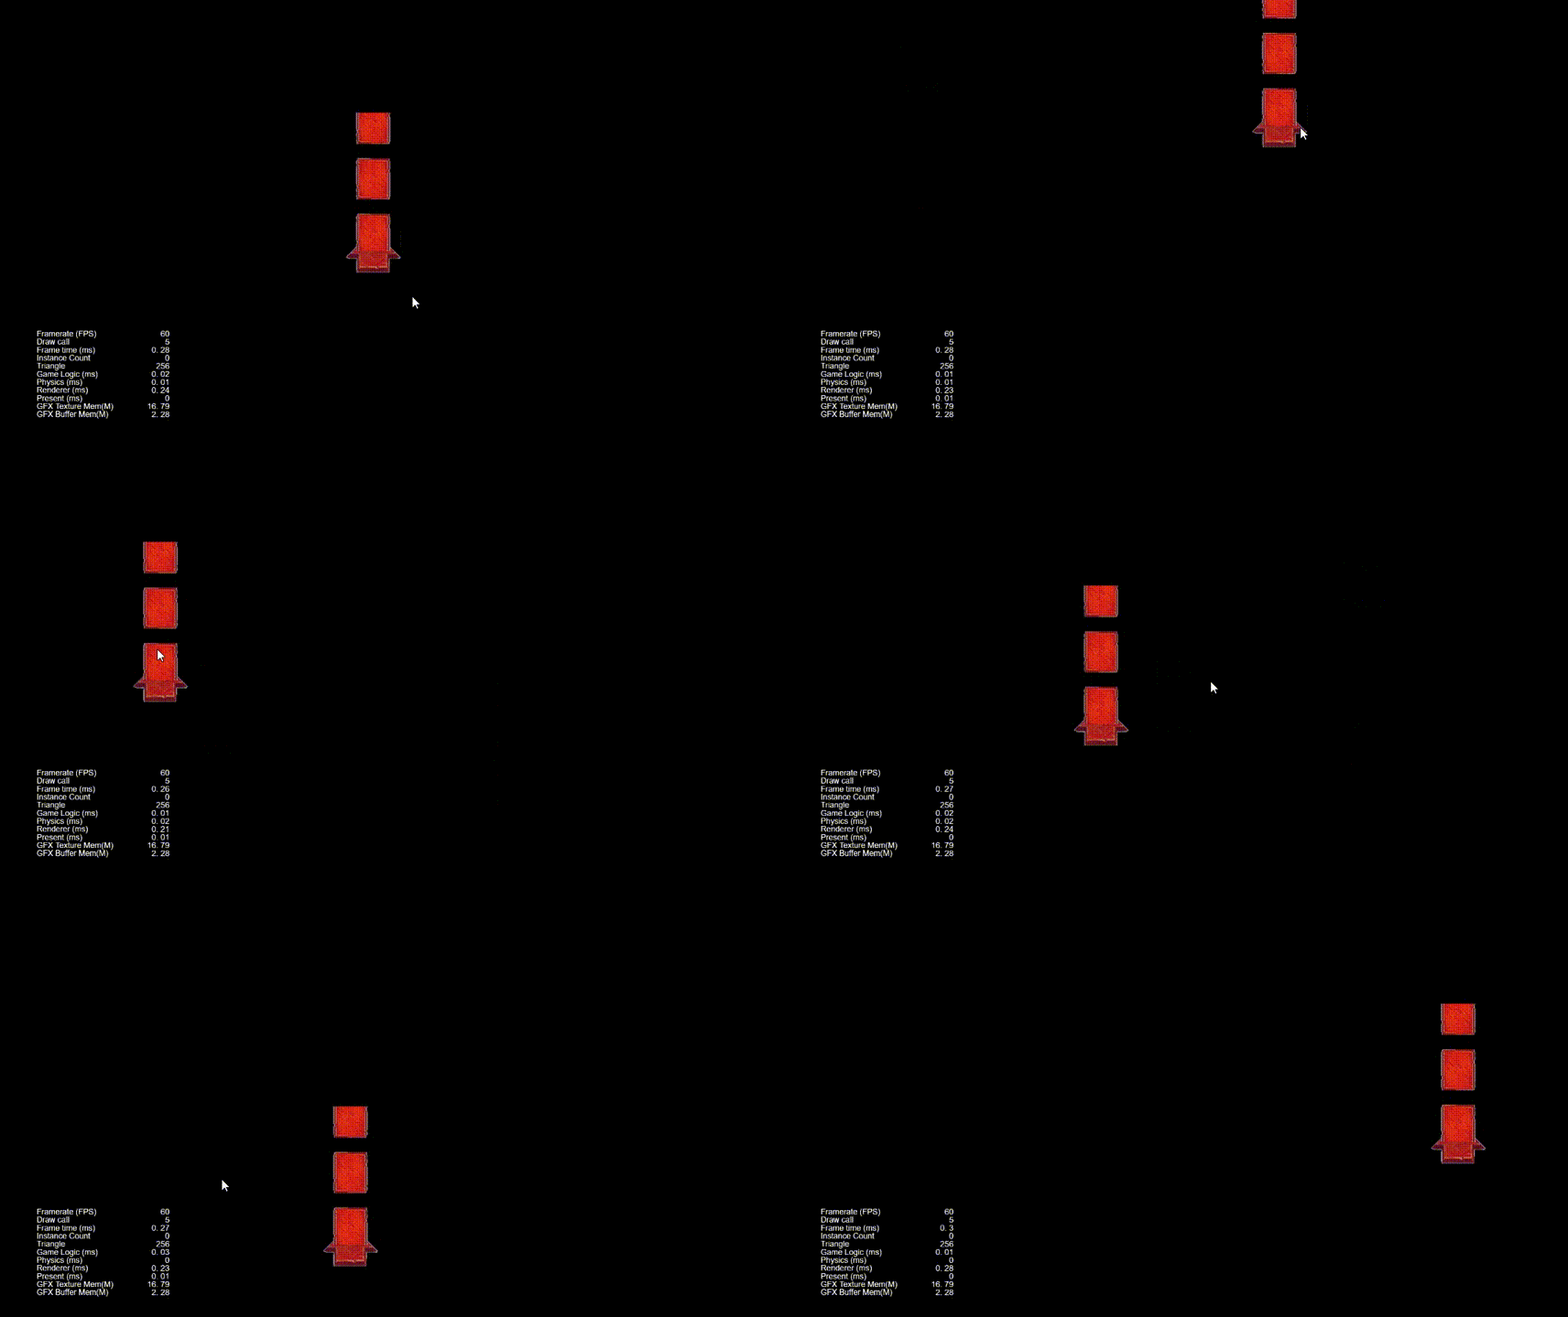
然后在NodeEventType.MOUSE_DOWN事件中更新箭头的位置和朝向、更新身体的长度和朝向。
canvas.on(NodeEventType.MOUSE_MOVE, (event: EventMouse) => {
    if (startPos != null) {
        if (!this.arrow.active) {
            this.arrow.active = true;
        }
        const pos = event.getUILocation();
        this.arrow.worldPosition = v3(pos.x, pos.y, 0);
        this.body.angle = this.calculateAngle(v2(0, 1), v2(pos.x - startPos.x, pos.y - startPos.y))
        this.arrow.angle = this.body.angle;
        this.bodyTrans.height = (Vec3.distance(this.arrow.worldPosition, startPos) - 50) / this.node.scale.y;
    }
}, this);
其中朝向的计算运用到了求2个向量的夹角。
calculateAngle(vectorA: Vec2, vectorB: Vec2) {
    // 使用 Math.atan2 获取带方向的角度(弧度)
    const angleRad = Math.atan2(vectorB.y, vectorB.x) - Math.atan2(vectorA.y, vectorA.x);
    // 将弧度转换为角度
    const degrees = misc.radiansToDegrees(angleRad);
    // 确保角度在 [0, 360) 范围内
    return (degrees + 360) % 360;
}
箭头的长度通过修改Mask组件所在的节点的UITransform组件的高度,长度的计算用Vec3.distance计算。
this.bodyTrans.height = (Vec3.distance(this.arrow.worldPosition, startPos) - 50) / this.node.scale.y;
效果如下:

最后箭头的简易动画效果我们在update中实现,不断更新y坐标,并且循环。
protected update(dt: number): void {
    for (let i = 0; i < this.body.children[0].children.length; i++) {
        this.body.children[0].children[i].position = this.body.children[0].children[i].position.add3f(0, 10, 0);
        if (this.body.children[0].children[i].position.y >= this.criticalValue) {
            this.body.children[0].children[i].position = v3();
        }
    }
}
效果如下:
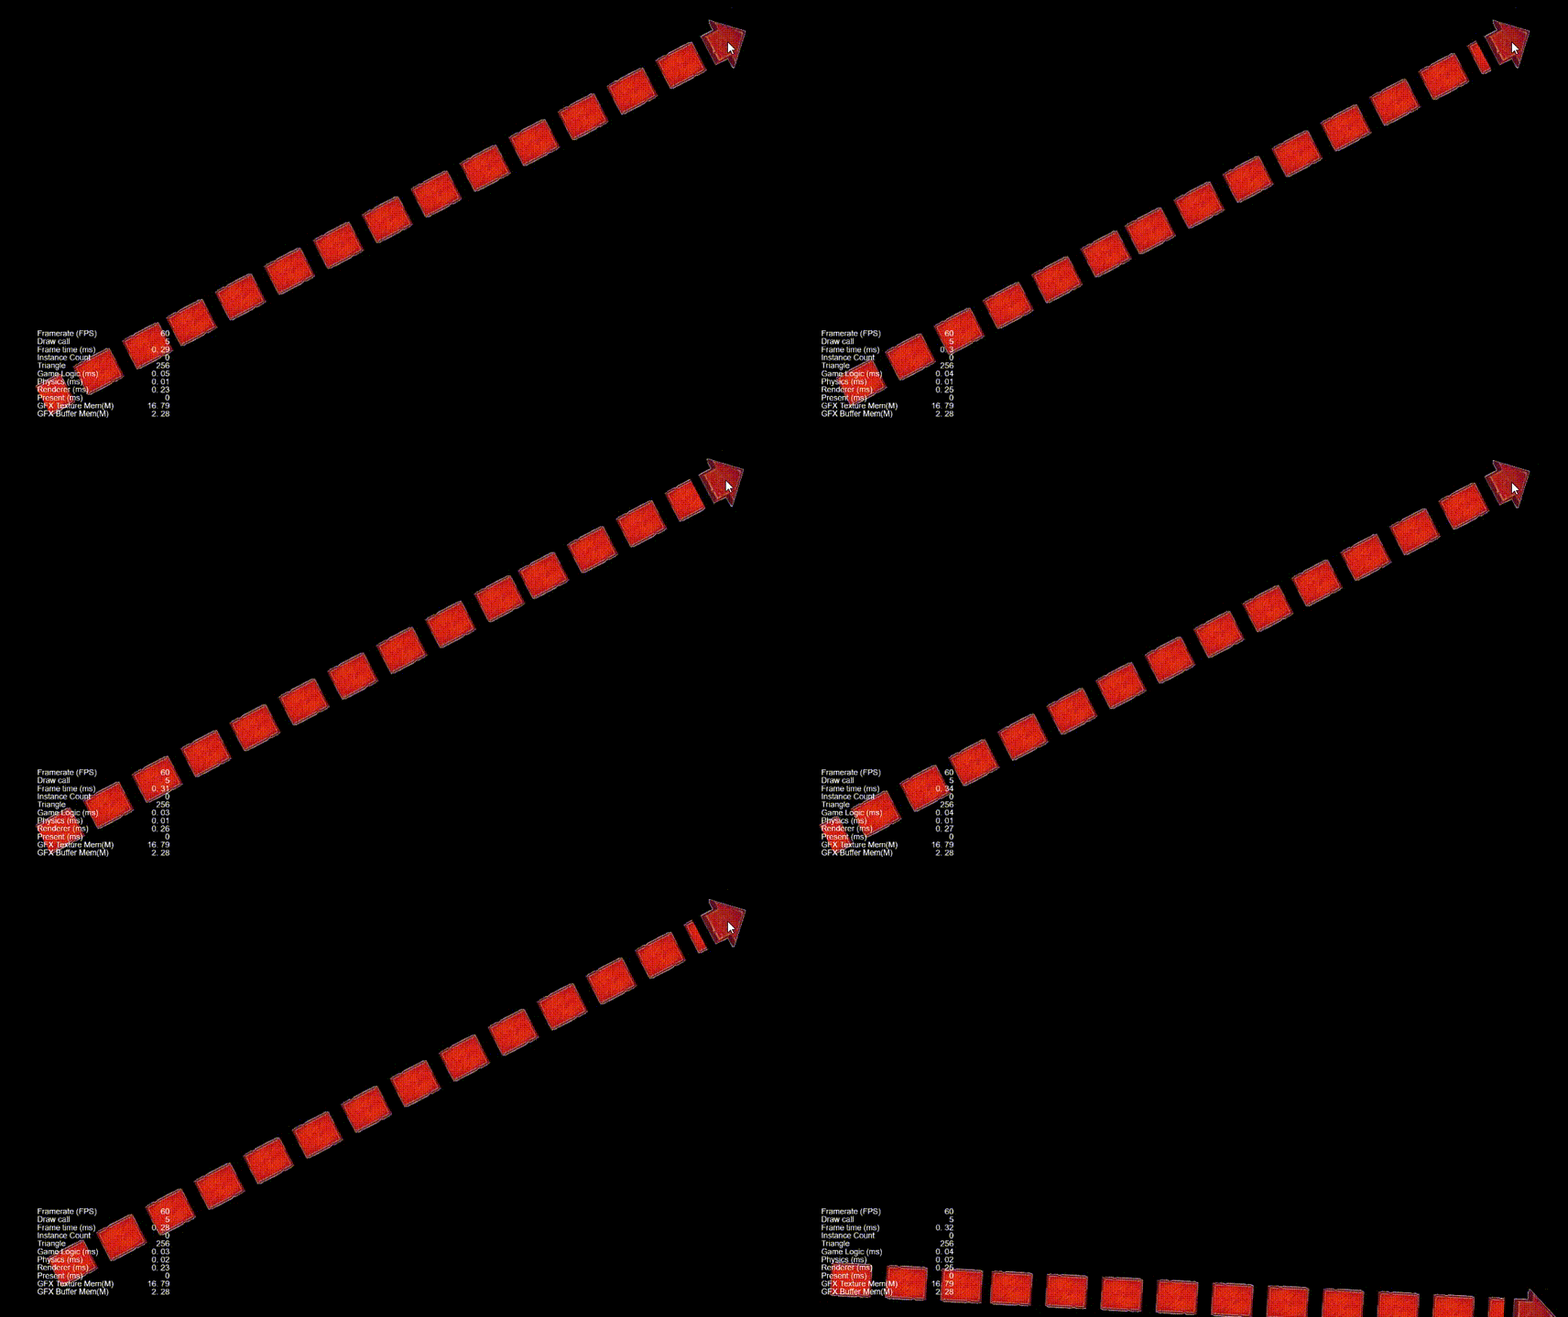
就这样我们的代码编写完毕,下面看看效果。
5.效果演示

结语
向好游戏和青春致敬!
本文源工程可通过私信HeartStoneArrow获取。
在哪里可以看到如此清晰的思路,快跟上我的节奏!关注我,和我一起了解游戏行业最新动态,学习游戏开发技巧。
我是"亿元程序员",一位有着8年游戏行业经验的主程。在游戏开发中,希望能给到您帮助, 也希望通过您能帮助到大家。
AD:笔者线上的小游戏《贪吃蛇掌机经典》《重力迷宫球》《填色之旅》大家可以自行点击搜索体验。
实不相瞒,想要个赞和在看!请把该文章分享给你觉得有需要的其他小伙伴。谢谢!
推荐专栏:
本文来自互联网用户投稿,该文观点仅代表作者本人,不代表本站立场。本站仅提供信息存储空间服务,不拥有所有权,不承担相关法律责任。 如若内容造成侵权/违法违规/事实不符,请联系我的编程经验分享网邮箱:chenni525@qq.com进行投诉反馈,一经查实,立即删除!
- Python教程
- 深入理解 MySQL 中的 HAVING 关键字和聚合函数
- Qt之QChar编码(1)
- MyBatis入门基础篇
- 用Python脚本实现FFmpeg批量转换
- 多人小游戏
- 如何在Milk-V duo的小核FreeRTOS中跑i2c
- YOLOv8改进 添加新型卷积注意力框架SegNext_Attention
- MySQL 5.7.35下载安装使用_忘记密码_远程授权
- 计算机网络(第八版)期末复习(第二章物理层)
- git apt wget 全局设置代理
- Java 常用设计模式详解
- Oracle-数据库迁移之后性能变慢问题分析
- 服装店收银系统+零售商城+批发订货系统+进销存管理搭建思路
- Java:网络编程讲解