【Spring Boot】Starter机制的使用及案例
一、引言
1、什么是SpringBoot Starter
????????SpringBoot中的starter是一种非常重要的机制(自动化配置),能够抛弃以前繁杂的配置,将其统一集成进starter,应用者只需要在maven中引入starter依赖,SpringBoot就能自动扫描到要加载的信息并启动相应的默认配置。starter让我们摆脱了各种依赖库的处理,需要配置各种信息的困扰。
????????SpringBoot会自动通过classpath路径下的类发现需要的Bean,并注册进IOC容器。SpringBoot提供了针对日常企业应用研发各种场景的spring-boot-starter依赖模块。
所有这些依赖模块都遵循着约定成俗的默认配置,并允许我们调整这些配置,即遵循“约定大于配置”的理念。
2、为什么要使用SpringBoot Starter
- 简化配置:通过使用Starter,开发者可以减少手动添加和配置依赖的工作量。Starter通常包含了许多相关的依赖项,以及一些配置模板和自动配置功能,使用者可以非常方便地将其引入到应用程序中,并快速地获得相关的功能。
- 统一管理:Starter能够将相关依赖和配置统一集成进一个模块,这使得项目的依赖管理更加清晰和有序。
- 自动配置:SpringBoot的Starter机制能够自动扫描并加载相应的模块信息,从而减少了开发者手动配置的工作量,提高了开发效率。
- 方便团队协作:由于Starter的使用,开发者无需关心复杂的依赖关系和配置,只需关注业务逻辑的开发,这有助于提高团队协作的效率。
3、应用场景
????????我们的日常开发工作中,可能会需要开发一个通用模块,以供其它工程复用。SpringBoot就为我们提供这样的功能机制,我们可以把我们的通用模块封装成一个个starter,这样其它工程复用的时候只需要在pom中引用依赖即可,由SpringBoot为我们完成自动装配。
常见应用场景:
- 通用模块-短信发送模块
- 基于AOP技术实现日志切面
- 分布式雪花ID,Long转String,解决精度问题
- 微服务项目的数据库连接池配置
- 微服务项目的每个模块都要访问redis数据库,每个模块都要配置redisTemplate
4、自动加载核心注解说明
SpringBoot的自动加载核心注解是@SpringBootApplication。这个注解是Spring Boot最核心的注解,用于标识这是一个Spring Boot应用,并开启Spring Boot的各项能力。
实际上,@SpringBootApplication注解主要组合了以下几个核心注解:
- @Configuration:表示这是一个配置类,Spring Boot会为这个类生成一个默认的bean定义。
- @EnableAutoConfiguration:这是Spring Boot自动配置的核心注解,它会根据项目的依赖情况自动进行bean的定义和属性的配置。
- @ComponentScan:这个注解用于扫描当前类所在的包及其子包,找到标注了@Component, @Service, @Repository等注解的类,并将其定义成bean。

5、命名规范
starter项目和SpringBoot工程结构没有什么区别。必须引入的依赖:
<dependency>
    <groupId>org.springframework.boot</groupId>
    <artifactId>spring-boot-configuration-processor</artifactId>
    <optional>true</optional>
</dependency>
spring-boot-configuration-processor 是一个注解处理器,用于处理 Spring Boot 配置类的注解,并生成配置属性的元数据。它在开发过程中起到以下几个重要的作用:
-
生成配置属性的元数据: 当你使用
@ConfigurationProperties注解来声明配置类时,spring-boot-configuration-processor会解析该注解,并生成与配置属性相关的元数据。这些元数据包括属性的名称、类型、描述、默认值等信息。这些信息可以帮助 IDE 在开发过程中提供代码提示、自动补全和验证功能。 -
提供配置属性的编译时验证: 使用
@ConfigurationProperties注解时,你可以使用其他注解(如@Value、@Valid等)来描述配置属性的约束条件。spring-boot-configuration-processor可以处理这些注解,并在编译时进行验证。这样,你可以在开发阶段及早发现配置属性的错误或不一致,而不是在运行时才遇到问题。 -
简化配置类的编写: 通过使用
spring-boot-configuration-processor,你可以更轻松地编写配置类。它会自动处理@ConfigurationProperties注解及其相关注解,生成属性的 getter、setter 方法,并提供默认的配置文件映射规则。这样,你可以专注于定义配置属性的结构和业务逻辑,而不需要手动编写重复的代码。 -
提升开发体验:
spring-boot-configuration-processor增强了开发工具的功能,例如在 IDE 中提供配置属性的智能提示、文档、类型检查等功能。这可以减少开发过程中的错误,并提高代码的可读性和可维护性。
spring-boot-configuration-processor 可以简化 Spring Boot 配置类的开发,提供编译时验证和开发工具的支持,从而改善开发体验并减少潜在的配置错误。它是 Spring Boot 框架中重要的辅助工具,帮助开发者更高效地处理配置属性。
SpringBoot官方命名方式:
spring-boot-starter-{模块名}例如:spring-boot-starter-web
二、综合案例
1、模拟短信发送
①创建配置类Properties
提供accessKeyId和accessKeySecret属性的getter、setter方法。
package com.zl.smsspringbootstart;

import lombok.Data;
import org.springframework.beans.factory.annotation.Value;
import org.springframework.boot.context.properties.ConfigurationProperties;
import org.springframework.stereotype.Component;
import org.springframework.stereotype.Controller;

@Data
//@Component
//@ConfigurationProperties 会自动去yml文件中找到需要的配置将它放到对应的属性中
@ConfigurationProperties(prefix = "sms")
public class SmsProperties {

    /**
     * 应用标识
     */
//    @Value("${sms.key}")
    private String key;
    /**
     * 应用密钥
     */
//    @Value("${sms.secret}")
    private String secret;
    /**
     * 关闭
     */
    private String enable;

}
②编写短信业务功能
service
package com.zl.smsspringbootstart.service;

public interface ISmsService {

    /**
     * 发送短信
     *
     * @param phone        要发送的手机号
     * @param data         要发送的内容
     */
    void send(String phone, String data);

}
接口实现impl
package com.zl.smsspringbootstart.service.impl;


import com.zl.smsspringbootstart.SmsProperties;
import com.zl.smsspringbootstart.service.ISmsService;

public class SmsServiceImpl implements ISmsService {

    private SmsProperties smsProperties; //null

    public SmsServiceImpl(SmsProperties smsProperties) {
        this.smsProperties = smsProperties;
    }

    @Override
    public void send(String phone, String data) {
        String key = smsProperties.getKey();
        String secret = smsProperties.getSecret();
        System.out.println("接入短信系统,Key=" + key + ",Secret=" + secret);
        System.out.println("短信发送,phone=" + phone + ",data=" + data);
    }

}
③创建自动配置类
@EnableConfigurationProperties注解的作用是@ConfigurationProperties注解生效。
如果只配置@ConfigurationProperties注解,在IOC容器中是获取不到properties配置文件转化的bean的。
package com.zl.smsspringbootstart;

import com.zl.smsspringbootstart.service.ISmsService;
import com.zl.smsspringbootstart.service.impl.SmsServiceImpl;
import org.springframework.beans.factory.annotation.Autowired;
import org.springframework.boot.autoconfigure.condition.ConditionalOnProperty;
import org.springframework.boot.context.properties.EnableConfigurationProperties;
import org.springframework.context.annotation.Bean;
import org.springframework.context.annotation.Configuration;

@Configuration
//开启配置加载
@EnableConfigurationProperties({SmsProperties.class})
//添加一个条件 sms.enable
@ConditionalOnProperty(prefix = "sms", name = "enable", havingValue = "true")
public class SmsConfig {

    //控制当前的service是否加载到spring里面去

    @Autowired
    private SmsProperties smsProperties;

    //@Bean 方法会在spring运行的时候自动执行,返回值会被放到spring容器中
    @Bean
    public ISmsService smsService() {
        return new SmsServiceImpl(smsProperties);
    }

}
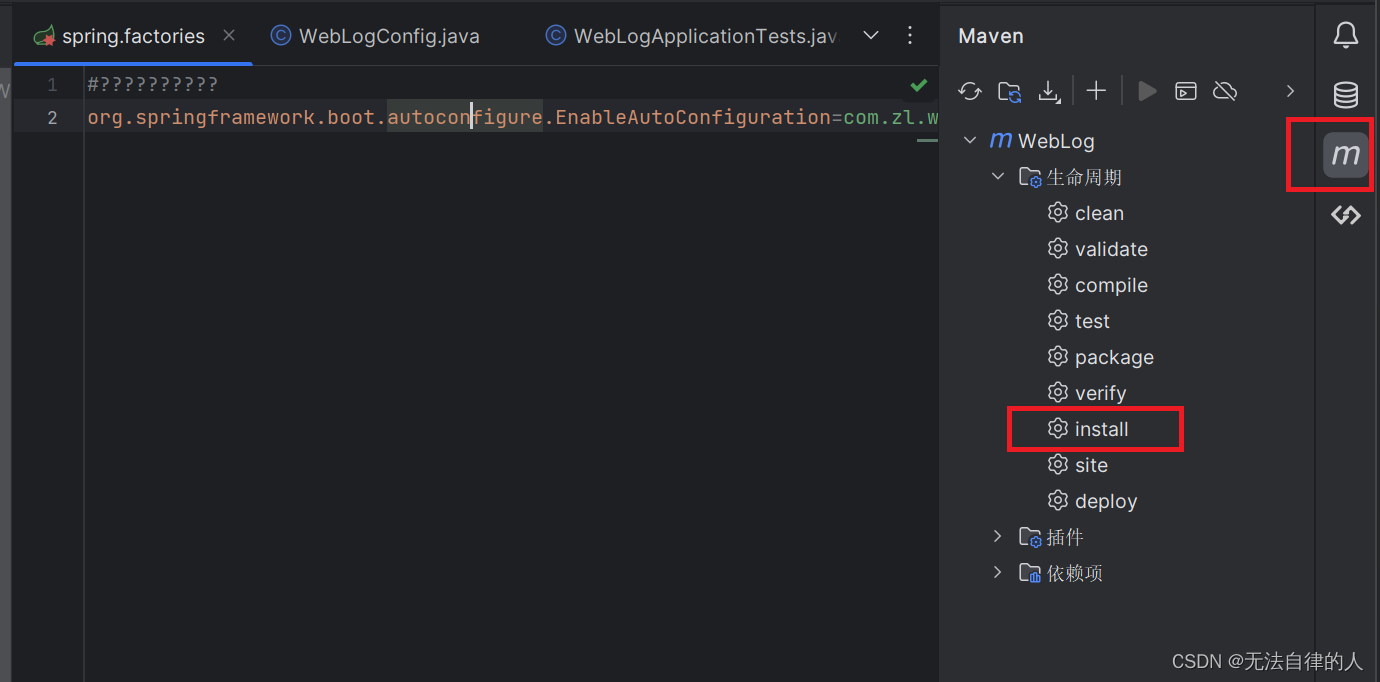
④编写spring.factories文件加载自动配置类
在resources下新建META-INF文件夹,然后创建spring.factories文件。在该文件中加入如下配置,该配置指定上步骤中定义的配置类为自动装配的配置:
org.springframework.boot.autoconfigure.EnableAutoConfiguration=com.zl.smsspringbootstart.SmsConfig
其中AutoConfig是starter配置文件的类限定名,多个之间逗号分割,还可以\进行转义即相当于去掉后面换行和空格符号。

⑤打包

⑥其他项目引用
- 引入依赖
<dependency> <groupId>com.zl</groupId> <artifactId>sms-spring-boot-start</artifactId> <version>0.0.1-SNAPSHOT</version> </dependency> -
配置application.yml文件
enable如果为false则不使用# 配置 sms: key: 11115 secret: 100006 enable: true -
创建Junit测试
?package com.example.springboot01; import com.zl.smsspringbootstart.service.ISmsService; import com.zl.weblog.WebLogProperties; import org.junit.jupiter.api.Test; import org.springframework.beans.factory.annotation.Autowired; import org.springframework.boot.test.context.SpringBootTest; @SpringBootTest class Springboot01ApplicationTests { // 使用短信功能 @Autowired private ISmsService iSmsService; @Test void contextLoads() { iSmsService.send("137", "123456"); } } -
测试结果

2、基于AOP技术实现日志切面
①创建配置类Properties
enabled属性用于控制是否开关日志,请提供enabled属性的getter、setter方法。
package com.zl.weblog;

import org.springframework.boot.context.properties.ConfigurationProperties;

// 添加@ConfigurationProperties注解,将配置文件中的属性映射到WebLogProperties类中
@ConfigurationProperties(prefix = "spcloud.weblog")
public class WebLogProperties {
    // 定义一个boolean类型的变量
    private boolean enabled;

    // 构造函数
    public WebLogProperties() {
    }

    // 获取enabled属性
    public boolean isEnabled() {
        return enabled;
    }

    // 设置enabled属性
    public void setEnabled(boolean enabled) {
        this.enabled = enabled;
    }
}
②实现基于AOP技术的日志切面功能
package com.zl.weblog;

import lombok.extern.slf4j.Slf4j;
import org.aspectj.lang.JoinPoint;
import org.aspectj.lang.annotation.AfterReturning;
import org.aspectj.lang.annotation.Aspect;
import org.aspectj.lang.annotation.Before;
import org.aspectj.lang.annotation.Pointcut;
import org.springframework.stereotype.Component;
import org.springframework.web.context.request.RequestContextHolder;
import org.springframework.web.context.request.ServletRequestAttributes;

import javax.servlet.http.HttpServletRequest;
import java.util.Arrays;

@Aspect
@Component
@Slf4j
public class WebLogAspect {
    //@Pointcut("execution(public * com.zl..controller.*.*(..))")
    // 定义一个切入点,拦截com.zl..controller.*.*(..)方法
    @Pointcut("execution(* *..*Controller.*(..))")
    public void webLog() {
    }

    @Before("webLog()")
    // 在执行方法之前执行
    public void doBefore(JoinPoint joinPoint) throws Throwable {
        // 接收到请求,记录请求内容
        ServletRequestAttributes attributes = (ServletRequestAttributes) RequestContextHolder.getRequestAttributes();
        HttpServletRequest request = attributes.getRequest();

        // 记录下请求内容
        log.info("开始服务:{}", request.getRequestURL().toString());
        log.info("客户端IP :{}", request.getRemoteAddr());
        log.info("参数值 :{}", Arrays.toString(joinPoint.getArgs()));
    }

    @AfterReturning(returning = "ret", pointcut = "webLog()")
    // 在执行方法之后执行
    public void doAfterReturning(Object ret) throws Throwable {
        // 处理完请求,返回内容
        log.info("返回值 : {}", ret);
    }
}
③创建自动配置类
package com.zl.weblog;

//import com.zl.spcloudspringbootstarter.properties.WebLogProperties;

import org.springframework.boot.autoconfigure.condition.ConditionalOnMissingBean;
import org.springframework.boot.autoconfigure.condition.ConditionalOnProperty;
import org.springframework.boot.context.properties.EnableConfigurationProperties;
import org.springframework.context.annotation.Bean;
import org.springframework.context.annotation.Configuration;

/**
 * @ConditionalOnProperty 配置属性a:
 * 1:不配置a        matchifmissing=false 不满足      matchifmissing=true 满足
 * 2:配置a=false    matchifmissing=false 不满足      matchifmissing=true 不满足
 * 3:配置a=true     matchifmissing=false 满足        matchifmissing=true 满足
 */
@Configuration
@EnableConfigurationProperties({WebLogProperties.class})
@ConditionalOnProperty(prefix = "spcloud.weblog",
        value="enabled",matchIfMissing = true)
public class WebLogConfig {

    @Bean
    @ConditionalOnMissingBean
    public WebLogAspect webLogAspect() {
        return new WebLogAspect();
    }
}
④编写spring.factories文件加载自动配置类
在resources下新建META-INF文件夹,然后创建spring.factories文件。在该文件中加入如下配置,该配置指定上步骤中定义的配置类为自动装配的配置:
org.springframework.boot.autoconfigure.EnableAutoConfiguration=com.zl.weblog.WebLogConfig
其中AutoConfig是starter配置文件的类限定名,多个之间逗号分割,还可以\进行转义即相当于去掉后面换行和空格符号。

⑤打包
⑥其他项目引用
- 引入依赖
<!-- 切面--> <dependency> <groupId>com.zl</groupId> <artifactId>WebLog</artifactId> <version>0.0.1-SNAPSHOT</version> </dependency> -
配置application.yml文件
enable如果为false则不使用# 配置 spcloud: weblog: enabled: true -
创建Controller层测试
在这里可以使用自己的Controller层测试package com.example.springboot01.controller; import com.example.springboot01.entity.TBook; import com.example.springboot01.page.PageBean; import com.example.springboot01.service.TBookService; import com.github.pagehelper.PageHelper; import org.aspectj.lang.annotation.Aspect; import org.springframework.beans.factory.annotation.Autowired; import org.springframework.web.bind.annotation.*; import java.util.List; @RestController @RequestMapping("/book") public class TBookController { @Autowired private TBookService tBookService; @RequestMapping("/list") public Object list2(PageBean pageBean) { List<TBook> tBooks = tBookService.selectAll(pageBean); return tBooks; } } -
测试结果


分享就到这里!欢迎搭建在评论区进行讨论!
本文来自互联网用户投稿,该文观点仅代表作者本人,不代表本站立场。本站仅提供信息存储空间服务,不拥有所有权,不承担相关法律责任。 如若内容造成侵权/违法违规/事实不符,请联系我的编程经验分享网邮箱:chenni525@qq.com进行投诉反馈,一经查实,立即删除!
- Python教程
- 深入理解 MySQL 中的 HAVING 关键字和聚合函数
- Qt之QChar编码(1)
- MyBatis入门基础篇
- 用Python脚本实现FFmpeg批量转换
- 51单片机之按键和数码管
- xLearn机器学习库:安装与实践指南
- 巧用AI玩转时事分析
- 小程序样例2:简单图片分类查看
- 同一对象放入集合转换成json异常记录
- 代码随想录算法训练营Day08|344.反转字符串、541. 反转字符串II、卡码网:替换数字、151.翻转字符串里的单词、卡码网:右旋字符串
- 用Spark在大数据平台DataBricks轻松处理数据
- Educational Codeforces Round 104 (Rated for Div. 2)(VP)(寒假ACM模拟赛2)
- 牛客小白月赛85
- 【影像组学入门百问】#51----#57