3D点云分割之SAGA(cvpr2023) 配置及使用
SAGA即segment any 3d Gaussians, 为3D高斯点云下的目标分割。
在第一帧图片点击一个目标,可在3D点云中分割出来。
paper
github
语义分割采用的是SAM (segment anything), SAM和3d gaussian-splatting结合,
通过训练一个MLP,把SAM特征和3D特征进行映射,从而不需要每帧都分割,缩短耗时,达到ms级。
训练的损失函数有2个,SAM-guidance loss和Correspondence loss.
推理时有后处理过程,
后处理有2步,一个是statistical filtering, 一个是growing.
后面会通过点云看到这2步的效果。
数据集用的是nerf_llff_data/fern.
配置环境。
github上面配环境就一步:
conda env create --file environment.yml
这一步在博主的主机上并不好使,会报错,所以这里把它拆开来执行。
根据environment.yml里面的内容。
cudatookit要根据自己的版本来修改。
pytorch3d==0.7.1的版本直接pip安装不了,下载源码装的(下载地址)。
conda create -n gaussian_splatting python==3.7.13
conda activate gaussian_splatting
pip install torch==1.12.1+cu113 torchvision==0.13.1+cu113 --extra-index-url https://download.pytorch.org/whl/cu113

#安装pytorch3d==0.7.1
cd third_party
unzip pytorch3d-0.7.1.zip
cd pytorch3d-0.7.1
pip install -e .

pip install tqdm

cd submodules/diff-gaussian-rasterization
pip install -e .

cd diff-gaussian-rasterization_contrastive_f
pip install -e .
cd ../simple-knn/
pip install -e .

cd ../../third_party/segment-anything
pip install -e .

cd kmeans_pytorch
pip install --editable .
pip install plyfile==0.8.1
pip install jupyter
pip install opencv-python
pip install matplotlib
pip install numba  #没有写错,不是numpy
提取features和sam_masks
按github要求运行下面2步,
scene data path,比如用nerf_llff_data/fern,那就到这一层,
down_sample这个参数,原则上提取的features和sam_masks用的图片尺寸要一致,
如果用down_sample=4, 那么都用4.
目前extract_features.py`里面是把原图resize到1024 * 1024的.
所以提取sam_maks时不要用默认的down_sample=4,用1。
python extract_features.py --image_root <path to the scene data> --sam_checkpoint_path <path to the pre-trained SAM model>

python extract_segment_everything_masks.py --image_root <path to the scene data> --sam_checkpoint_path <path to the pre-trained SAM model>
顺便说一下down_sample使用中会出现的问题:
extract_segment_everything_masks.py它的默认down_sample=4,
如果直接这么用了,意味着它会用images_4下的图片,
但是extract_segment_everything_masks.py中指定的文件夹却是images,
如果你把文件夹名改成images_4, 后面还会报错,因为你提取的sam_masks的文件会跟images_4的图片同名,
你会发现images_4的图片名和images不一样!
所以,不要用downsample=4, 用downsample=1,
你会说,那原图太大了,会出现cuda out of memory。
注意extract_features.py里面是把原图resize到1024 * 1024的,
所以提取的mask也必须是1024 * 1024的,或者只要二者保持一致即可。
因此修改extract_segment_everything_masks.py,加上resize.
if __name__ == '__main__':
    ...
    print("Extracting SAM segment everything masks...")
    for path in tqdm(os.listdir(IMAGE_DIR)):
        name = path.split('.')[0]
        img = cv2.imread(os.path.join(IMAGE_DIR, path))
        img = cv2.resize(img, dsize=(1024, 1024), fx=1, fy=1, interpolation=cv2.INTER_LINEAR) #加上这一句
        masks = mask_generator.generate(img)
3D分割
这一步在prompt_segmenting.ipynb里面实现,
最后会得到./segmentation_res/final_mask.pt,它是一个mask, 用来过滤点云中的点,以得到分割后的3D点云。
这里面要根据数据的不同改路径,改输入点坐标。
DATA_ROOT = 'your data path'
MODEL_PATH = './output/XXX/'
FEATURE_GAUSSIAN_ITERATION = 30000
SAM_CKPT_PATH = 'your path/sam_vit_h_4b8939.pth'

input_point = np.array([[500, 400]])  #手动选的点坐标
mask_id = 1  #初始有3个mask,选第2个mask作为初始mask
这时可以在后处理第一步filter之后看点云效果
filtered_points, filtered_mask, thresh = postprocess_grad_based_statistical_filtering(pcd=selected_xyz.clone(),
                                                                                          precomputed_mask=mask_.clone(),
                                                                                          feature_gaussians=feature_gaussians,
                                                                                          view=view,
                                                                                          sam_mask=ref_mask.clone(),
                                                                                          pipeline_args=pipeline.extract(
                                                                                              args))

path = './output/XXX/point_cloud/iteration_30000/scene_point_cloud.ply'
colors = load_filtered_point_colors_from_pcd(len(filtered_points), path, filtered_mask)
write_ply_with_color('./segmentation_res/filtered_seg_color.ply', filtered_points,colors)
效果如下,用的是nerf_llff_data/fern

渲染
根据上面计算出的final_mask.pt渲染点云。
参数如下:
3DGS model: ./output/XXX/
mask: final_mask.pt
python render.py -m <path to the pre-trained 3DGS model> --precomputed_mask <path to the segmentation results> --target scene --segment
这一步结束后会在out/XXX/point_cloud/iteration_30000下面生成这2个文件
它们是没有颜色的点云。

如果想输出带颜色的点云,可以修改一下prompt_segmenting.ipynb的load_point_colors_from_pcd函数。
用final_mask.pt过滤scene_point_cloud.ply中的点,提取color即可。
这是渲染效果。

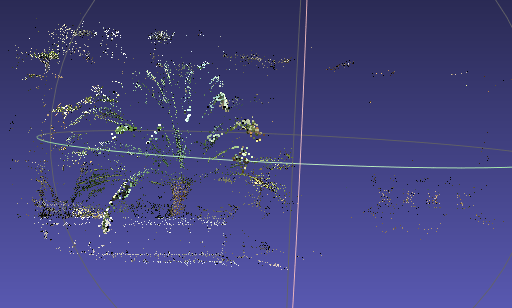
顺带看一下input点云和3DGS之后的点云。
input点云

3DGS处理后

本文来自互联网用户投稿,该文观点仅代表作者本人,不代表本站立场。本站仅提供信息存储空间服务,不拥有所有权,不承担相关法律责任。 如若内容造成侵权/违法违规/事实不符,请联系我的编程经验分享网邮箱:chenni525@qq.com进行投诉反馈,一经查实,立即删除!
- Python教程
- 深入理解 MySQL 中的 HAVING 关键字和聚合函数
- Qt之QChar编码(1)
- MyBatis入门基础篇
- 用Python脚本实现FFmpeg批量转换
- STM32存储左右互搏 SPI总线读写FRAM MB85RS2M
- 引导和服务
- UG阵列特征
- 14.12-常见的对于非阻塞复制的误解
- 基于springboot的美食信息推荐系统java+vue-论文、毕设源码、开题报告
- SourceTree跳过注册登录安装
- VUE+Prime Pro开发的靓号系统,号卡分销系统,靓号销售系统,号卡管理系统,前后分离管理后台
- 美的楼宇科技携手火山引擎,共筑边缘云新型生态圈
- Windows项目部署
- 街机模拟游戏逆向工程(HACKROM)教程:[11]68K汇编sub指令