Keil中添加15的芯片型号和头文件
发布时间:2023年12月29日
文章目录
详细步骤
选择好所需芯片类型
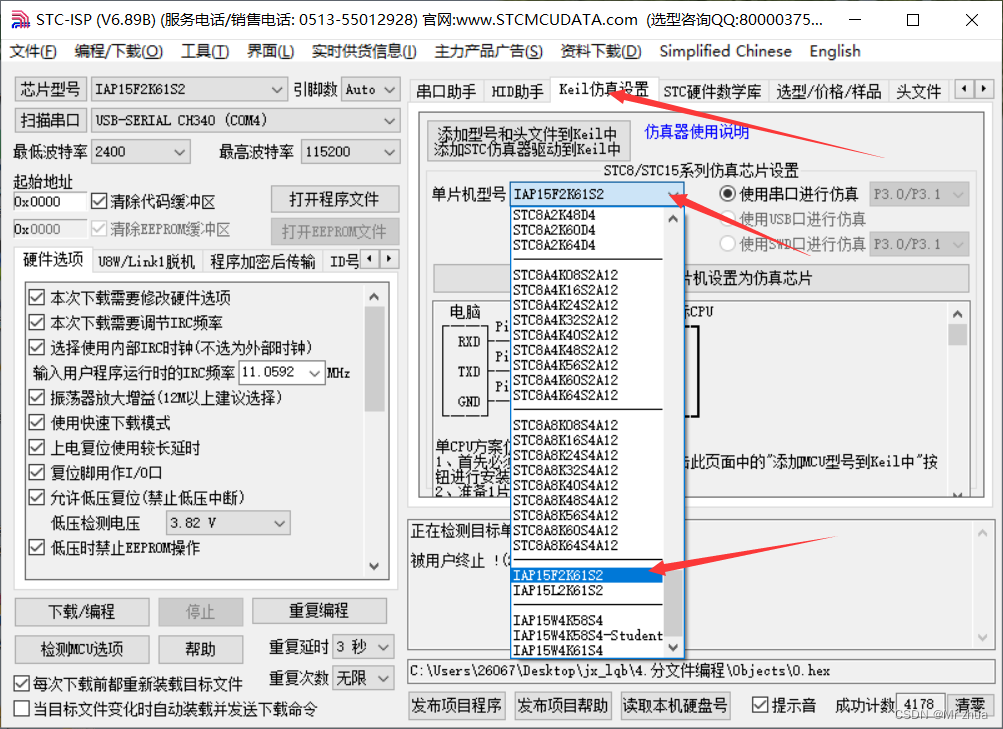
点击添加型号
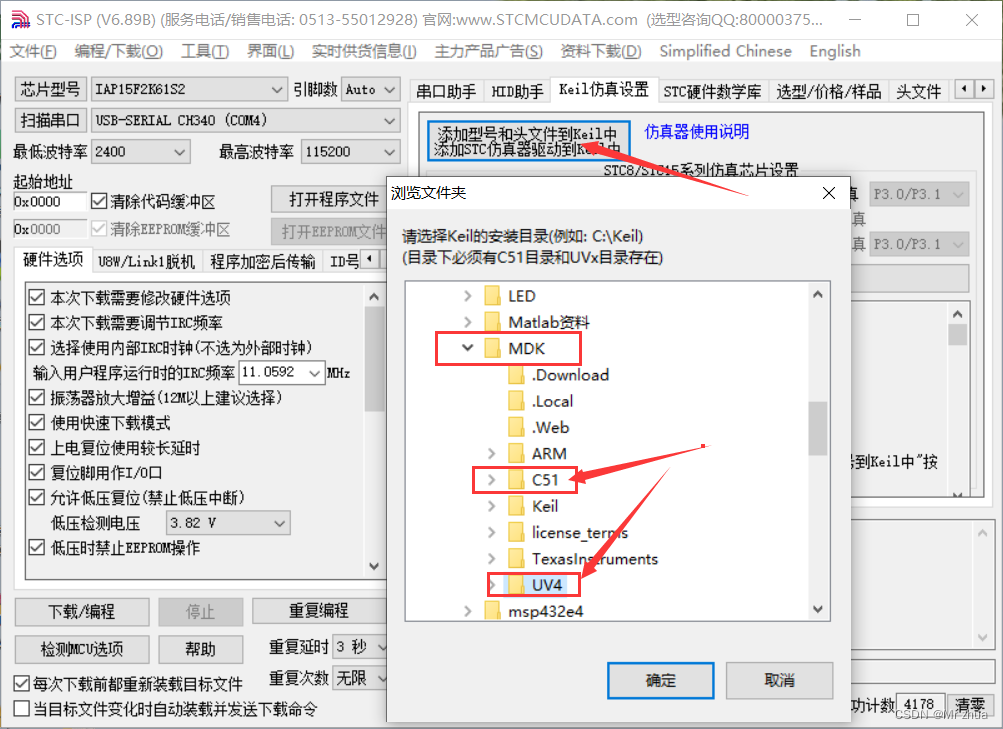
选择安装的keil路径文件目录(该目录下必须含有C51和UV4文件)
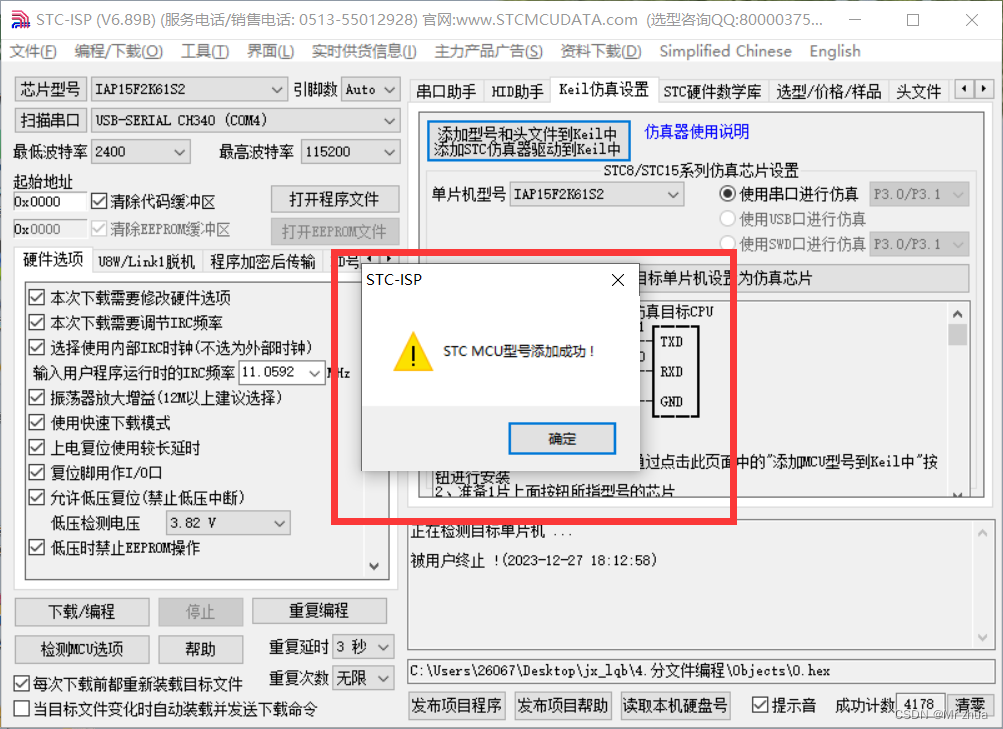
至此芯片型号和头文件添加完成
先验证头文件是否添加成功
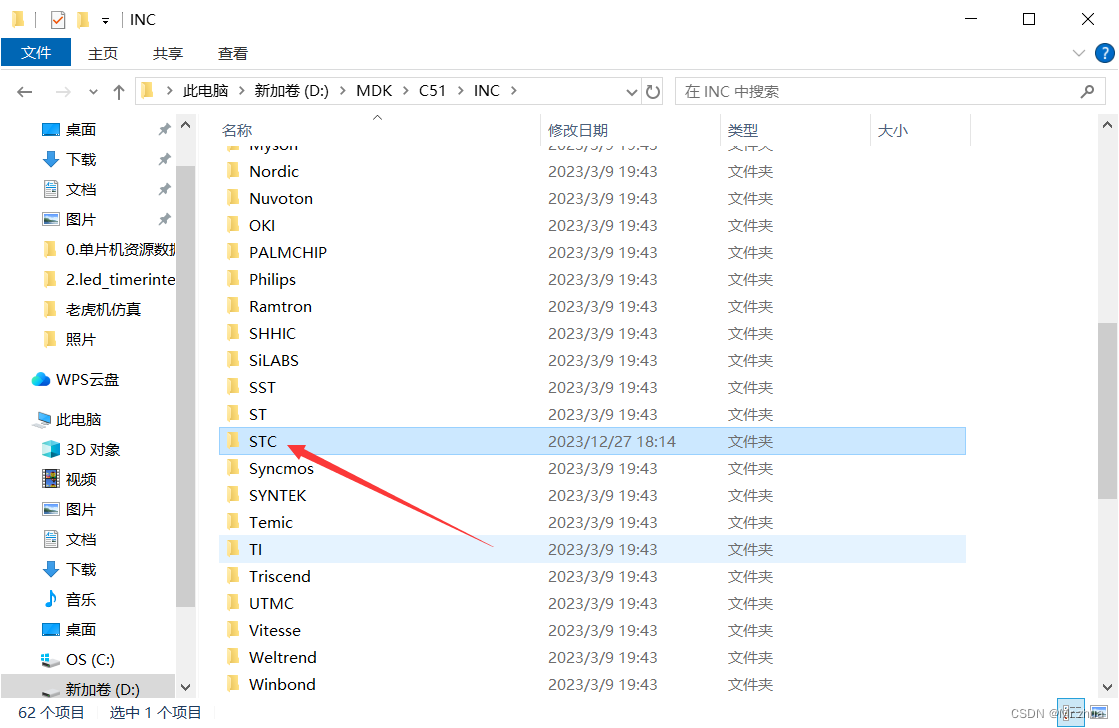
打开刚才添加到目录的C51文件下的INC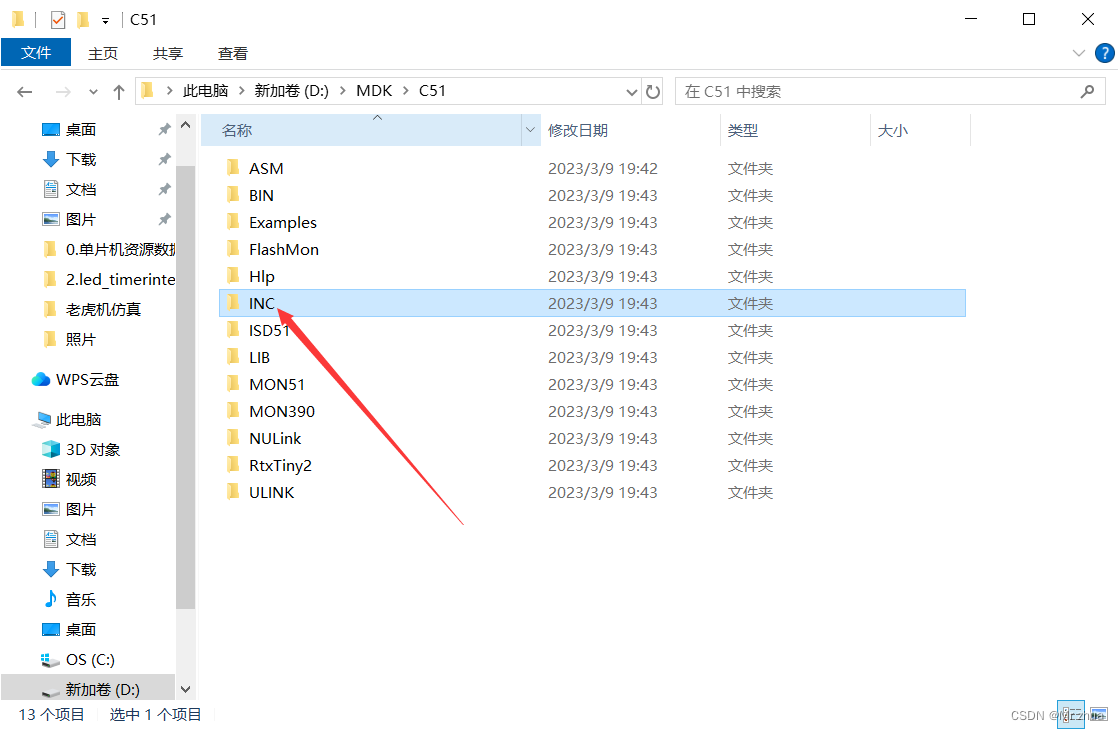
再进入STC文件下
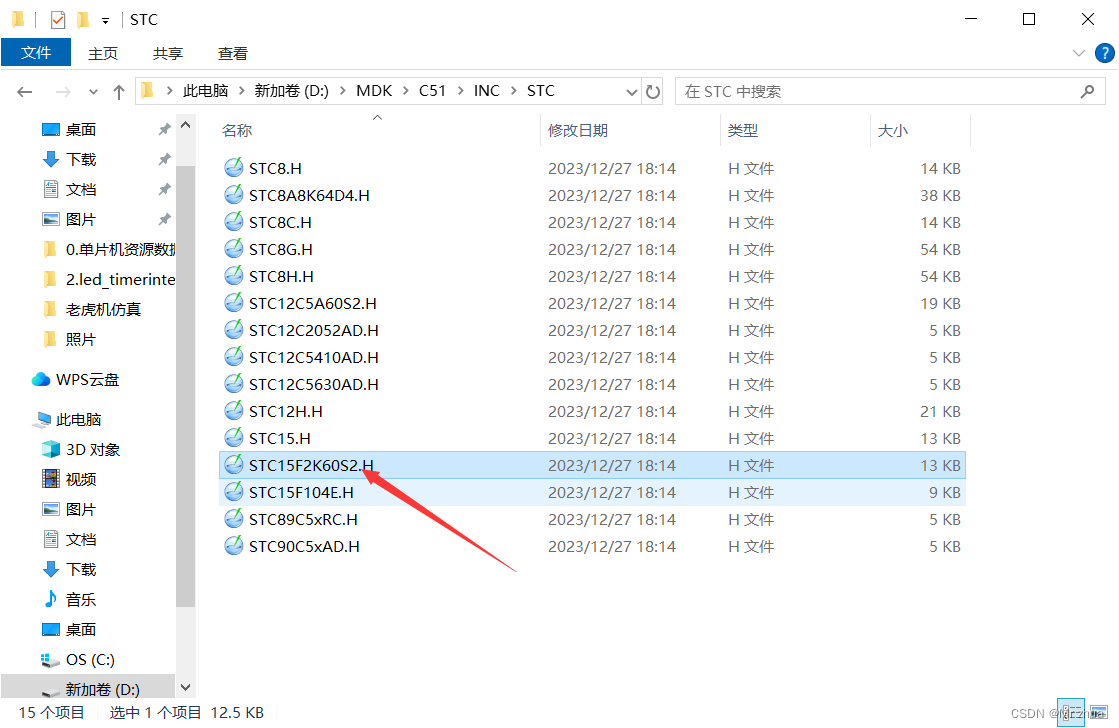
看见STC15F2K60S2.H的头文件
再验证是芯片类型是否添加成功
打开Keil的Device (如图)
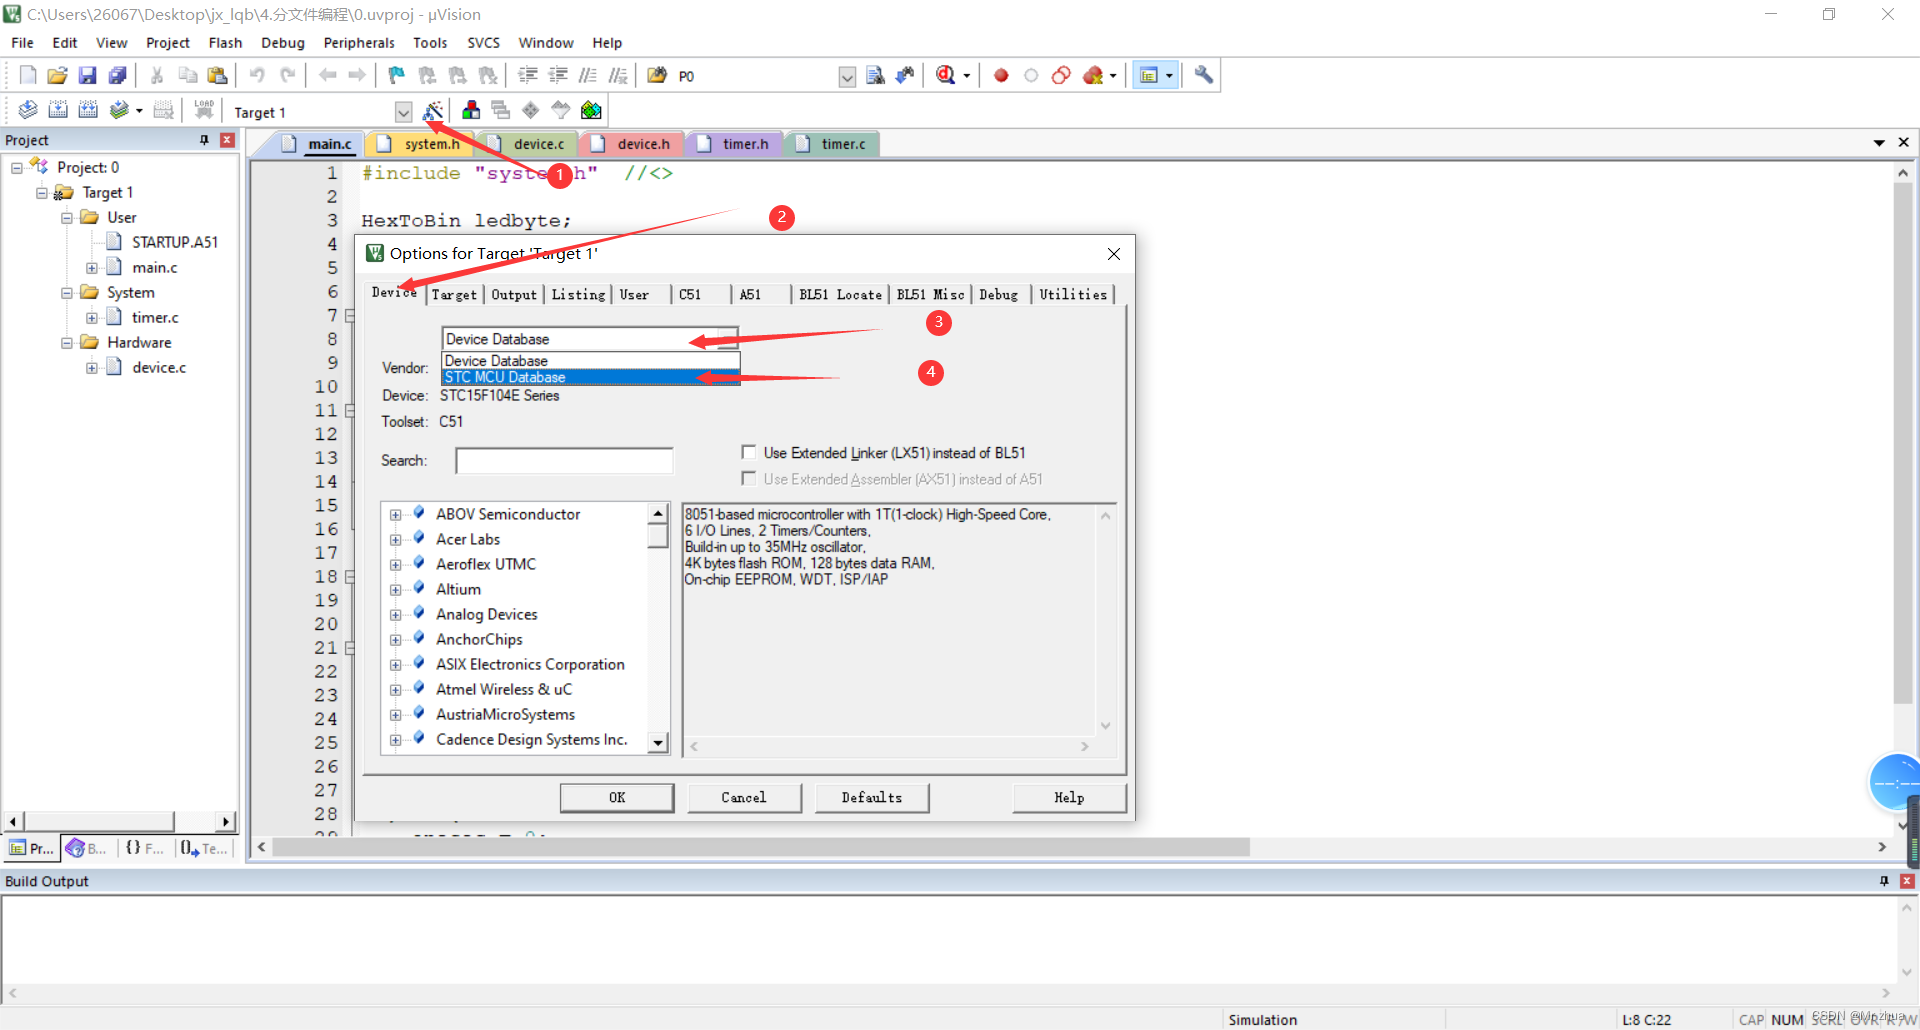
选择STC MCU Database
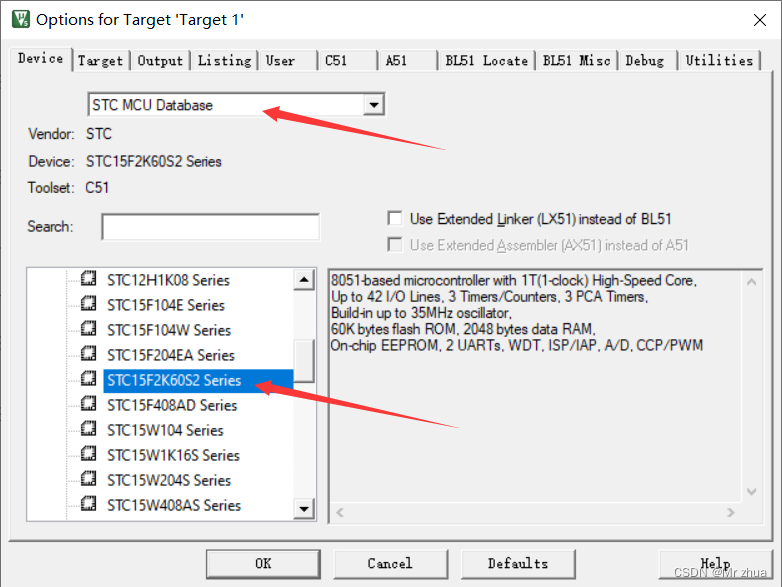
至此对应的STC15F2K60S2 Series芯片型号即添加成功
----- 如有错误欢迎大家批评指正!!!
文章来源:https://blog.csdn.net/m0_52555663/article/details/135252566
本文来自互联网用户投稿,该文观点仅代表作者本人,不代表本站立场。本站仅提供信息存储空间服务,不拥有所有权,不承担相关法律责任。 如若内容造成侵权/违法违规/事实不符,请联系我的编程经验分享网邮箱:chenni525@qq.com进行投诉反馈,一经查实,立即删除!
本文来自互联网用户投稿,该文观点仅代表作者本人,不代表本站立场。本站仅提供信息存储空间服务,不拥有所有权,不承担相关法律责任。 如若内容造成侵权/违法违规/事实不符,请联系我的编程经验分享网邮箱:chenni525@qq.com进行投诉反馈,一经查实,立即删除!