React 入门 - 05(响应式与事件绑定)
本章内容
继上一节我们简单实现一个 TodoList来更加了解编写组件的一些细节。本节继续这个案例功能的完成。
一、响应式设计思想
1、在原生的 JS中,如果要实现点击”提交“按钮就将输入框的内容添加至页面列表中,我们通常的步骤是:
- 首先给”提交“按钮绑定一个点击事件,然后获取到
input输入框的value值。 - 接着通过
document.getElementById找到这个”列表“最外层的元素,然后把input框里的内容”挂载“到这个外层DOM元素中
2、然而,在 React编码过程中,由于 React是一个响应式的框架。它跟原生JS操作 DOM的方式思想完全不一样。React强调的是”自动感知数据的变化,然后自动的生成DOM“。因此在 React代码编写过程中,我们只需要关注”数据层“即可
3、现在我们打开 TodoList.js文件,使用 React的编程思想来编写功能。React编码只需要关注数据层,按照功能的要求,我们只需要两组”数据“:一组”数据“存储input框里的值,一组”数据“用来存储列表中的”每一项“
import React, { Component, Fragment } from "react";

class TodoList extends Component{
  constructor(props) {
    super(props) // ES6 的语法

    this.state = {
      inputValue: 'hello wolrd!', // input 输入框中的值
      list: [] // 列表里的数据
    }
  }

  render() {
    return (
      <Fragment>
        <div>
          {/* 在 JSX 语法中,标签里如果有 JS表达式,需要使用 {} 括起来。注释也一样 */}
          {/* input 元素的 value 绑定在 state 的 inputValue 中,因此输入框中的内容由 inputValue 的内容决定*/}
          <input value={this.state.inputValue} />
          <button> 提交 </button>
        </div>


        <ul>
          <li>React 入门-01</li>
          <li>React 入门-02</li>
          <li>React 入门-03</li>
        </ul>
      </Fragment>
    )
  }
}

export default TodoList
4、不停的修改 inputValue的值,页面输入框的内容也随之变化。这也就是说,React可以感知数据的变化,主动的把数据映射到页面中,而不需要像原生 JS那么麻烦的去操作 DOM
5、当在页面输入框中不停的输入内容,我们会发现里面的内容完全不会变化。这是因为 input框中的内容是由”组件“的 state状态对应的 inputValue值决定的。在代码里我们已经写死了,所以不管我们怎么操作input框中的内容,页面都毫无变化。那怎么解决这问题呢?这就需要给 input绑定事件了
二、React 中的事件绑定
1、修改 TodoList.js中的代码,给 input元素绑定事件
import React, { Component, Fragment } from "react";

class TodoList extends Component{
  constructor(props) {
    super(props) // ES6 的语法

    this.state = {
      inputValue: '', // 1、input 输入框中的值. 设置为空字符,以便后续自由输入
      list: []
    }
  }


  render() {
    return (
      <Fragment>
        <div>
          {/* 2、给 input 绑定一个 onChange 的监听事件,当输入框有内容变化时,执行 changeInputValue 方法 */}
          {/* 3、React 绑定事件不同于原生 JS,使用”驼峰“形式 */}
          {/* 4、”JSX 语法“ 要求将 ”JS 表达式“ 写在 {} 中 */}
          {/* 5、使用 bind(this), 将 this 的指向指为 TodoList  */}
          <input value={this.state.inputValue} onChange={this.changeInputValue.bind(this)} />
          <button> 提交 </button>
        </div>


        <ul>
          <li>React 入门-01</li>
          <li>React 入门-02</li>
          <li>React 入门-03</li>
        </ul>
      </Fragment>
    )
  }

  // 6、定义一个 方法,传入 event 事件,其 target 指向 input 框对应的 DOM 节点,event.target.value 对应输入框中的 value 值。
  changeInputValue(e) {
    console.log(e.target.value)
  }
}

export default TodoList
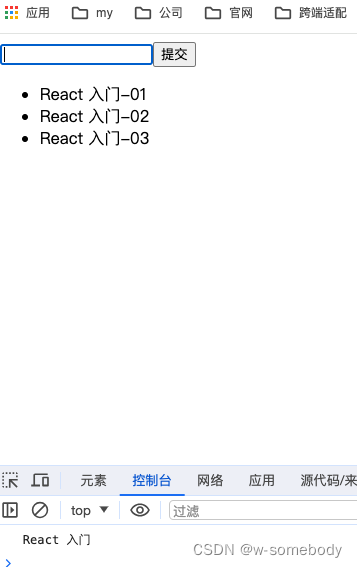
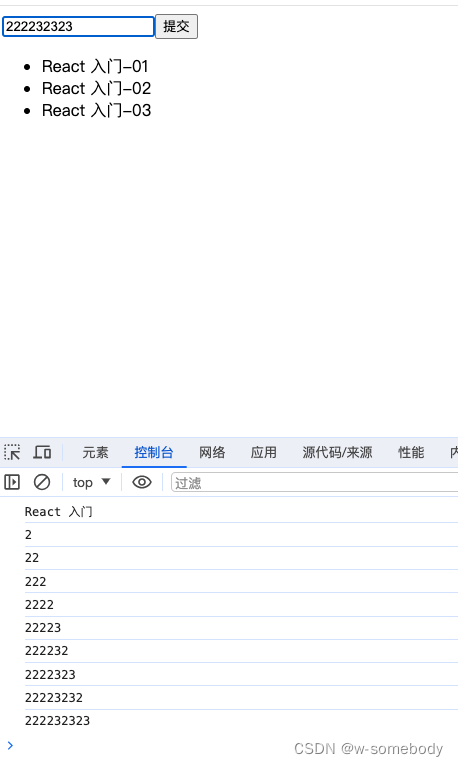
2、运行代码,再次操作页面的输入框,可以看到控制台输出对应的内容

3、但是有个问题就是,控制台是可以看到内容的变化,但是页面输入框仍然没啥变化。这个时候就要使用 React 为每个组件提供的 setState()方法,用来改变组件的 state状态里的数据值
import React, { Component, Fragment } from "react";

class TodoList extends Component{
  constructor(props) {
    super(props) // ES6 的语法

    this.state = {
      inputValue: '', // 1、input 输入框中的值. 设置为空字符,以便后续自由输入
      list: []
    }
  }


  render() {
    return (
      <Fragment>
        <div>
          {/* 2、给 input 绑定一个 onChange 的监听事件,当输入框有内容变化时,执行 changeInputValue 方法 */}
          {/* 3、React 绑定事件不同于原生 JS,使用”驼峰“形式 */}
          {/* 4、”JSX 语法“ 要求将 ”JS 表达式“ 写在 {} 中 */}
          {/* 5、使用 bind(this), 将 this 的指向指为 TodoList  */}
          <input value={this.state.inputValue} onChange={this.changeInputValue.bind(this)} />
          <button> 提交 </button>
        </div>


        <ul>
          <li>React 入门-01</li>
          <li>React 入门-02</li>
          <li>React 入门-03</li>
        </ul>
      </Fragment>
    )
  }

  // 6、定义一个 方法,传入 event 事件,其 target 指向 input 框对应的 DOM 节点,event.target.value 对应输入框中的 value 值。
  changeInputValue(e) {
    console.log(e.target.value)
    this.setState({
      inputValue: e.target.value
    })
  }
}

export default TodoList
4、再次操作界面,发现输入框里的内容可以变化了

到此,本章的内容就结束了!
本文来自互联网用户投稿,该文观点仅代表作者本人,不代表本站立场。本站仅提供信息存储空间服务,不拥有所有权,不承担相关法律责任。 如若内容造成侵权/违法违规/事实不符,请联系我的编程经验分享网邮箱:chenni525@qq.com进行投诉反馈,一经查实,立即删除!