基于轻量级GhostNet模型开发构建工业生产制造场景下滚珠丝杠传动表面缺陷图像识别系统
轻量级识别模型在我们前面的博文中已经有过很多实践了,感兴趣的话可以自行移步阅读:
《移动端轻量级模型开发谁更胜一筹,efficientnet、mobilenetv2、mobilenetv3、ghostnet、mnasnet、shufflenetv2驾驶危险行为识别模型对比开发测试》
《基于Pytorch框架的轻量级卷积神经网络垃圾分类识别系统》
《基于轻量级卷积神经网络模型实践Fruits360果蔬识别——自主构建CNN模型、轻量化改造设计lenet、alexnet、vgg16、vgg19和mobilenet共六种CNN模型实验对比分析》
《探索轻量级模型性能上限,基于GhostNet模型开发构建多商品细粒度图像识别系统》
《基于轻量级神经网络GhostNet开发构建的200种鸟类细粒度识别分析系统》
《基于MobileNet的轻量级卷积神经网络实现玉米螟虫不同阶段识别分析》
《基于轻量级模型GHoshNet开发构建眼球眼疾识别分析系统,构建全方位多层次参数对比分析实验》
《python基于轻量级卷积神经网络模型ShuffleNetv2开发构建辣椒病虫害图像识别系统》
《基于轻量级神经网络GhostNet开发构建光伏太阳能电池缺陷图像识别分析系统》
《python开发构建轻量级卷积神经网络模型实现手写甲骨文识别系统》
《基于轻量级GhostNet模型开发构建工业生产制造场景下滚珠丝杠传动表面缺陷图像识别系统》
本文的核心思想是像基于GhostNet来开发构建生活场景下的生活垃圾图像识别系统,首先看下实例效果:

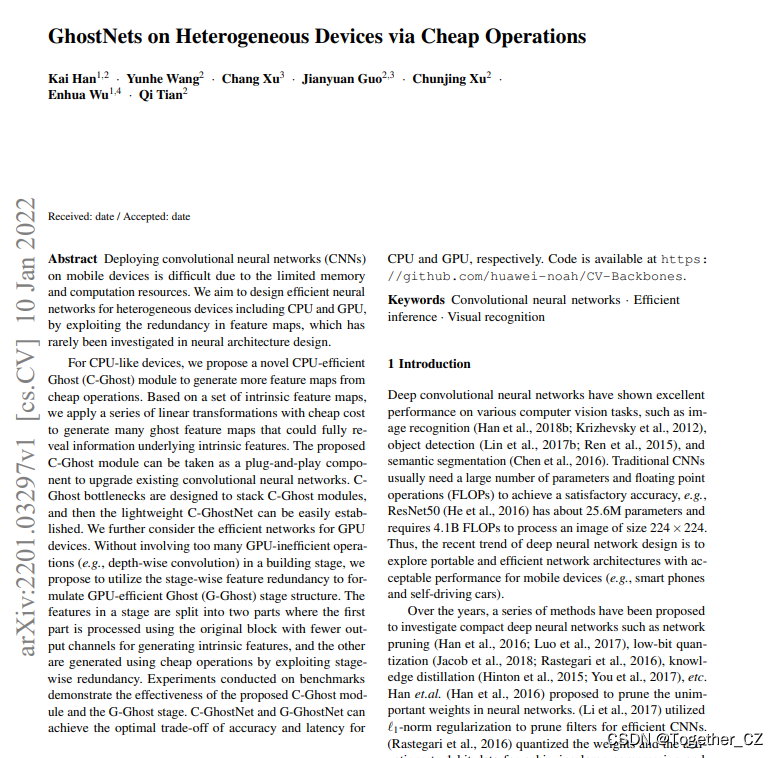
GhostNet 是一种轻量级卷积神经网络,是专门为移动设备上的应用而设计的。其主要构件是 Ghost 模块,一种新颖的即插即用模块。Ghost 模块设计的初衷是使用更少的参数来生成更多特征图 (generate more features by using fewer parameters)。
官方论文地址在这里,如下所示:


官方也开源了项目,地址在这里,如下所示:

可以详细阅读官方的代码实例即可,之后可以基于自己的数据集来开发构建模型即可。
这里给出GhostNet的核心实现部分,如下所示:
class GhostNet(nn.Module):
    def __init__(self, cfgs, num_classes=1000, width_mult=1.0):
        super(GhostNet, self).__init__()
        self.cfgs = cfgs
        output_channel = _make_divisible(16 * width_mult, 4)
        layers = [
            nn.Sequential(
                nn.Conv2d(3, output_channel, 3, 2, 1, bias=False),
                nn.BatchNorm2d(output_channel),
                nn.ReLU(inplace=True),
            )
        ]
        input_channel = output_channel
        block = GhostBottleneck
        for k, exp_size, c, use_se, s in self.cfgs:
            output_channel = _make_divisible(c * width_mult, 4)
            hidden_channel = _make_divisible(exp_size * width_mult, 4)
            layers.append(
                block(input_channel, hidden_channel, output_channel, k, s, use_se)
            )
            input_channel = output_channel
        self.features = nn.Sequential(*layers)
        output_channel = _make_divisible(exp_size * width_mult, 4)
        self.squeeze = nn.Sequential(
            nn.Conv2d(input_channel, output_channel, 1, 1, 0, bias=False),
            nn.BatchNorm2d(output_channel),
            nn.ReLU(inplace=True),
            nn.AdaptiveAvgPool2d((1, 1)),
        )
        input_channel = output_channel
        output_channel = 1280
        self.classifier = nn.Sequential(
            nn.Linear(input_channel, output_channel, bias=False),
            nn.BatchNorm1d(output_channel),
            nn.ReLU(inplace=True),
            nn.Dropout(0.2),
            nn.Linear(output_channel, num_classes),
        )
        self._initialize_weights()

    def forward(self, x, need_fea=False):
        if need_fea:
            features, features_fc = self.forward_features(x, need_fea)
            x = self.classifier(features_fc)
            return features, features_fc, x
        else:
            x = self.forward_features(x)
            x = self.classifier(x)
            return x

    def forward_features(self, x, need_fea=False):
        if need_fea:
            input_size = x.size(2)
            scale = [4, 8, 16, 32]
            features = [None, None, None, None]
            for idx, layer in enumerate(self.features):
                x = layer(x)
                if input_size // x.size(2) in scale:
                    features[scale.index(input_size // x.size(2))] = x
            x = self.squeeze(x)
            return features, x.view(x.size(0), -1)
        else:
            x = self.features(x)
            x = self.squeeze(x)
            return x.view(x.size(0), -1)

    def _initialize_weights(self):
        for m in self.modules():
            if isinstance(m, nn.Conv2d):
                nn.init.kaiming_normal_(m.weight, mode="fan_out", nonlinearity="relu")
            elif isinstance(m, nn.BatchNorm2d):
                m.weight.data.fill_(1)
                m.bias.data.zero_()

    def cam_layer(self):
        return self.features[-1]
简单看下数据集情况:


数据集分布可视化如下所示:

基于tsne算法实现了分布的可视化,可以清楚地看到:两类数据区分度还是很明显的。
整体模型训练识别的难度也是相对较低的,接下来看下loss走势:

acc曲线:

可以看到:模型的精度非常高了。
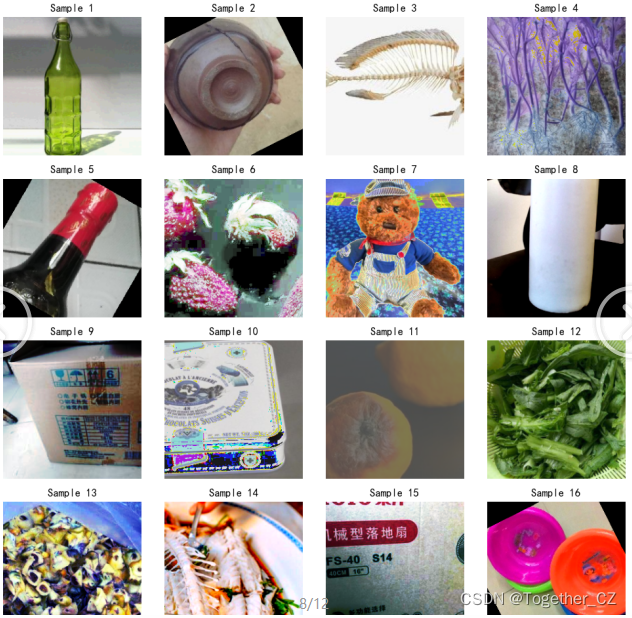
基于常用的数据增强算法来实现对原始图像数据的增强处理效果实例如下所示:

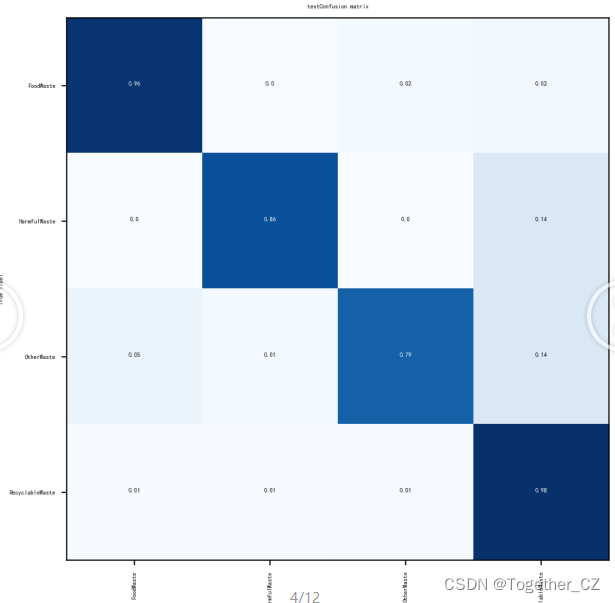
混淆矩阵如下:

感兴趣的话也都可以动手实践下!
?
本文来自互联网用户投稿,该文观点仅代表作者本人,不代表本站立场。本站仅提供信息存储空间服务,不拥有所有权,不承担相关法律责任。 如若内容造成侵权/违法违规/事实不符,请联系我的编程经验分享网邮箱:chenni525@qq.com进行投诉反馈,一经查实,立即删除!
- Python教程
- 深入理解 MySQL 中的 HAVING 关键字和聚合函数
- Qt之QChar编码(1)
- MyBatis入门基础篇
- 用Python脚本实现FFmpeg批量转换
- 文心一言 VS 讯飞星火 VS chatgpt (174)-- 算法导论13.3 3题
- Python中的open与JSON的使用
- 层次聚类(学习笔记
- 计算机网络 第1章(概述)
- Magnet AXIOM 7.8 (Windows) - 数字取证分析
- 车载测试相关理论知识
- JS 将字符串‘10.3%‘ 经过运算加2转换为 ‘12.3%‘
- 最优化考试之黄金分割法
- 【第4期】Springboot集成阿里云对象存储OSS+Vue+Iview文件上传组件
- 【平稳性检验】ADF检验原理及其MATLAB实现