lnmp+高可用+负载均衡
实验目标:高可用,负载均衡,网站加密,lnmp
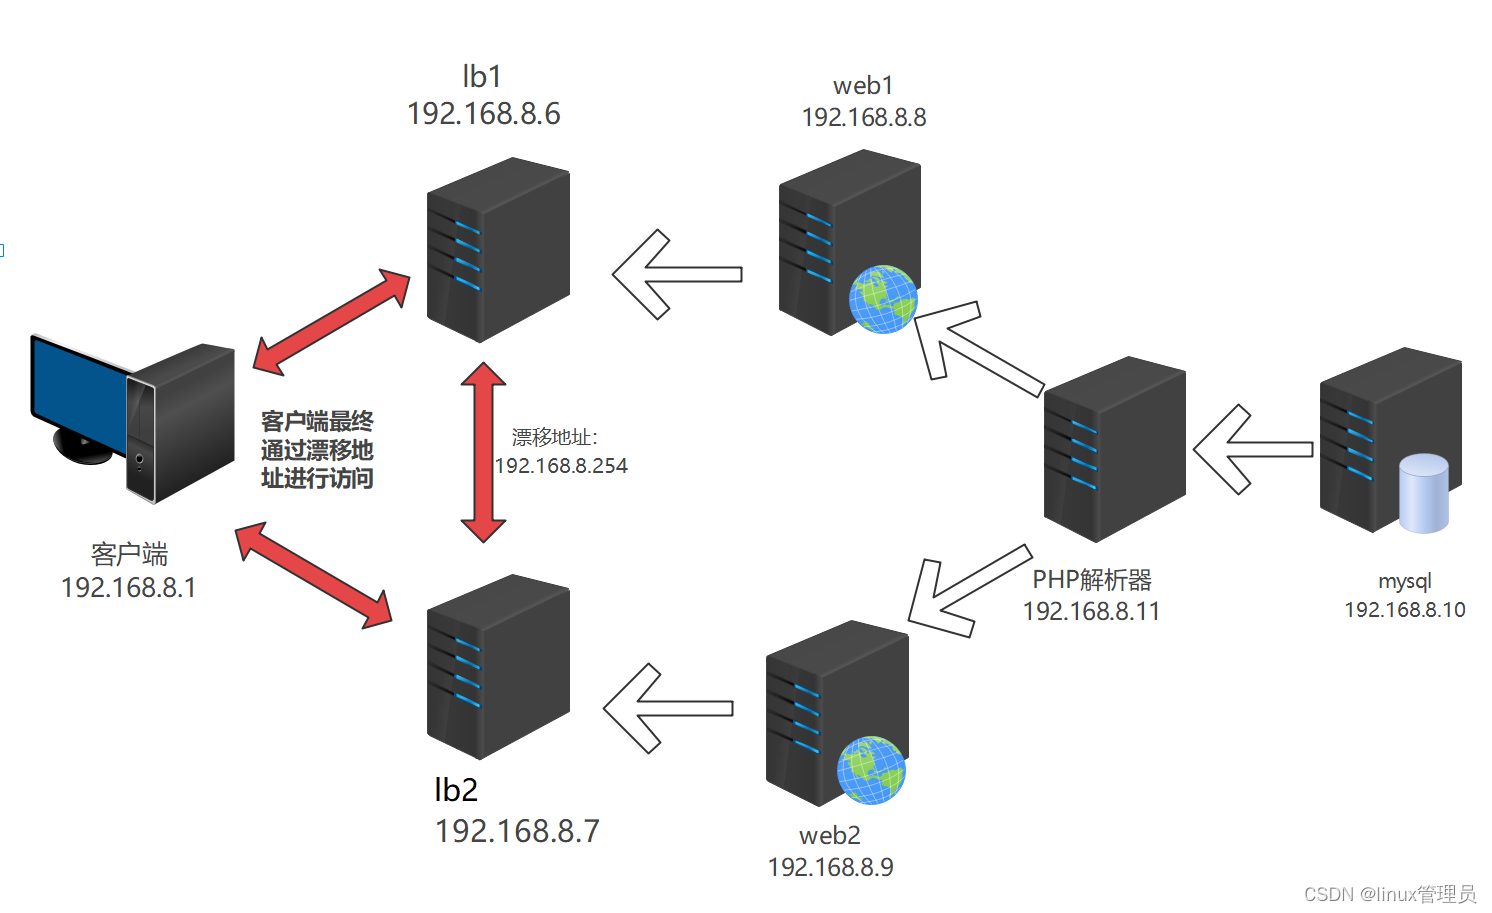
实验拓扑:

实验步骤:
一、搭建负载均衡
使用xftp上传nginx-rpm安装包到lb1,lb2,web1,web2主机上

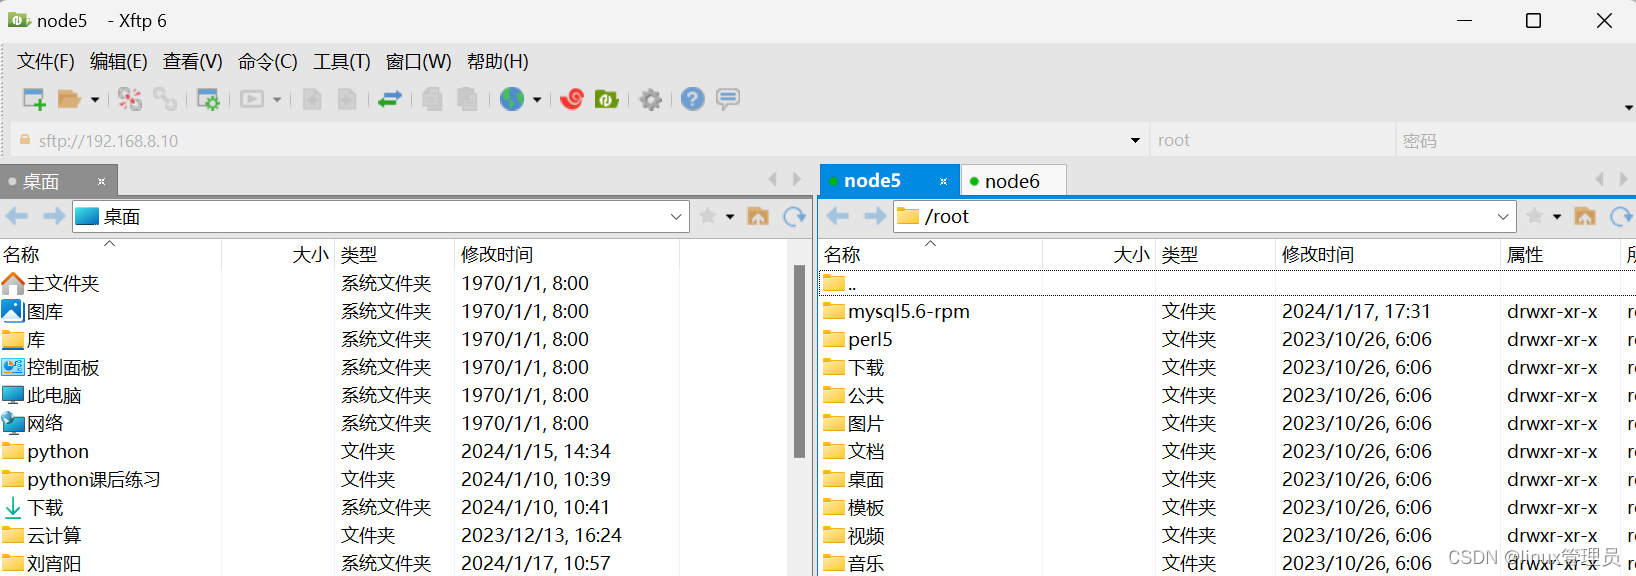
使用xftp上传mysql-rpm包到8.11主机上,mysql-rpm包到8.10主机上


在四台nginx主机上安装nginx软件
[root@lb1 ~]# cd nginx-rpm/
[root@lb1 nginx-rpm]# rpm -ivh *.rpm --nodeps –force
[root@lb2 ~]# cd nginx-rpm/
[root@lb2 nginx-rpm]# rpm -ivh *.rpm --nodeps –force
[root@web1 ~]# cd nginx-rpm/
[root@web1nginx-rpm]# rpm -ivh *.rpm --nodeps –force
[root@web2 ~]# cd nginx-rpm/
[root@web2 nginx-rpm]# rpm -ivh *.rpm --nodeps –force
配置lb1主机:
[root@lb1 ~]# cd /etc/nginx/conf.d/
[root@lb1 conf.d]# rm -rf *??????? #删除default默认配置文件
[root@lb1 conf.d]# vim lb.conf?? #编写负载均衡配置文件
upstream webcluster {
??????? server 192.168.8.8:80;
??????? server 192.168.8.9:80;
}
server {
??????? listen 80;
??????? server_name blog.benet.com;
??????? location / {
??????????????? proxy_pass????? http://webcluster;
??????????????? proxy_set_header Host $http_host;
??????????????? proxy_set_header X-Real-IP $remote_addr;
??????????????? proxy_set_header X-Forwarded-For $proxy_add_x_forwarded_for;
??????? }
}
重新启动nginx
[root@lb1 ~]# systemctl restart nginx
[root@lb1 ~]# systemctl enable nginx #开机自启
上传lb.conf配置文件到lb2主机上
[root@lb1 ~]# scp -rp /etc/nginx/conf.d/lb.conf root@192.168.8.7:/etc/nginx/conf.d
配置lb2主机
[root@lb1 ~]# rm -rf /etc/nginx/conf.d/default.conf???????????? #删除default默认文件
第一台lb1配置和第二台lb2文件一样,已经上传到lb2无需编写,重启服务
[root@lb2 ~]# systemctl restart nginx
[root@lb2 ~]# systemctl enable nginx #开机自启
二、搭建高可用
1、[root@lb1 ~]# yum -y install keepalived
??????
?????? 配置lb1主机:
?????? [root@lb1 ~]# vim /etc/keepalived/keepalived.conf
?????? global_defs {
?? ???????? router_id lb1?????????????????????? #master名称为lb1,两台不能重名
}
vrrp_script check_nginx_proxy {
??????? script “/sh/check_nginx_proxy.sh”???????????? #nginx网站异常自动关闭漂移地址
??????? interval 2
??????? weight 5
??????? }
vrrp_instance VI_1 {
??? ?????? state MASTER????????????????????????????????????????? #主服务器为大写master
??? ?????? interface ens33??????????????????????????????????????? #网卡名称
??? ?????? virtual_router_id 51?????????????????????????????????
??? ?????? priority 100????????????????????????????????????????????? #优先级,backup优先级不能高于master
??? ?????? advert_int 1
??? ?????? authentication {
??????? auth_type PASS
??????? auth_pass 1111
??? }
??? virtual_ipaddress {
??????? 192.168.8.254????????????????????????????????????????? #漂移地址
??? }
??? track_script {
??????? check_nginx_proxy
??? }
}
2、创建检测nginx是否存活脚本,如果不存活自动关闭keepalived
?????? [root@lb1 ~]# mkdir /sh
?????? [root@lb1 ~]# vim /sh/check_nginx_proxy.sh
#!/bin/bash
killall? -0? nginx
if? [ $? -ne 0 ];then
????? ?systemctl stop keepalived
fi
保存退出
[root@lb1 ~]#? chmod? +x? /sh/check_nginx_proxy.sh #设置脚本执行权限
设置每秒每分钟每天每月运行
[root@lb1 ~]# crontab -e
* * * * * /bin/bash /sh/check_nginx_proxy.sh
配置lb2主机keepalived:
1、[root@lb2 ~]# yum -y install keepalived
2、[root@lb2 ~]# vim /etc/keepalived/keepalived.conf
global_defs {
?? router_id lb2?????????????????
}
vrrp_instance VI_1 {
??? state BACKUP?????????????
??? interface ens33
??? virtual_router_id 51
??? priority 99??????????????????????????
??? advert_int 1
??? authentication {
??????? auth_type PASS
??????? auth_pass 1111
??? }
??? virtual_ipaddress {
??????? 192.168.8.254
??? }
}
重启两台高可用服务
[root@lb1 ~]# systemctl restart keepalived
[root@lb2 ~]# systemctl restart keepalived
查看漂移地址:ip a show dev ens33
搭建nginx网站:
配置web1
使用xftp上传WordPress论坛到,web1根目录

[root@web1 /]# unzip wordpress-4.9.4-zh_CN.zip
[root@web1 /]# chmod -R 777 /wordpress ??#设置可读可写
上传到web2主机上
[root@web1 /]# scp -rp /wordpress root@192.168.8.9:/
在web1上创建nginx配置文件
删除默认default文件
[root@web1 ~]# rm -rf /etc/nginx/conf.d/default.conf
编写配置文件:
vim /etc/nginx/conf.d/blog.conf
server {
??????? listen 80;
??????? server_name blog.benet.com;
??????? root /wordpress;
??????? index index.php index.html;
??????? location ~ \.php$ {
??????????????? root /wordpress;
??????????????? fastcgi_pass 192.168.8.60:9000;??????????????? #指向php服务器
??????????????? fastcgi_index index.php;
??????????????? fastcgi_param SCRIPT_FILENAME $document_root$fastcgi_script_name;
??????????????? include fastcgi_params;
??????? }
?????? }
?????? 保存退出
systemctl restart nginx? #重启nginx服务
上传nginx配置文件到web2主机/etc/nginx/conf.d/目录下:
[root@web1 ~]# scp -rp /etc/nginx/conf.d/* root@192.168.8.9:/etc/ nginx/conf.d/*
删除web2默认文件:
[root@web2 ~]# rm -rf /etc/nginx/conf.d/default.conf
?????? 重启web2主机nginx服务:
?????? [root@web2 ~]# systemctl restart nginx
搭建mysql
进入mysql-rpm目录中
[root@mysql ~]# cd mysql5.6-rpm/
[root@mysql mysql5.6-rpm]# rpm -ivh *.rpm --nodeps --force
启动mysql并进入mysql创建blog数据库:
[root@mysql ~]# systemctl start mysqld ??????? #启动mysqld
[root@mysql ~]# mysql #进入数据库
创建blog数据库:
mysql> create database blog;
创建blog数据库管理员:
?????? grant all on blog.* to lisi@'%' identified by '123.com';
搭建php解析器:
1、安装php:
[root@php ~]# cd php-rpm/
[root@php php-rpm]# rpm -ivh *.rpm --nodeps –force
2、启动php
[root@php ~]# systemctl start php-fpm
启动php如果报错
[root@php ~]# systemctl start php-fpm

????????????? #安装yum -y install openssl 解决报错问题
修改配置文件:
[root@php ~]# vim /etc/php-fpm.d/www.conf
定位并修改为:
listen = 192.168.8.11:9000
listen.allowed_clients = 192.168.8.8,192.168.8.9?? #指向web1和web2主机ip
在web1上传WordPress论坛到php主机根目录
[root@web1 ~]# scp -rp /wordpress root@192.168.8.11:/
重启php,测试lnmp
[root@php ~]# systemctl restart php-fpm
打开浏览器访问web1和web2主机ip

??????????????????????????? #数据库名一定是blog和mysql主机上的库一致
??????????????????????????? #数据库主机指定:192.168.8.10? mysql主机ip地址
??????????????????????????? #用户名和密码是blog管理员lisi
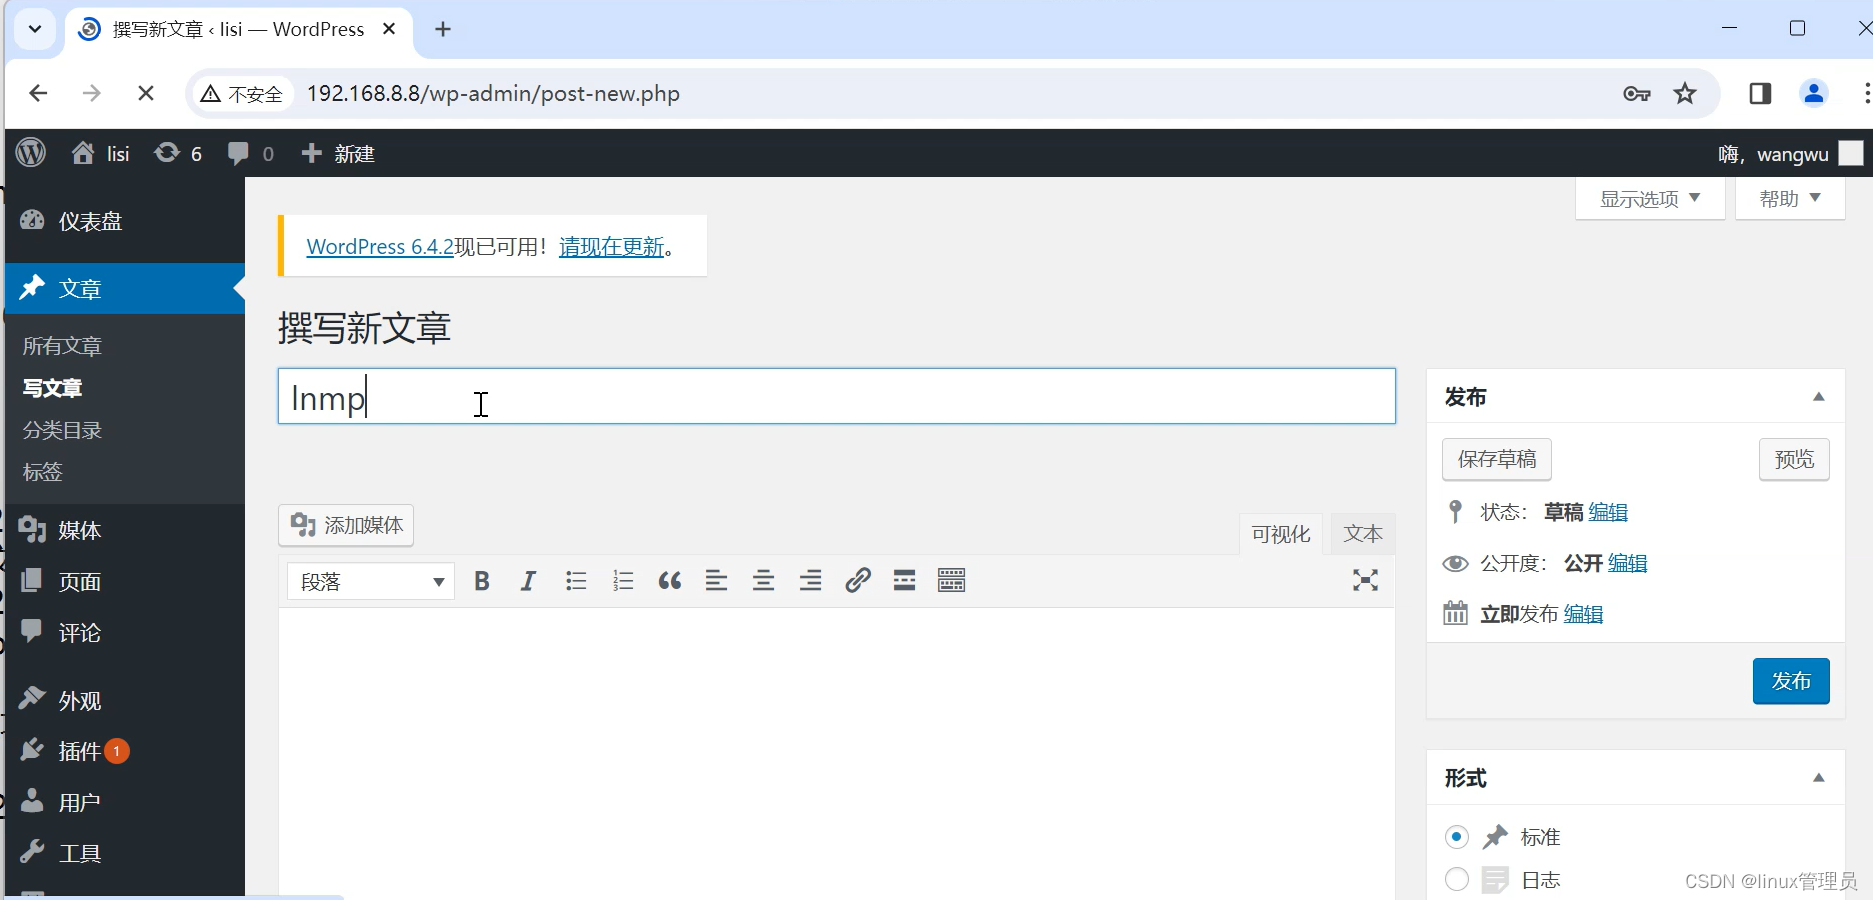
登录之后写篇文章

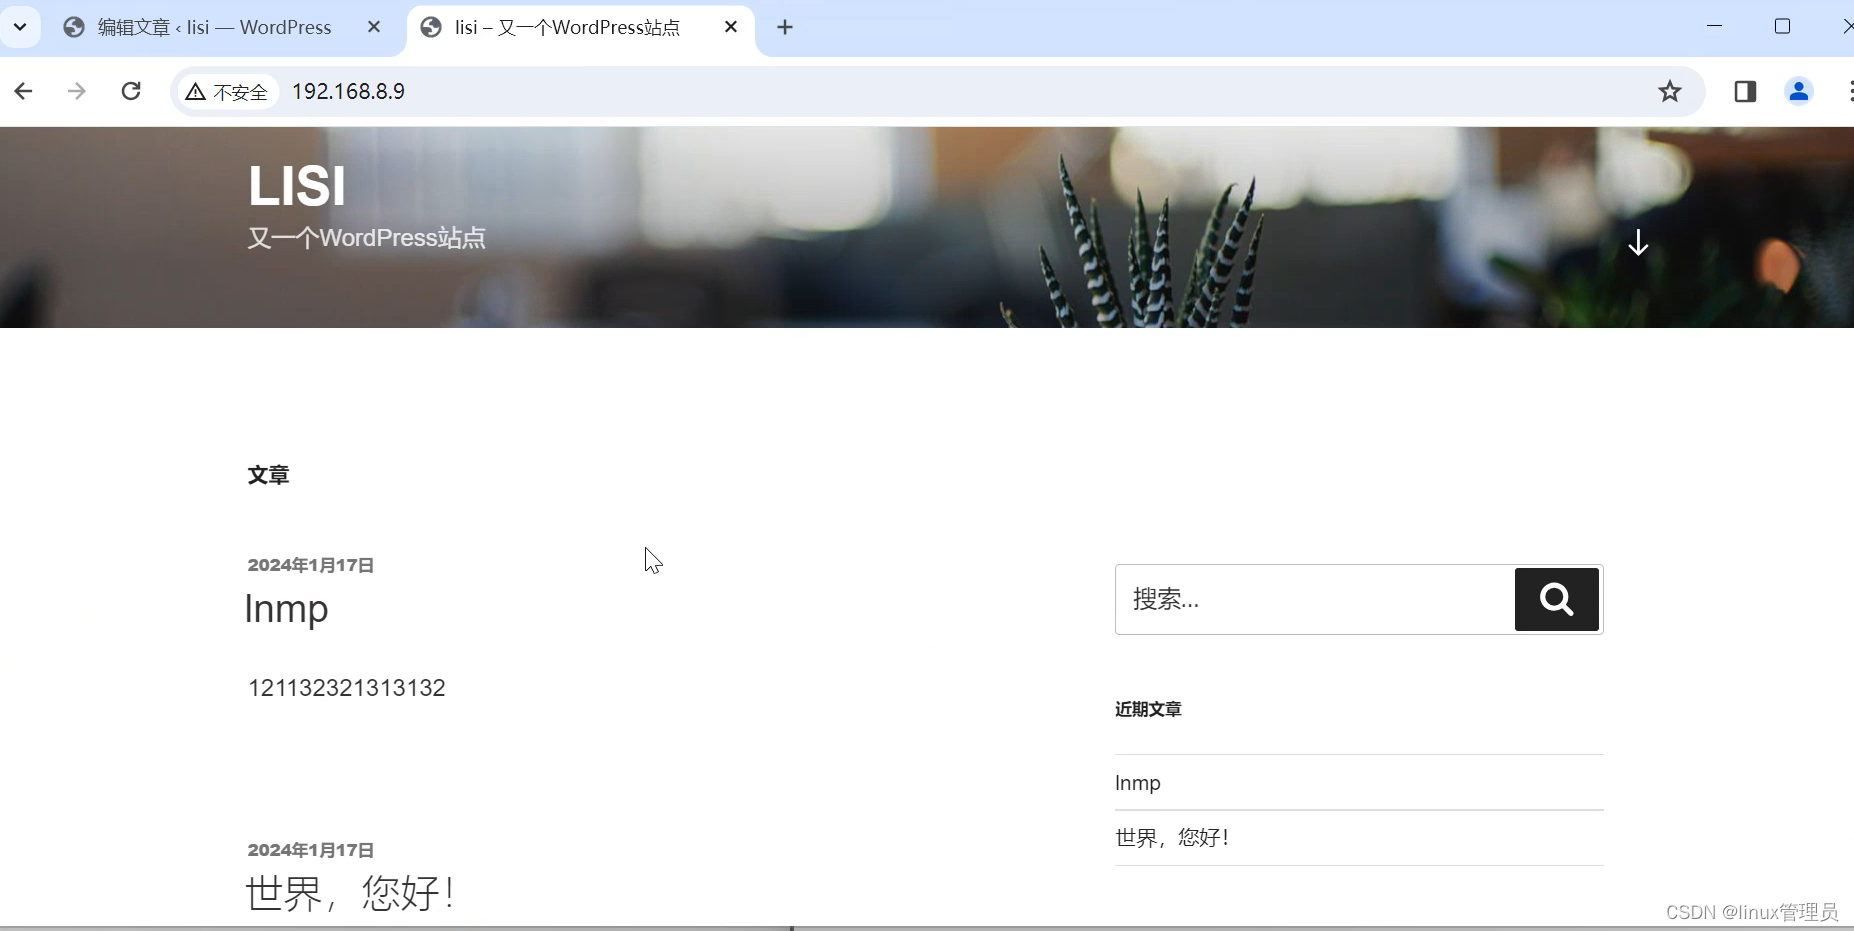
测试web2网站

测试负载均衡输入web1和web2的IP地址,测试高可用输入漂移地址8.254

搭建ssl加密
创建目录
1、[root@web1 ~]# mkdir -p /etc/nginx/ssl_key
2、[root@web1 ~]# cd /etc/nginx/ssl_key/? #进入目录
生成私钥需要输入密码
3、[root@web1 ssl_key]# openssl genrsa -idea -out server.key 2048?
4、生成证书
[root@web1 ssl_key]#openssl req -days 3650 -x509 -sha256 -nodes -newkey rsa:2048 -keyout server.key -out server.crt
删除/etc/nginx/conf.d/目录下的所有文件,添加加密文件
[root@web1 ~]# rm -rf /etc/nginx/conf.d/*
[root@web1 ~]# vim /etc/nginx/conf.d/https.conf
server {
??????? listen 443 ssl;
??????? server_name blog.benet.com;
????????????? ssl_certificate ssl_key/server.crt;
??????? ssl_certificate_key ssl_key/server.key;
??????? root /wordpress;
??????? index index.php index.html;
??????? location ~ \.php$ {
??????????????? root /wordpress;
??????????????? fastcgi_pass 192.168.8.11:9000;
??????????????? fastcgi_index index.php;
??????????????? fastcgi_param SCRIPT_FILENAME $document_root$fastcgi_script_name;
??????????????? include fastcgi_params;
??????? }
?????? }
server {
??????? listen 80;
??????? server_name blog.benet.com;
??????? rewrite .* https://$server_name$1 redirect;
}
保存退出
上传证书到lb1,lb2,web2主机上
[root@web1 ~]#scp -rp /etc/nginx/ssl_key root@192.168.8.6:/etc/nginx/
[root@web1 ~]#scp -rp /etc/nginx/ssl_key root@192.168.8.7:/etc/nginx/
[root@web1 ~]#scp -rp /etc/nginx/ssl_key root@192.168.8.9:/etc/nginx/
删除web2主机/etc/nginx/conf.d/目录下的所有文件,上传web1主机上的文件
[root@web2 ~]# rm -rf /etc/etc/nginx/conf.d/*
[root@web1 ~]# scp -rp /etc/nginx/conf.d/* root@192.168.8.9:/etc/nginx/conf.d/
配置lb1和lb2文件/etc/nginx/conf.d/添加lb.conf,删除原有的文件创建lb.conf
[root@lb1 ~]# rm -rf /etc/nginx/conf.d/*
[root@lb1 ~]# vim /etc/nginx/conf.d/lb.conf
upstream webcluster {
??????? server 192.168.8.8:443;
??????? server 192.168.8.9:443;
}
server {
??????? listen 443 ssl;
??????? server_name blog.benet.com;
??????? ssl_certificate ssl_key/server.crt;
??????? ssl_certificate_key ssl_key/server.key;
??????? location / {
??????????????? proxy_pass????? https://webcluster;
??????? }
}
server {
??????? listen 80;
??????? server_name blog.benet.com;
??????? return 302 https://$server_name$1;
}
配置lb2
[root@lb2 ~]# rm -rf /etc/nginx/conf.d/*
[root@lb2 ~]# vim /etc/nginx/conf.d/lb.conf
upstream webcluster {
??????? server 192.168.8.8:443;
??????? server 192.168.8.9:443;
}
server {
??????? listen 443 ssl;
??????? server_name blog.benet.com;
??????? ssl_certificate ssl_key/server.crt;
??????? ssl_certificate_key ssl_key/server.key;
??????? location / {
??????????????? proxy_pass????? https://webcluster;
??????? }
}
server {
??????? listen 80;
??????? server_name blog.benet.com;
??????? return 302 https://$server_name$1;
}
测试:
没有搭建dns无法解析域名,打开hosts文件添加漂移地址和域名

在客户端中找红线目录

添加blog.benet.com

点击高级添加例外,就能进入网站首页

关闭lb1主机keepalived服务,在lb2主机上查看有没有出现漂移地址
[root@lb2 ~]# ip a show dev ens33
会出现192.168.8.254漂移地址
本文来自互联网用户投稿,该文观点仅代表作者本人,不代表本站立场。本站仅提供信息存储空间服务,不拥有所有权,不承担相关法律责任。 如若内容造成侵权/违法违规/事实不符,请联系我的编程经验分享网邮箱:chenni525@qq.com进行投诉反馈,一经查实,立即删除!
- Python教程
- 深入理解 MySQL 中的 HAVING 关键字和聚合函数
- Qt之QChar编码(1)
- MyBatis入门基础篇
- 用Python脚本实现FFmpeg批量转换
- 前缀和(用于计算某数组区间的总和)
- PythonStudio=vb7国人写的python可视化窗体设计器IDE,可以替代pyqt designer等设计器了
- Android 13.0 recovery竖屏界面旋转为横屏
- oracle数据库密码有限期查询
- Vue使用Canvas实现电子签名功能示例
- 小红书开店要怎么运营?
- 固定资产盘点系统设计与实现
- Linux C语言 45-sscanf函数
- java实现时间轮算法
- 一键完成爬虫之Cookie获取:利用浏览器模拟一个cookie出来、面对反爬虫、加密的cookie的应对方法