ThreeJS-3D教学十一:屏幕坐标和世界坐标转换
发布时间:2024年01月15日
<!DOCTYPE html>
<html lang="en">
<head>
  <meta charset="UTF-8">
  <title>Title</title>
  <style>
    body {
      width: 100%;
      height: 100%;
    }
    * {
      margin: 0;
      padding: 0;
    }
    .label {
      font-size: 20px;
      color: #000;
      font-weight: 700;
    }
    .circle {
      width: 20px;
      height: 20px;
      border-radius: 10px;
      position: absolute;
      left: 0;
      top: 0;
      background-color: red;
      z-index: 1000;
    }
    #container {
      position: relative;
      width: 100%;
      height: 100vh;
    }
  </style>
</head>
<body>
<div class="circle"></div>
<div id="container"></div>
<script type="importmap">
  {
    "imports": {
      "three": "../three-155/build/three.module.js",
      "three/addons/": "../three-155/examples/jsm/"
    }
  }
</script>
<script type="module">
import * as THREE from 'three';
import Stats from 'three/addons/libs/stats.module.js';
import { OrbitControls } from 'three/addons/controls/OrbitControls.js';
import { GPUStatsPanel } from 'three/addons/utils/GPUStatsPanel.js';
import { CSS2DRenderer, CSS2DObject } from 'three/addons/renderers/CSS2DRenderer.js';
let stats, labelRenderer, gpuPanel, temporaryKeep;
let camera, scene, renderer, controls, cubeBox;
const group = new THREE.Group();
let widthImg = 200;
let heightImg = 200;
const mouse = new THREE.Vector2();
init();
initHelp();
initLight();
axesHelperWord();
animate();
// 添加平面
addPlane();
// 用这个模型演示 世界坐标 转为 屏幕坐标
let point = new THREE.Vector3(-40, 20, 30);
let geometry = new THREE.BoxGeometry(2, 2, 2);
let material = new THREE.MeshLambertMaterial({color: 0xccc000});
let cube = new THREE.Mesh(geometry, material);
cube.position.x = point.x;
cube.position.y = point.y;
cube.position.z = point.z;
cube.name = 'BoxGeometry';
scene.add(cube);
// 这个演示 屏幕坐标转为世界坐标
let geometry2 = new THREE.BoxGeometry(2, 2, 2);
let material2 = new THREE.MeshLambertMaterial({color: 0x000000});
cubeBox= new THREE.Mesh(geometry2, material2);
cubeBox.name = 'BoxGeometry2';
scene.add(cubeBox);

/**
 * CylinderGeometry(radiusTop : Float, radiusBottom : Float, height : Float, radialSegments : Integer, heightSegments : Integer)
 radiusTop—顶部圆柱体的半径。默认值为1。
 radiusBottom—底部圆柱体的半径。默认值为1。
 height——圆柱体的高度。默认值为1。
 radialSegments—圆柱体圆周上的分段面数。默认值为32
 heightSegments—沿圆柱体高度的面行数。默认值为1。
 */
let geometry1 = new THREE.CylinderGeometry(15, 15, 10, 32, 1);
let material1 = new THREE.MeshLambertMaterial({color: 0xffff00});
let cylinder = new THREE.Mesh(geometry1, material1);
cylinder.position.set(30, 5, -50);
cylinder.name = 'CylinderGeometry';
scene.add(cylinder);

setTimeout(() => {
  point3DT2D();
}, 300);

function point3DT2D() {
  // 下面就是世界坐标转为屏幕坐标的代码
  let worldVector = new THREE.Vector3(point.x, point.y, point.z);
  // 世界坐标转标准设备坐标
  // 官方释义:将此矢量从世界空间投影到相机的标准化设备坐标(NDC)空间中。
  let standardVector = worldVector.project(camera);
  // canvas画布的宽高尺寸
  let container = document.querySelector('#container');
  if (!container) return;
  let cavWidth = container.offsetWidth / 2;
  let cavHeight = container.offsetHeight / 2;
  console.log(standardVector);
  let x = Math.round(standardVector.x * cavWidth + cavWidth); // 设备坐标转屏幕坐标
  let y = Math.round(-standardVector.y * cavHeight + cavHeight); // 设备坐标转屏幕坐标
  /**
   * 更新立方体元素位置
   */
  console.log(x);
  console.log(y);
  let box = document.querySelector('.circle');
  box.style.left = x + 'px';
  box.style.top = y + 'px';
}

function onDocumentMouseMove(event) {

  event.preventDefault();

  // 将鼠标点击位置的屏幕坐标转成threejs中的标准坐标,具体解释见代码释义 如果 canvas有左边距 和 上边距 需 要减去
  mouse.x = (event.clientX / window.innerWidth) * 2 - 1;
  mouse.y = -(event.clientY / window.innerHeight) * 2 + 1;
  // 新建一个三维单位向量 假设z方向就是1 或者 0.5,这个为什么是这样,有知道详情的还请赐教
  // 官方释义:将此矢量从相机的标准化设备坐标(NDC)空间投影到世界空间中。
  const vector = new THREE.Vector3(mouse.x, mouse.y, 0.5).unproject(camera);
  // 将获取的坐标设置为模型的位置
  cubeBox.position.x = vector.x;
  cubeBox.position.y = vector.y;
  cubeBox.position.z = vector.z;
}

function addPlane() {
  // 创建一个平面 PlaneGeometry(width, height, widthSegments, heightSegments)
  const planeGeometry = new THREE.PlaneGeometry(widthImg, heightImg, 1, 1);
  // 创建 Lambert 材质:会对场景中的光源作出反应,但表现为暗淡,而不光亮。
  const planeMaterial = new THREE.MeshPhongMaterial({
    color: 0xb2d3e6,
    side: THREE.DoubleSide
  });
  const plane = new THREE.Mesh(planeGeometry, planeMaterial);
  // 以自身中心为旋转轴,绕 x 轴顺时针旋转 45 度
  plane.rotation.x = -0.5 * Math.PI;
  plane.position.set(0, -4, 0);
  scene.add(plane);
}

function init() {

  camera = new THREE.PerspectiveCamera( 70, window.innerWidth / window.innerHeight, 10, 2000 );
  camera.up.set(0, 1, 0);
  camera.position.set(60, 40, 60);
  camera.lookAt(0, 0, 0);

  scene = new THREE.Scene();
  scene.background = new THREE.Color( '#ccc' );

  renderer = new THREE.WebGLRenderer( { antialias: true } );
  renderer.setPixelRatio( window.devicePixelRatio );
  renderer.setSize( window.innerWidth, window.innerHeight );
  document.getElementById( 'container' ).appendChild( renderer.domElement );

  labelRenderer = new CSS2DRenderer();
  labelRenderer.setSize( window.innerWidth, window.innerHeight );
  labelRenderer.domElement.style.position = 'absolute';
  labelRenderer.domElement.style.top = '0px';
  labelRenderer.domElement.style.left = '0px';
  labelRenderer.domElement.style.pointerEvents = 'none';
  document.getElementById( 'container' ).appendChild( labelRenderer.domElement );

  controls = new OrbitControls( camera, renderer.domElement );
  controls.mouseButtons = {
    LEFT: THREE.MOUSE.PAN,
    MIDDLE: THREE.MOUSE.DOLLY,
    RIGHT: THREE.MOUSE.ROTATE
  };
  controls.enablePan = true;
  // 设置最大最小视距
  controls.minDistance = 20;
  controls.maxDistance = 1000;

  window.addEventListener( 'resize', onWindowResize );

  stats = new Stats();
  stats.setMode(1); // 0: fps, 1: ms
  document.body.appendChild( stats.dom );

  gpuPanel = new GPUStatsPanel( renderer.getContext() );
  stats.addPanel( gpuPanel );
  stats.showPanel( 0 );

  scene.add( group );

  document.addEventListener('click', onDocumentMouseMove, false);
}

function initLight() {
  const light = new THREE.DirectionalLight(new THREE.Color('rgb(253,253,253)'));
  light.position.set(100, 100, -10);
  light.intensity = 3; // 光线强度
  light.castShadow = true; // 是否有阴影
  light.shadow.mapSize.width = 2048; // 阴影像素
  light.shadow.mapSize.height = 2048;
  // 阴影范围
  const d = 80;
  light.shadow.camera.left = -d;
  light.shadow.camera.right = d;
  light.shadow.camera.top = d;
  light.shadow.camera.bottom = -d;
  light.shadow.bias = -0.0005; // 解决条纹阴影的出现
  // 最大可视距和最小可视距
  light.shadow.camera.near = 0.01;
  light.shadow.camera.far = 2000;
  const AmbientLight = new THREE.AmbientLight(new THREE.Color('rgb(255, 255, 255)'));
  scene.add( light );
  scene.add( AmbientLight );
}

function initHelp() {
  // const size = 100;
  // const divisions = 5;
  // const gridHelper = new THREE.GridHelper( size, divisions );
  // scene.add( gridHelper );

  // The X axis is red. The Y axis is green. The Z axis is blue.
  const axesHelper = new THREE.AxesHelper( 100 );
  scene.add( axesHelper );
}

function axesHelperWord() {
  let xP = addWord('X轴');
  let yP = addWord('Y轴');
  let zP = addWord('Z轴');
  xP.position.set(50, 0, 0);
  yP.position.set(0, 50, 0);
  zP.position.set(0, 0, 50);
}

function addWord(word) {
  let name = `<span>${word}</span>`;
  let moonDiv = document.createElement( 'div' );
  moonDiv.className = 'label';
  // moonDiv.textContent = 'Moon';
  // moonDiv.style.marginTop = '-1em';
  moonDiv.innerHTML = name;
  const label = new CSS2DObject( moonDiv );
  group.add( label );
  return label;
}

function onWindowResize() {
  camera.aspect = window.innerWidth / window.innerHeight;
  camera.updateProjectionMatrix();
  renderer.setSize( window.innerWidth, window.innerHeight );
}

function animate() {
  requestAnimationFrame( animate );

  stats.update();
  controls.update();
  labelRenderer.render( scene, camera );
  renderer.render( scene, camera );
}
</script>
</body>
</html>
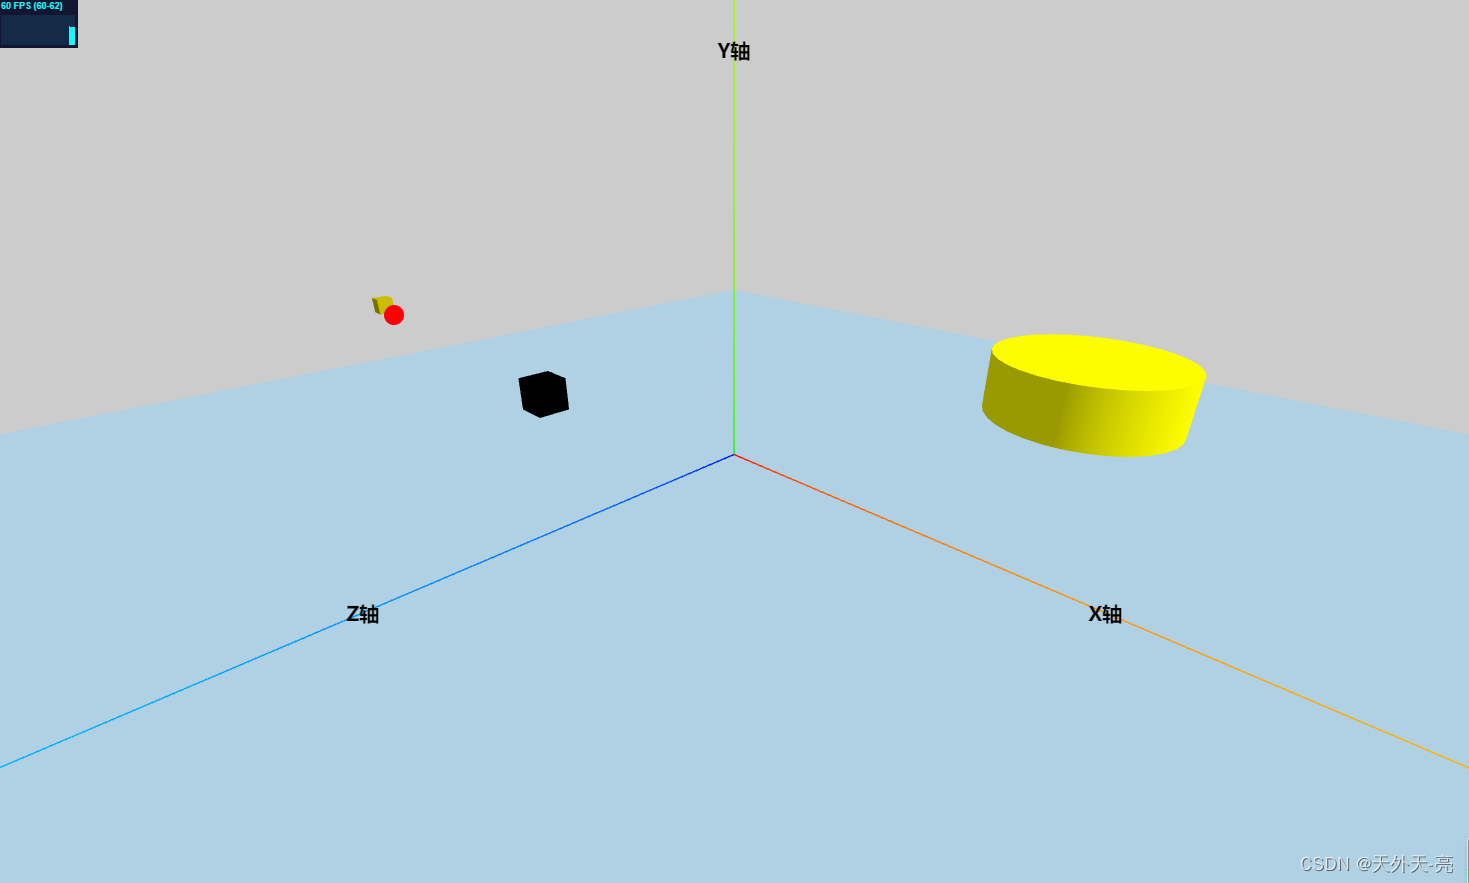
直接复制上面的代码,将three资源路径修改后,启动即可看到效果
上面是代码实现,以下我们看下一些理论知识点:
坐标系之间的转换关系大致为:
    局部坐标 -> 世界坐标 -> 观察空间坐标 -> 裁剪空间坐标 -> 屏幕空间坐标

    我们将 观察空间坐标系 和 裁剪空间坐标系 之间的转换统一处理,最终得到 标准设备坐标系
因此坐标转换过程就变成了:
局部坐标 -> 世界坐标 -> 标准设备坐标 -> 屏幕空间坐标
原本世界坐标转换到观察空间坐标需要乘上视图矩阵 CameraMatrixWorldInverse(ViewMatrix)
随后,观察空间坐标转换到裁剪空间坐标需要乘上相机投影矩阵:ProjectMatrix
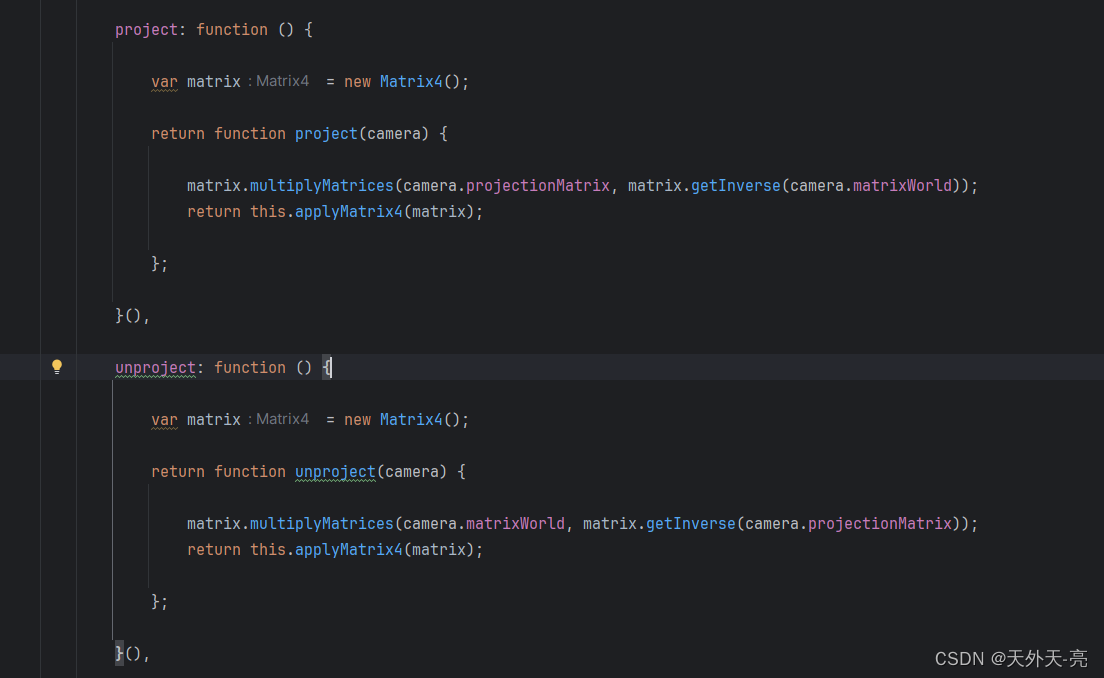
在 ThreeJS 中有一个方法 Vector3.project(camera) 综合了这两步:
// 这是之前的版本
project( camera ) {
    return this.applyMatrix4( camera.matrixWorldInverse ).applyMatrix4( camera.projectionMatrix );
}
最新的是
文章来源:https://blog.csdn.net/weixin_44384273/article/details/135594549
本文来自互联网用户投稿,该文观点仅代表作者本人,不代表本站立场。本站仅提供信息存储空间服务,不拥有所有权,不承担相关法律责任。 如若内容造成侵权/违法违规/事实不符,请联系我的编程经验分享网邮箱:chenni525@qq.com进行投诉反馈,一经查实,立即删除!
本文来自互联网用户投稿,该文观点仅代表作者本人,不代表本站立场。本站仅提供信息存储空间服务,不拥有所有权,不承担相关法律责任。 如若内容造成侵权/违法违规/事实不符,请联系我的编程经验分享网邮箱:chenni525@qq.com进行投诉反馈,一经查实,立即删除!
最新文章
- Python教程
- 深入理解 MySQL 中的 HAVING 关键字和聚合函数
- Qt之QChar编码(1)
- MyBatis入门基础篇
- 用Python脚本实现FFmpeg批量转换
- 导轨安装DIN12 IPO OC系列一路输入两路输出模拟信号隔离分配器4-20mA/0-5V/0-10V/0-20mA/0-±10mA/0-±20mA
- 跨区域大型医院的网络设计与搭建
- 【Spring 篇】深入解析SpringMVC的组件魅力
- 大模型、AI-Agent、langchain之间的关系
- alibaba.item_get API:电商行业中的数据驱动决策支持
- 生成模型 | GAN系列生成系列论文及代码调研总结
- 2024年股市创新低
- 进程与计划任务
- React Proxy跨域配置(纯代码-可直接拉取使用)
- Tc3xx MCAL