【demoSURF】室内定位(图像匹配)基础代码实现,包含所有可以出现问题的解法
发布时间:2024年01月06日
代码如下
import numpy as np
import cv2
from matplotlib import pyplot as plt
plt.rcParams['font.sans-serif'] = ['SimHei']  # 用来正常显示中文标签
plt.rcParams['axes.unicode_minus'] = False  # 用来正常显示负号

img1 = cv2.imread("D:/data/North/0007.JPG",0)
img2 = cv2.imread("D:/data/North/0019.JPG",0)
img1 = cv2.resize(img1, (1920, 1080))
img2 = cv2.resize(img2, (1920, 1080))

surf = cv2.xfeatures2d.SURF_create(1200)

kp1 = surf.detect(img1, None)
kp2 = surf.detect(img2, None)

# kp:检测到的特征点 des:描述子矩阵
kp1, des1 = surf.compute(img1, kp1)
kp2, des2 = surf.compute(img2, kp2)
# img2=cv2.drawKeypoints(img,kp,None,(255,0,0),4)

bf = cv2.BFMatcher(cv2.NORM_L2)

matchesknn = bf.knnMatch(des1, des2, k=2)  # knn 匹配可以返回k个最佳的匹配项、bf返回所有的匹配项
good = []

for m, n in matchesknn:
    if m.distance < 0.7 * n.distance:
        good.append(m)

img32 = cv2.drawMatchesKnn(img1, kp1, img2, kp2, matchesknn, img2, flags=2)
imgknnfilter = cv2.drawMatches(img1, kp1, img2, kp2, good, img2, flags=2)
imgsurfshowkp = cv2.drawKeypoints(img2, kp2, img2, flags=4)

print('matchesknn' + str(len(matchesknn)))
print(matchesknn)
print('good' + str(len(good)))

# plt.title('SURF特征点提取',fontsize=12)
plt.imshow(imgsurfshowkp)
plt.axis('off')
plt.savefig('featureExtract.png', dpi=300, bbox_inches='tight', pad_inches=0.0)
plt.show()

# plt.figure(figsize=(10,10))
# plt.title('knn法匹配(noFilter)',fontsize=12)
plt.figure(dpi=300, figsize=(16,9))
plt.imshow(img32)
plt.axis('off')
plt.savefig('knnNoFilter.png', dpi=300, bbox_inches='tight', pad_inches=0.0)
plt.show()

# plt.title('knn法匹配(withFilter)',fontsize=12)
plt.figure(dpi=300, figsize=(16,9))
plt.imshow(imgknnfilter)
plt.axis('off')
plt.savefig('knnWithFilter.png', dpi=300, bbox_inches='tight', pad_inches=0.0)
plt.show()
#
# cv2.waitKey(0)
# cv2.destroyAllWindows()

# match
matches = bf.match(des1, des2)
matches = sorted(matches, key=lambda x: x.distance)

# draw
img12 = cv2.drawMatches(img1, kp1, img2, kp2, matches[: 50], img2, flags=2)

# plt.figure(figsize=(10,10))
# plt.title('surf检测特征点',fontsize=20)
plt.title('暴力法匹配',fontsize=12)
plt.axis('off')
plt.imshow(img12)
plt.show()


cv2.waitKey(0)
cv2.destroyAllWindows()
1. 修改图像文件路径
出现
SyntaxError: (unicode error) 'unicodeescape' `在这里插入代码片`codec can't decode bytes in position 7-8: malformed \N character escape
问题,使用反斜杠更改路径

2.问题
算法被申请了专利,将opencv版本退到3.4.2即可解决,必须小于等于Python3.7

遇到这个问题 首先检查自己配置的python版本python --version ,这里要求是3.7版本的。
如果高版本无法转换到3.7的话建议重新创建一个虚拟环境。
conda安装虚拟环境
#这样就创建了一个名字为my_env_name,基于python版本3.7的一个虚拟环境了。
conda create -n my_env_name python=3.7
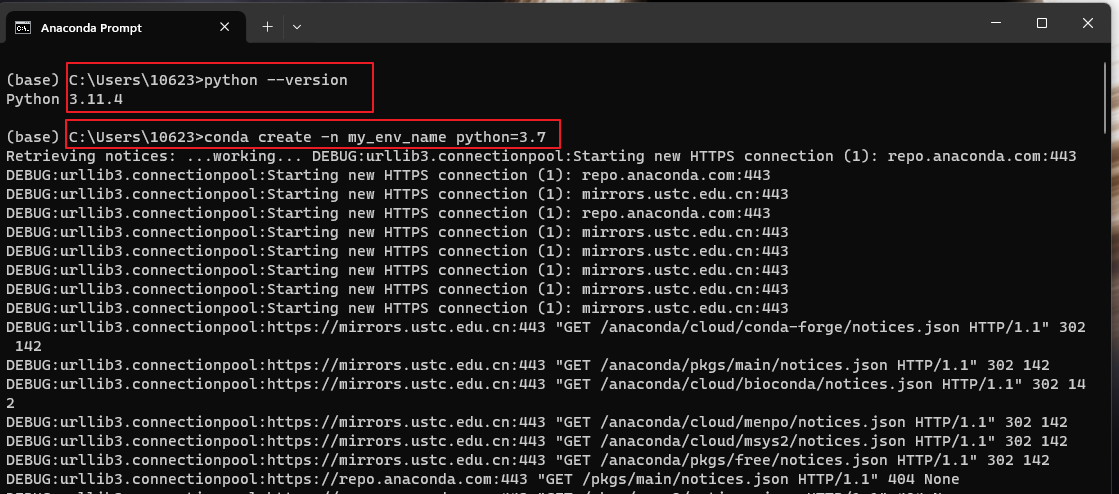
conda虚拟环境的激活脚本
activate my_env_name

安装虚拟环境的激活脚本3.4.2.17
#?卸载opencv
pip uninstall opencv-python

#安装3.4.2.16
pip install opencv-python==3.4.2.16   -i https://pypi.tuna.tsinghua.edu.cn/simple

pip install opencv-contrib-python==3.4.2.16  -i https://pypi.tuna.tsinghua.edu.cn/simple


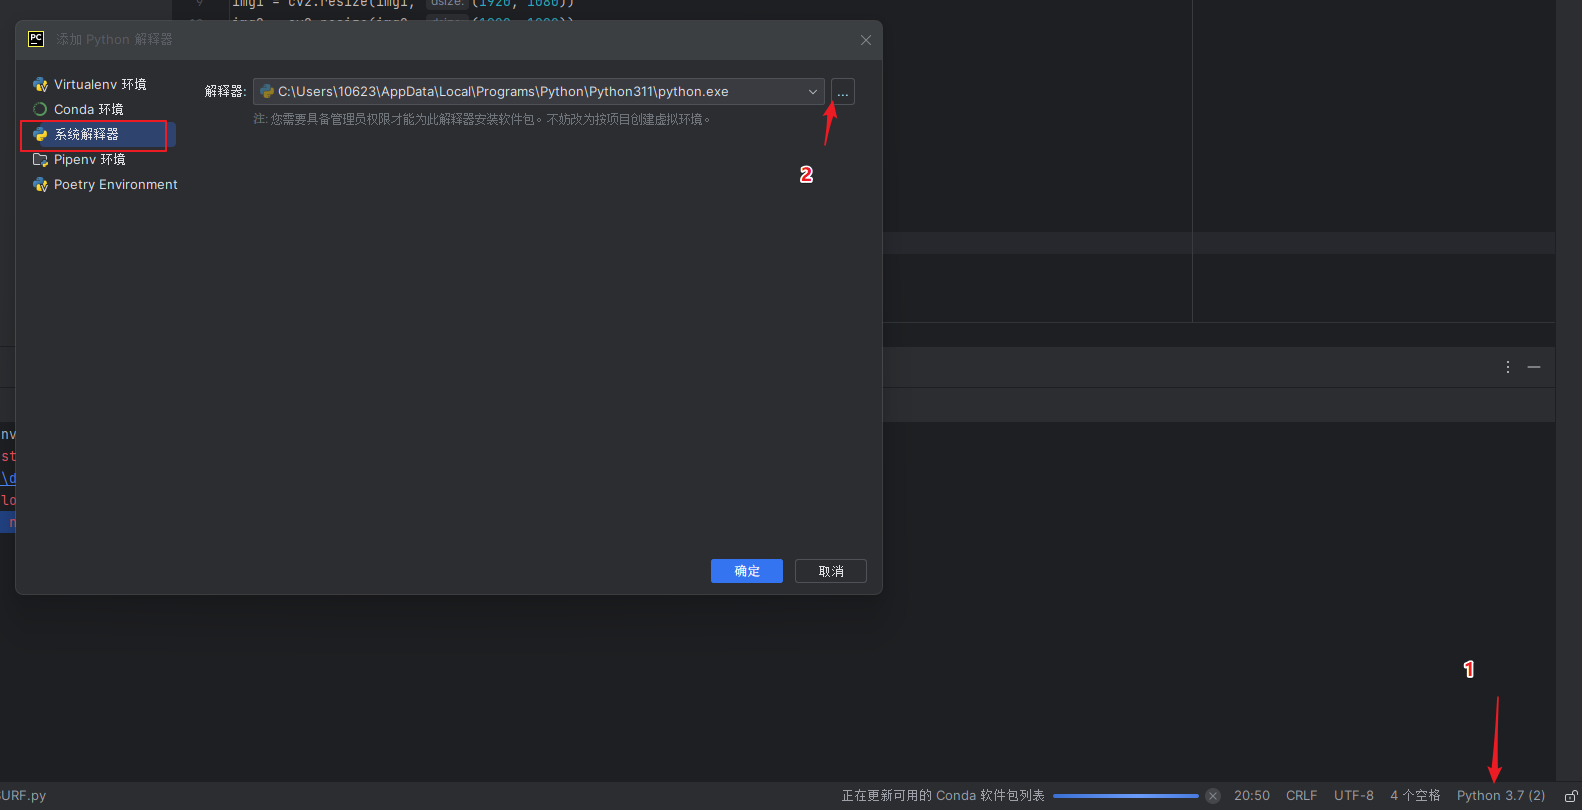
在pycharm中添加解释器,找到Anaconda目录下的envs文件夹,进去找到自己配置的虚拟环境文件夹,再找到python.exe文件,点击选中即可。点击确定。
3.问题

pip install matplotlib -i http://pypi.douban.com/simple/ --trusted-host pypi.douban.com

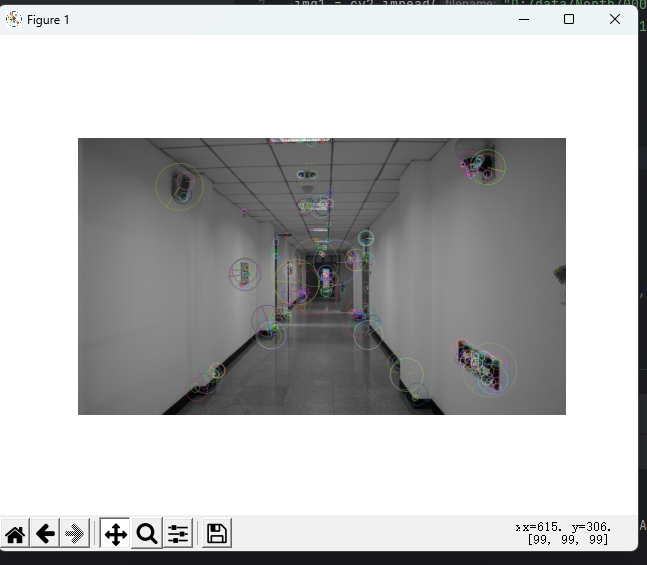
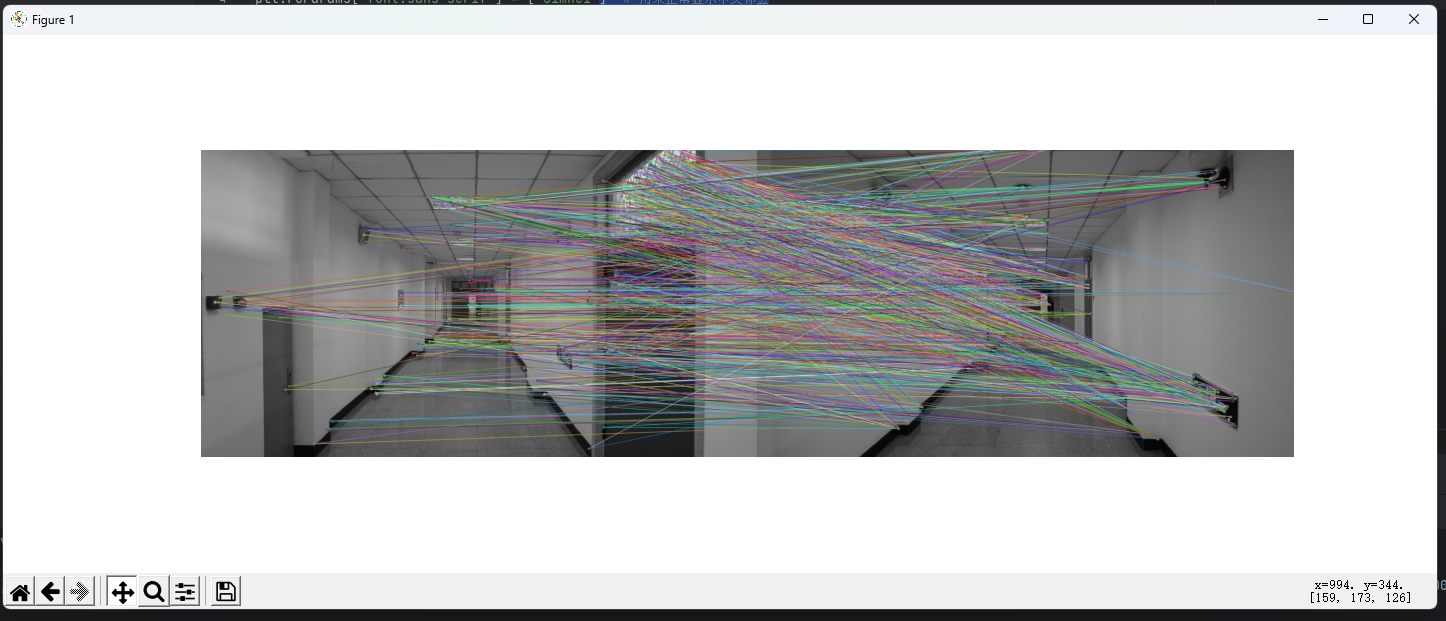
4.结果
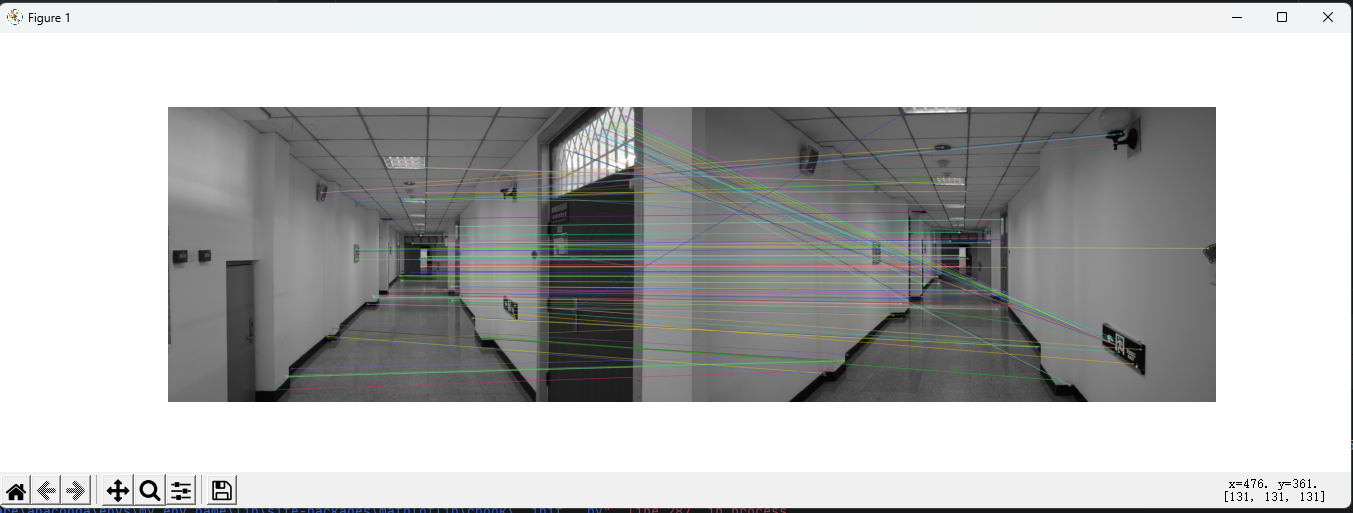
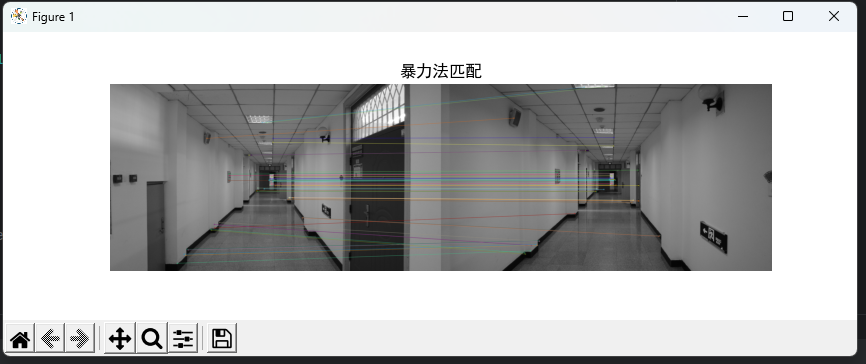
文章来源:https://blog.csdn.net/weixin_46050242/article/details/135421726
本文来自互联网用户投稿,该文观点仅代表作者本人,不代表本站立场。本站仅提供信息存储空间服务,不拥有所有权,不承担相关法律责任。 如若内容造成侵权/违法违规/事实不符,请联系我的编程经验分享网邮箱:chenni525@qq.com进行投诉反馈,一经查实,立即删除!
本文来自互联网用户投稿,该文观点仅代表作者本人,不代表本站立场。本站仅提供信息存储空间服务,不拥有所有权,不承担相关法律责任。 如若内容造成侵权/违法违规/事实不符,请联系我的编程经验分享网邮箱:chenni525@qq.com进行投诉反馈,一经查实,立即删除!
最新文章
- Python教程
- 深入理解 MySQL 中的 HAVING 关键字和聚合函数
- Qt之QChar编码(1)
- MyBatis入门基础篇
- 用Python脚本实现FFmpeg批量转换
- AIGC中的视觉生成文献整理
- Windows10神州网信版中的服务启动建议
- springboot使用EasyExcel导入数据
- 天空卫士协助蒙牛打造数据安全堡垒
- 【大数据实训】python石油大数据可视化(八)
- 在Ubuntu下载Python3.6 并建立软连接
- 【JUC的四大同步辅助类】
- php反序列化漏洞原理、利用方法、危害
- 智能销售助手:电话机器人与回拨系统的超强组合
- 2023.12.13 关于 MySQL 复杂查询