@Async注解的注意事项
@Async注解的注意事项
背景:在Springboot中曾经使用过@Async注解进行异步,将用户操作日志记录进mysql。但是因为贪图方便,没有指定线程池,而是简单在方法上标注了@Async注解。以为springboot默认为@Async提供了线程池,然后某天刷抖音刷到博主@威哥聊java 提及@Async注解,才发现@Async注解在没有指定线程池的情况下,和new Thread无异。
1. @Async的用法
先说下@Async,顾名思义,异步。标注Spring管理的方法上,该方法会异步执行。所在包org.springframework.scheduling.annotation.Async,需要配合@EnableAsync注解使用。
首先在Configuration类上添加@EnableAsync注解,(可以是SpringBootApplication启动类上添加,或者另外被标注@Configuration注解的类上添加)例如
@SpringBootApplication
@EnableAsync
public class InoteadminApplication {

    public static void main(String[] args) {
        SpringApplication.run(InoteadminApplication.class, args);
    }

}
然后在需要异步执行的方法上添加@Async注解即可,需要注意被标注注解的方法所属的类应该由spring管理。
@Component
public class MyComponent(){

    @Async
    public void testAsync(){
        // 方法内代码会异步执行
        Thread.sleep(3000);
    }

}
2. 为什么不能简单使用@Async
使用@Async注解,没有添加value参数,默认使用SimpleAsyncTaskExecutor线程池,而SimpleAsyncTaskExecutor线程池每次都会创建新线程,且线程不会重用。
我们调试看下执行代码,首先在一个Component中使用@Async修饰testAsync方法。
@Component
public class TestComponent {

    @Async
    public void testAsync(){
        try {
            Thread.sleep(5000);
        } catch (InterruptedException e) {
            throw new RuntimeException(e);
        }
    }

}
然后在SpringbootTest中调用该方法
@SpringBootTest
class InoteadminApplicationTests {
    @Autowired
    TestComponent testComponent;	// 注意是自定义的TestComponent类,测试时发现Springboot有个同名注解

    @Test
    void contextLoads() {

        System.out.println("test---------------");
        testComponent.testAsync();		// 调用测试方法

    }

}
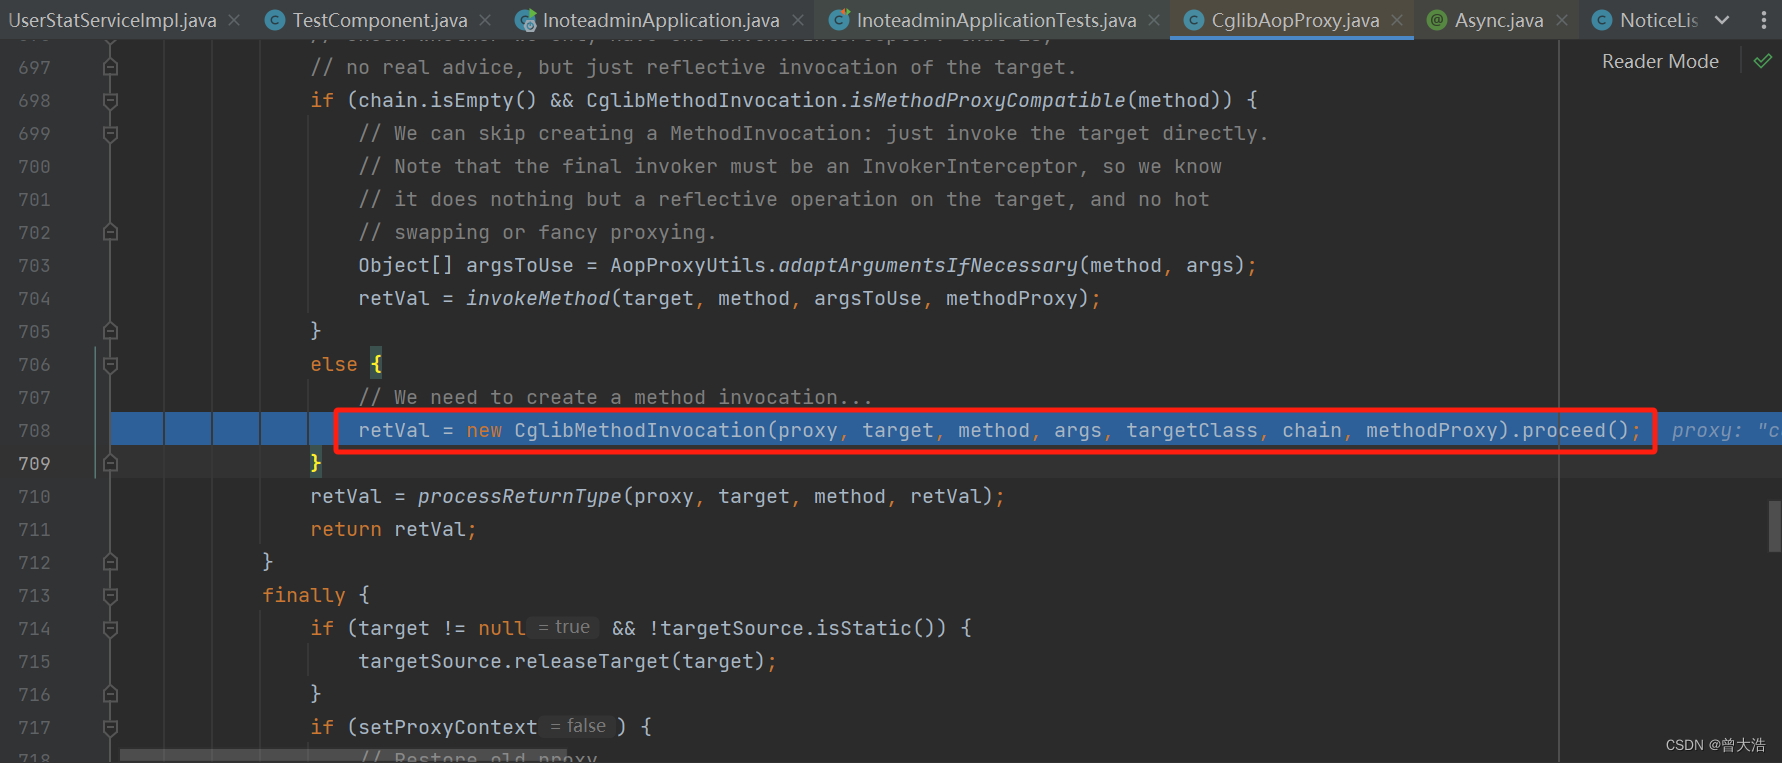
调试断点该方法显示进入cglib代理

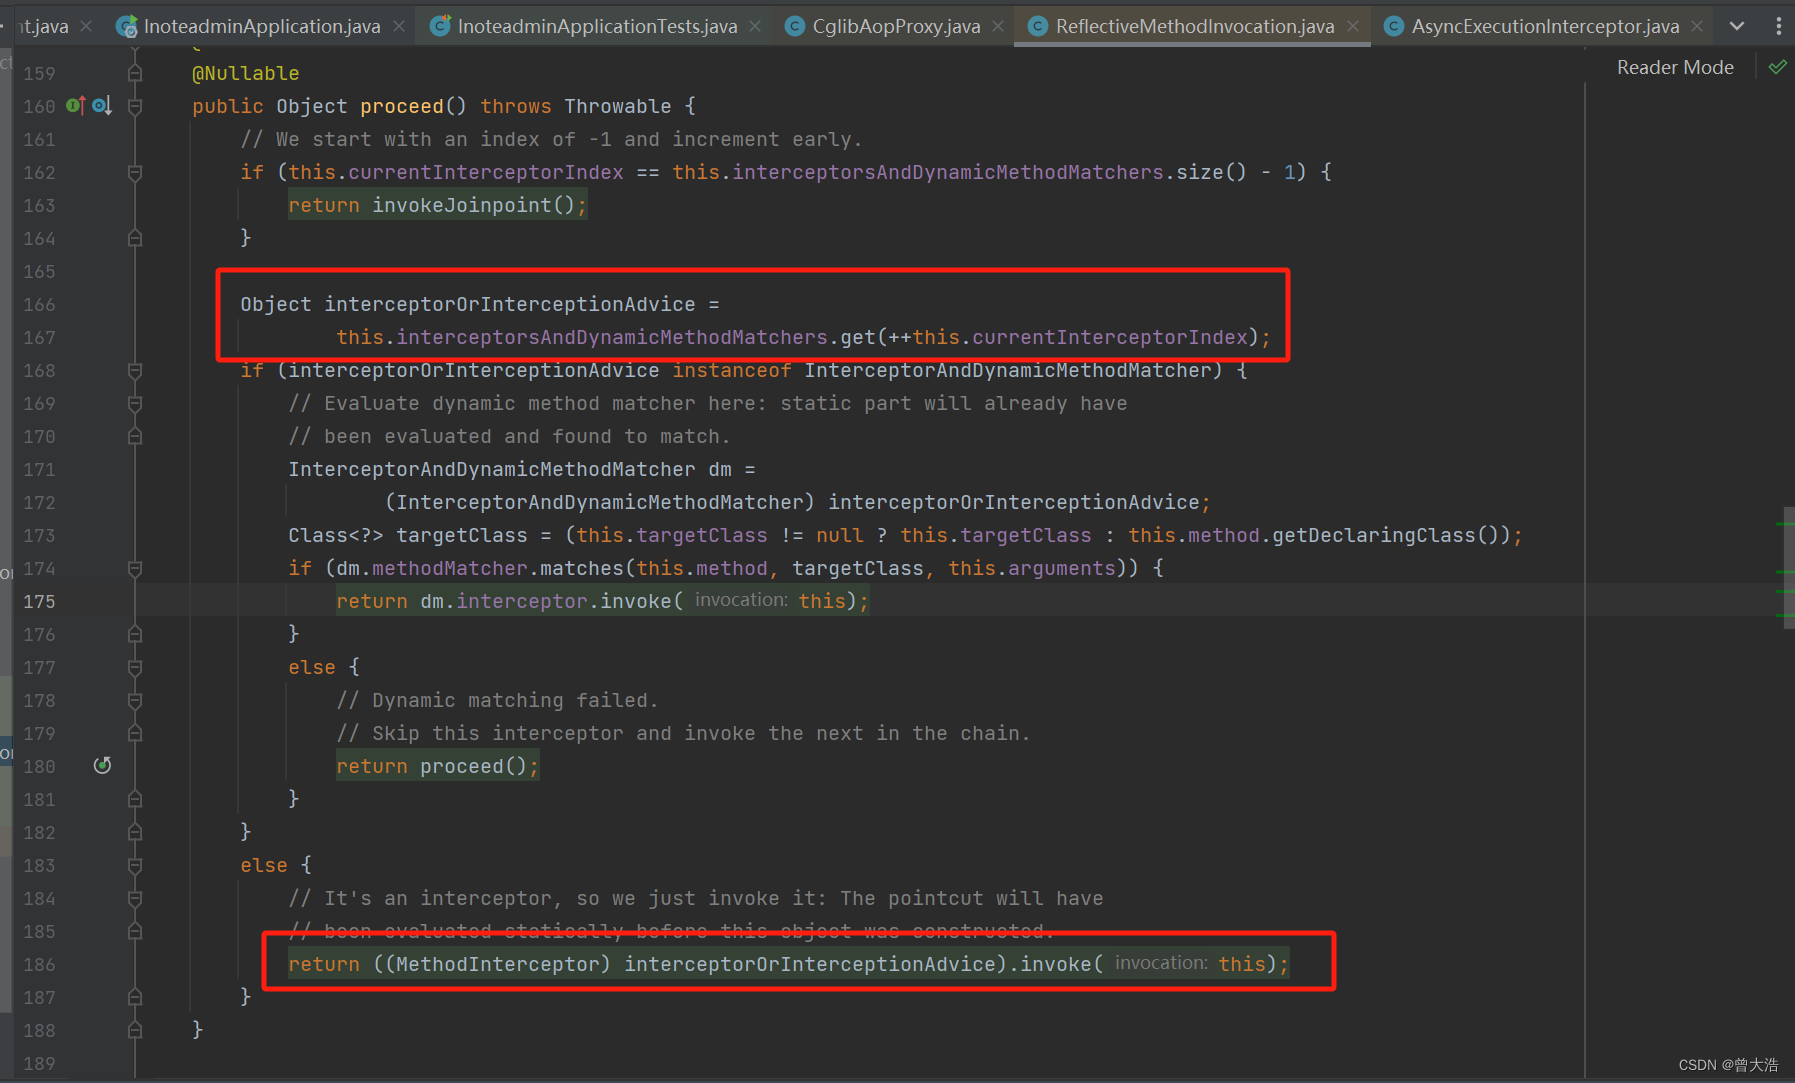
然后依次获取代理对象,执行代理方法

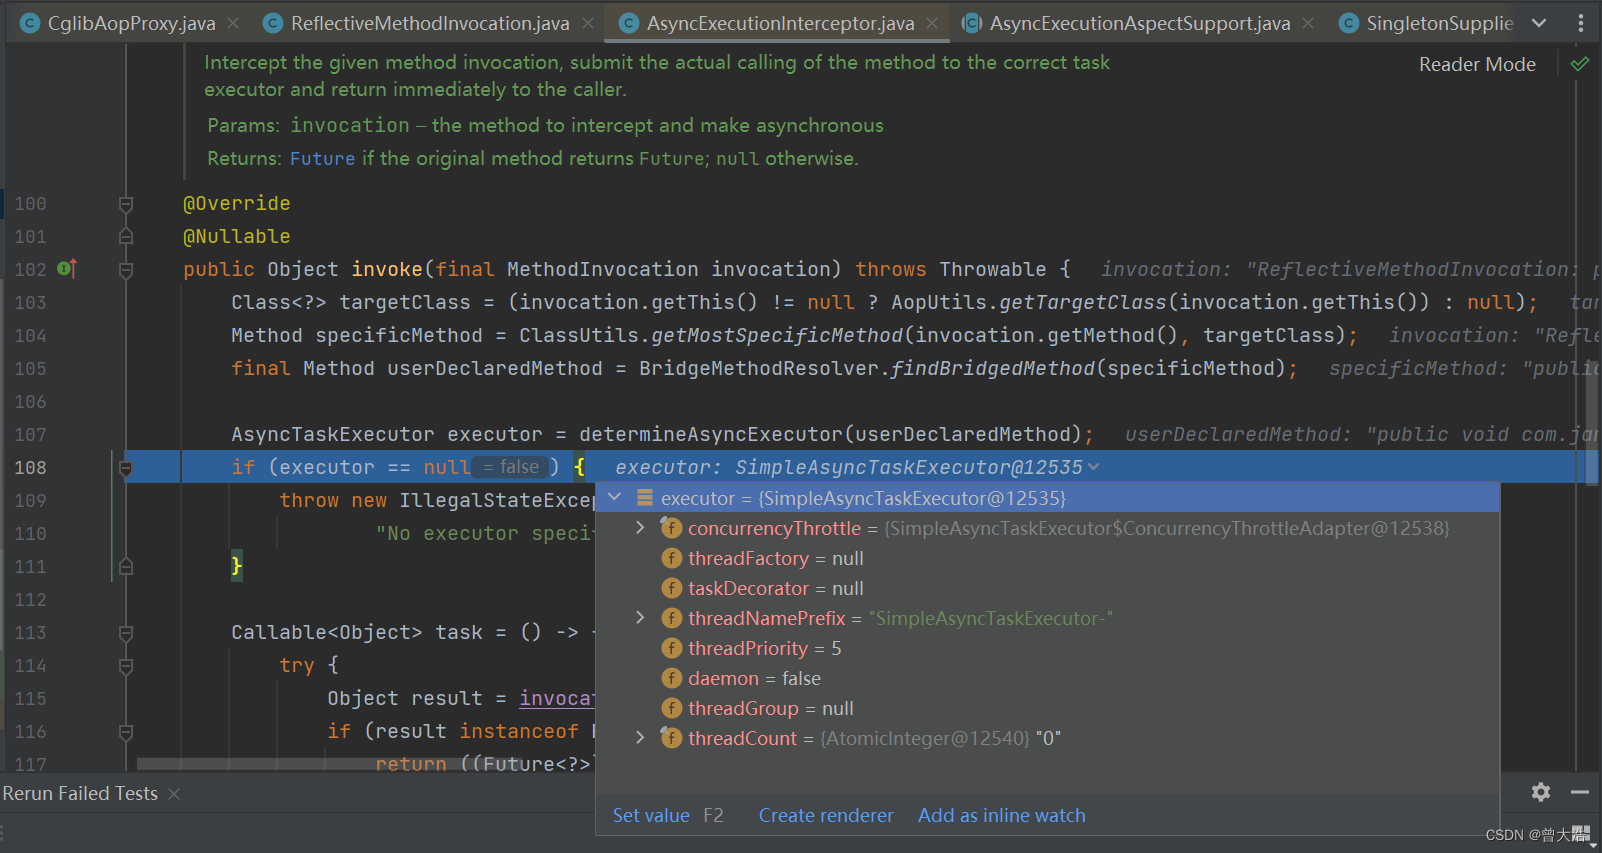
在Async注解代理对象中,获取用户定义的执行器(线程池)

没有指定线程池则返回默认执行器SimpleAsyncTaskExecutor,而通过SimpleAsyncTaskExecutor的配置可以看到,该线程池实质上不提供线程重用。

因此说在使用@Async注解时,不要默认使用Springboot提供的线程池,即value = ""
3. 添加自定义线程池
前面说了,使用@Async注解时最好声明使用的线程池,那么下面说说线程池的创建,事实上线程池的创建比较简单,直接添加一个Executor的Bean即可。例如
@Configuration
public class MyAsyncConfig {

    @Bean("myAsyncExecutor")
    public Executor myAsyncExecutor(){
        ThreadPoolTaskExecutor executor = new ThreadPoolTaskExecutor();
        // 核心线程数
        executor.setCorePoolSize(5);
        // 最大线程数
        executor.setMaxPoolSize(20);
        // 队列容量
        executor.setQueueCapacity(200);
        // 线程存活时间
        executor.setKeepAliveSeconds(60);
        // 线程前缀
        executor.setThreadNamePrefix("MyAsync-");
        // 拒绝策略
        executor.setRejectedExecutionHandler(new ThreadPoolExecutor.CallerRunsPolicy());
        return executor;
    }

}
另外,因为是异步执行,所以springboot中的ControllerAdvice无法捕获异步方法中的异常,Springboot中提供异常捕获接口AsyncUncaughtExceptionHandler,例如
@Slf4j
public class MyAsyncExceptionHandler implements AsyncUncaughtExceptionHandler {
    @Override
    public void handleUncaughtException(Throwable ex, Method method, Object... params) {
        // 异步异常处理方法 todo……
        log.error(Thread.currentThread().getName()+"异步方法执行失败-------");
        log.error("异常:"+ex.getMessage());
    }
}
创建异步异常处理类后还需要将其与@Async注解关联,可以通过AsyncConfig类继承AsyncConfigurerSupport或者实现AsyncConfigurer,然后重写getAsyncUncaughtExceptionHandler方法实现,例如将以上MyAsyncConfig改写为
@Configuration
public class MyAsyncConfig extends AsyncConfigurerSupport {

    @Bean("myAsyncExecutor")
    public Executor myAsyncExecutor(){
        ThreadPoolTaskExecutor executor = new ThreadPoolTaskExecutor();
        executor.setCorePoolSize(5);
        executor.setMaxPoolSize(20);
        executor.setQueueCapacity(200);
        executor.setKeepAliveSeconds(60);
        executor.setThreadNamePrefix("MyAsync-");
        executor.setRejectedExecutionHandler(new ThreadPoolExecutor.CallerRunsPolicy());
        return executor;
    }

    public AsyncUncaughtExceptionHandler getAsyncUncaughtExceptionHandler() {
        return new MyAsyncExceptionHandler();
    }

}
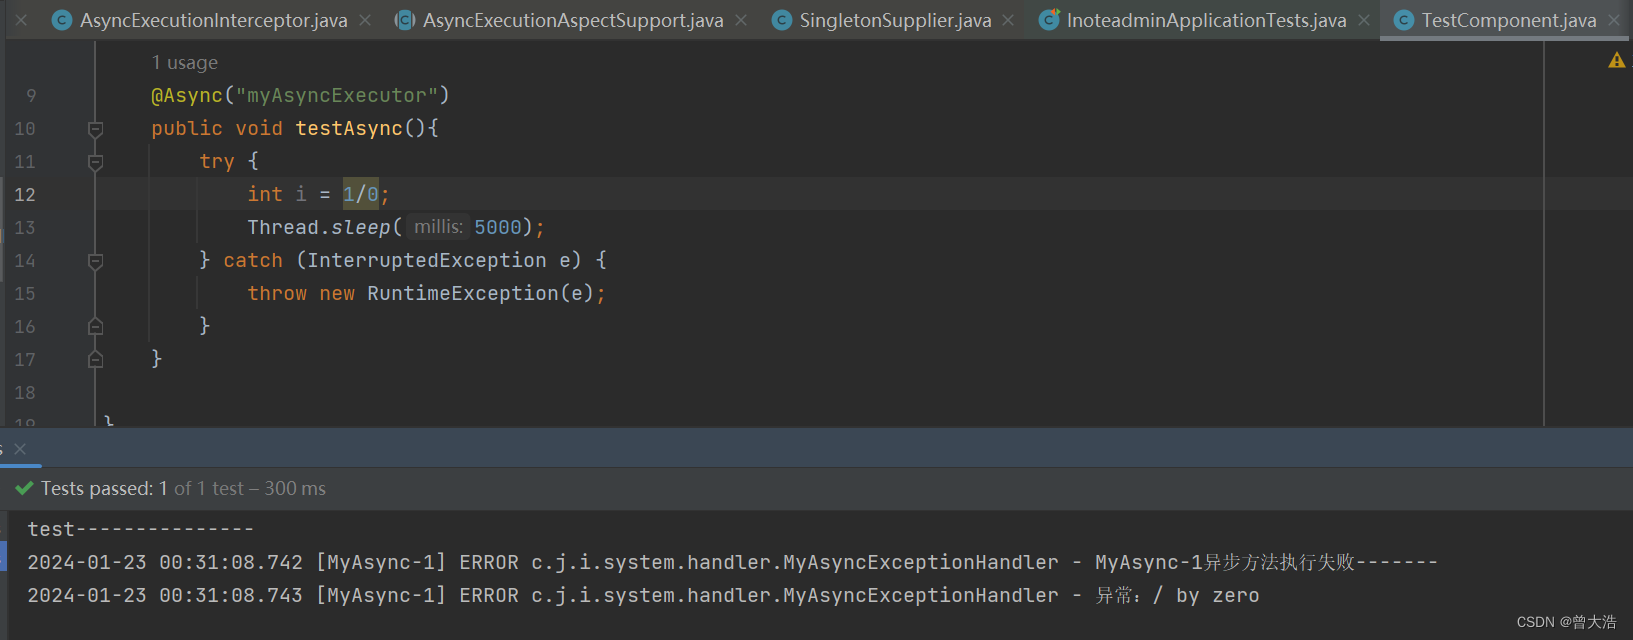
异常测试结果如下:

本文来自互联网用户投稿,该文观点仅代表作者本人,不代表本站立场。本站仅提供信息存储空间服务,不拥有所有权,不承担相关法律责任。 如若内容造成侵权/违法违规/事实不符,请联系我的编程经验分享网邮箱:chenni525@qq.com进行投诉反馈,一经查实,立即删除!
- Python教程
- 深入理解 MySQL 中的 HAVING 关键字和聚合函数
- Qt之QChar编码(1)
- MyBatis入门基础篇
- 用Python脚本实现FFmpeg批量转换
- 第十章:项目进度管理
- 2023年秋季学期《算法分析与设计》练习14 OJ-1421 算法分析与设计练习14,使用python、C语言
- NineAi 新版AI系统网站源码 ChatGPT
- MATLAB 最小二乘空间直线拟合 (37)
- Jenkins+Python自动化测试持续集成详细教程
- P8598 [蓝桥杯 2013 省 AB] 错误票据
- 链表
- uni-app的学习【第一节】
- 接收多个参数的函数——python
- Flink导入StarRocks