使用JSDoc生成漂亮的文档
发布时间:2023年12月26日
1. 什么是JSDoc
JSDoc是一个用于 JavaScript 的API文档生成器,类似于 Javadoc 或 phpDocumentor。可以将文档注释直接添加到源代码中。JSDoc 工具将扫描您的源代码并为您生成一个 HTML 文档网站。
2. JSDoc可以用来干什么
- 生成清晰文档: 通过为函数、方法和类添加 JSDoc 注释,可以自动生成结构化的代码文档,包括用途、参数、返回值等信息。
- 提供类型信息: JSDoc 注释可以包含类型信息,帮助开发人员更好地了解参数和返回值的数据类型。
- 示例代码演示: JSDoc 注释可以包含示例代码,演示如何正确地使用函数和方法。
- 类型安全和提示: 集成开发环境(IDE)可以根据 JSDoc 注释提供代码自动完成、参数提示和跳转到定义等功能。
3. 快速入门JSDoc
直接来一个项目应用的实例,简单说一下jsdoc的使用流程,并展示一下最终得到的js的api文档。
3.1 安装JSDoc
全局安装或者局部安装,我这里选择的是全局,jsdoc版本是4.0.2
npm install jsdoc -g

npm install jsdoc -save-dev
在下面使用命令的时候,可能会报taffydb模块找不到。npm i taffydb -D安装解决。

3.2 使用JSDoc进行代码注释
以现有项目微信小程序中的socket.io.js为例,代码如下
/**
 * WebSocketIO module.
 * @module utils/WebSocketIO
 */

import {
  HEADER,
  SERVER_DEBUG,
  PINGINTERVAL,
  WSS_SOCKET_URL,
  RE_CONNECT_LIMIT
} from '../config.js';


/**
 * 全局socket链接类
 * @class WebSocketIO
 * @see module:utils/WebSocketIO
 */
export default class WebSocketIO {
  constructor(app) {
    // 连接状态 false:未连接,true:已连接
    this.connectStatus = false
    this.timer = null // 心跳
    this.watcherList = {} // 订阅者
    this.app = app // 方便在Chat内部操作app
    this.limit = 0 // 记录重连次数
    this.rectimer = null // 重连定时器
    this.lockReconnect = false // 锁定重连尝试开关
    this.reclimit = RE_CONNECT_LIMIT // 断线最多尝试重连次数
    this.debug = SERVER_DEBUG //debug
  }

  /**
   * socket发起链接,且绑定回调
   */
  connectSocket() {
    let that = this;
    this.SocketTask = wx.connectSocket({
      url: WSS_SOCKET_URL,
      header: HEADER,
      success: res => {
        that.debug && console.log(res);
      },
      fail: err => {
        that.debug && console.log(err);
      }
    });

    wx.onSocketOpen(this.onOpen.bind(this));
    wx.onSocketMessage(this.onMessage.bind(this));
    wx.onSocketError(this.onError.bind(this));
    wx.onSocketClose(this.onClose.bind(this));
  }

  /**
   * 心跳
   * */
  ping() {
    let that = this;
    this.timer = setInterval(() => {
      that.send({
        type: 'ping'
      });
    }, PINGINTERVAL);
  }

  /**
   * 关闭链接
   */
  close() {
    clearInterval(this.timer);
    this.SocketTask.close();
    this.connectStatus = false;
  }

  /**
   * 发送消息
   * */
  send(data) {
    let that = this;
    return new Promise((reslove, reject) => {
      that.SocketTask.send({
        data: JSON.stringify(data),
        success: reslove,
        fail: reject,
      });
    });
  }

  /**
   * socket服务响应的信息
   * @param {jsonStr} res json字符串
   * */
  onMessage(res) {
    this.debug && console.log(res);
    if (!res.data.includes('ping') && !res.data.includes('Link succeeded') && !res.data.includes('Disconnection succeeded')) {
      const data = JSON.parse(res.data);
      const type = 'message';
      console.log("服务器端发送过来的消息:", type, data);
      this.$emit(type, data);
    }
  }
  /**
   * 重连socket
   * 设置一个锁和最大的重连次数,避免出现无限重连的情况,
   * 为了不给服务器太大的压力我这里设置的是5秒重试一次,最多请求{reclimit}次。
   */
  reconnect() {
    if (this.lockReconnect) return;
    this.lockReconnect = true;
    clearTimeout(this.rectimer);
    if (this.limit < this.reclimit) {
      this.rectimer = setTimeout(() => {
        this.connectSocket();
        this.lockReconnect = false;
      }, 5000);
      this.limit++
    }
  }

  /**
   * 关闭socket链接
   * */
  onClose() {
    this.close();
  }

  /**
   * socket链接发生错误捕捉
   * @param {JSONSTR} res
   * */
  onError(res) {
    this.debug && console.log(res);
    this.$emit('socket_error', res);
    this.connectStatus = false;
    this.reconnect(); // 断线重连
  }

  /**
   * socket链接成功
   * @param {JSONSTR} res
   * */
  onOpen(res) {
    this.debug && console.log('链接成功');
    this.connectStatus = true;
    this.ping();
  }

  /**
   * 注册事件
   * @param {string} name 事件名称
   * @param {callback} successFun 回调函数
   */
  $on(name, successFun) {
    if (!this.watcherList[name]) {
      this.watcherList[name] = []
    }
    this.watcherList[name].push(successFun);
  }
  /**
   * 销毁事件
   * @param {string} name 事件名称
   */
  $off(name) {
    let that = this;
    if (that.watcherList[name]) {
      delete that.watcherList[name];
    }
  }

  /**
   * 执行事件
   * @param {string} type 事件名称
   * @param {array} data 参数
   */
  $emit(type, data) {
    let onCallbacks = this.watcherList[type];
    if (onCallbacks && onCallbacks.length > 0) {
      onCallbacks.forEach(element => {
        element.apply(this, [data]);
      });
    }
  }
}
3.3 生成文档
命令:jsdoc -r src -d doc
其中-r表示源目录,-d表示生成的目标目录,因此得到以下命令执行生成文档。
jsdoc socket.io.js -d doc
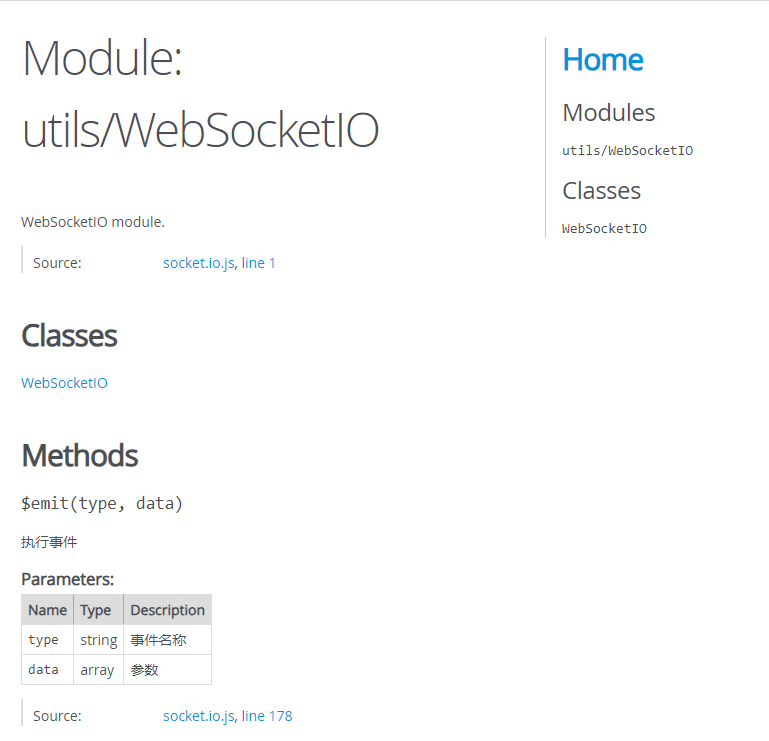
生成文档截图如下:

4. 使用配置文件配置JSDoc
通过配置文件,可以配置指定哪些文件需要生成,生成的出口等。更多配置解说可查看官方文档。https://jsdoc.zcopy.site/about-configuring-jsdoc.html
4.1 在根目录下创建 jsdoc.json 并从官网复制默认内容(使用json是可以注释)
{
    "plugins": [],
    "recurseDepth": 10,
    "source": {
        "includePattern": ".+\\.js(doc|x)?$",
        "excludePattern": "(^|\\/|\\\\)_"
    },
    "sourceType": "module",
    "tags": {
        "allowUnknownTags": true,
        "dictionaries": ["jsdoc","closure"]
    },
    "templates": {
        "cleverLinks": false,
        "monospaceLinks": false
    }
}
根据以上配置,修改一下 jsdoc.json 为自己要的:
{
    "plugins": ["plugins/markdown"], // 配置文件中让JSDoc开启Markdown 插件支持
    // "recurseDepth": 10, //  使用 -r 命令行选项开启了递归支持, JSDoc的递归深度为10 (recurseDepth).
    "source": {
        "include": ["js"], // 指定生成文档的文件夹名称,如果没有,需创建
        "includePattern": ".js$",  // 名为 js 的源文件夹下的所有js都会自动生成文档
        "excludePattern": "(node_modules/|docs)" // 忽略文件夹
    },
    "sourceType": "module",
    "templates": {
        "cleverLinks": false,
        "monospaceLinks": false
    },
    "opts": {
        "recurse": true,
        "destination": "./docs/" // 将生成的文放到指定目录下,如不指定,默认输出到 out 文件夹下
    }
}
4.2 配置好后执行以下命令
jsdoc -c jsdoc.json
docs 文件夹内就是生成的HTML文件了,效果如上图所示。
5. Home页面内使用markdown
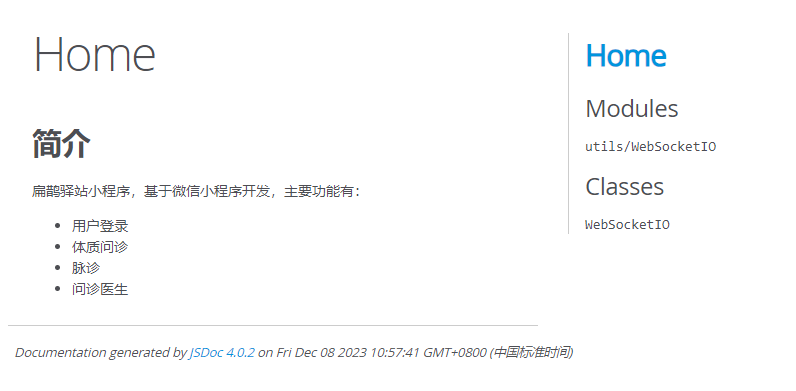
现在Home页内无内容,在项目根目录新建README.md文件,随便写些内容。
然后执行jsdoc -c jsdoc.json README.md命令,生成如下图所示:

6. 配置主题模板
js doc 生成的文档如果使用默认模板样式不仅不美观而且阅读体验感不好,官方也给出了一些模板:
- jaguarjs-jsdoc
- DocStrap
- jsdoc3Template
- minami
- docdash
- tui-jsdoc-template
- better-docs
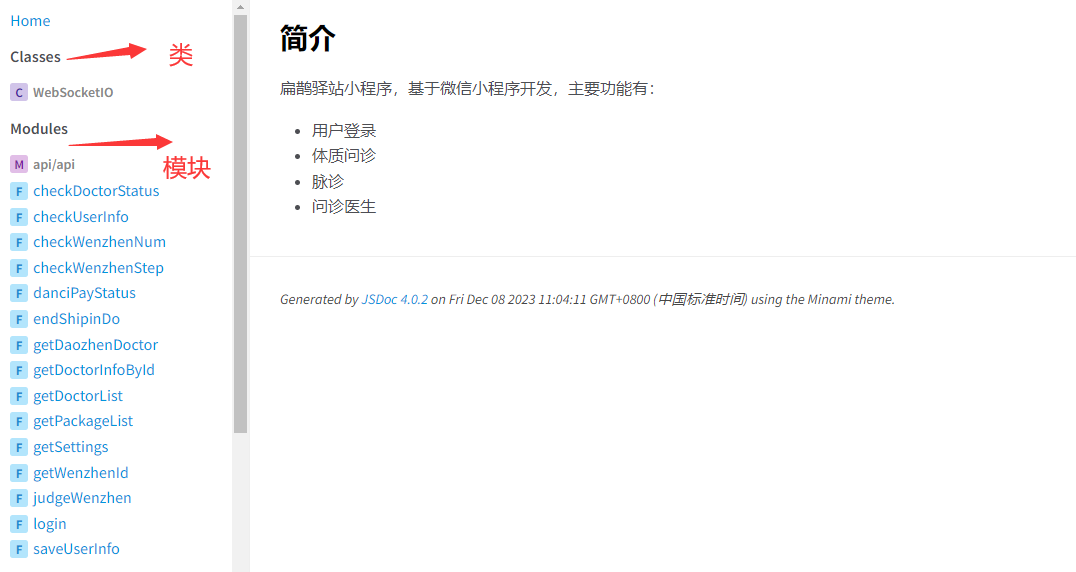
这里拿 minami 模板来配置
6.1 先安装minami
npm install minami --save-dev
6.2 在jsdoc.json中配置
{
  "opts": {
    "template": "node_modules/minami"
  }
}
配置好后执行jsdoc -c jsdoc.json README.md命令,生成如下图所示:

7. 在package.json的scripts脚本中添加
"scripts": {
    "doc": "jsdoc -c jsdoc.json"
 },
项目中可使用生成文档
npm run doc
参考链接
- https://jsdoc.app/ 官方英文
- https://jsdoc.zcopy.site/ 镜像中文
- https://www.jsdoc.com.cn/ 汉化中文
- 前端使用 js doc 生成接口文档
- 常用注释
- jsDoc注释规范
- 利用jsdoc为vue项目生成漂亮的文档
- 生成定制化的JSDoc文档
- jsdoc-vue
要注意vue的版本号要和vue-template-compiler一致
文章来源:https://blog.csdn.net/my_study_everyday/article/details/135215306
本文来自互联网用户投稿,该文观点仅代表作者本人,不代表本站立场。本站仅提供信息存储空间服务,不拥有所有权,不承担相关法律责任。 如若内容造成侵权/违法违规/事实不符,请联系我的编程经验分享网邮箱:chenni525@qq.com进行投诉反馈,一经查实,立即删除!
本文来自互联网用户投稿,该文观点仅代表作者本人,不代表本站立场。本站仅提供信息存储空间服务,不拥有所有权,不承担相关法律责任。 如若内容造成侵权/违法违规/事实不符,请联系我的编程经验分享网邮箱:chenni525@qq.com进行投诉反馈,一经查实,立即删除!