DAPLink源码固件编译与制作
发布时间:2023年12月20日
DAPLink源码固件编译与制作
- ?这里以Air/stm
32f103cbt6固件编译为例。 - 📌DAPLink源码地址:
https://github.com/ARMmbed/DAPLink - 🔖 如果不想自己生成,可以使用合宙提供的现成的工程以及固件;
https://gitee.com/openLuat/daplink/tree/main,但是需要注意,适配的是216MHz主频。🧨现成的固件下载地址:https://gitee.com/openLuat/luatos-soc-air32f103/tree/master/AIR_Jlink_Keil

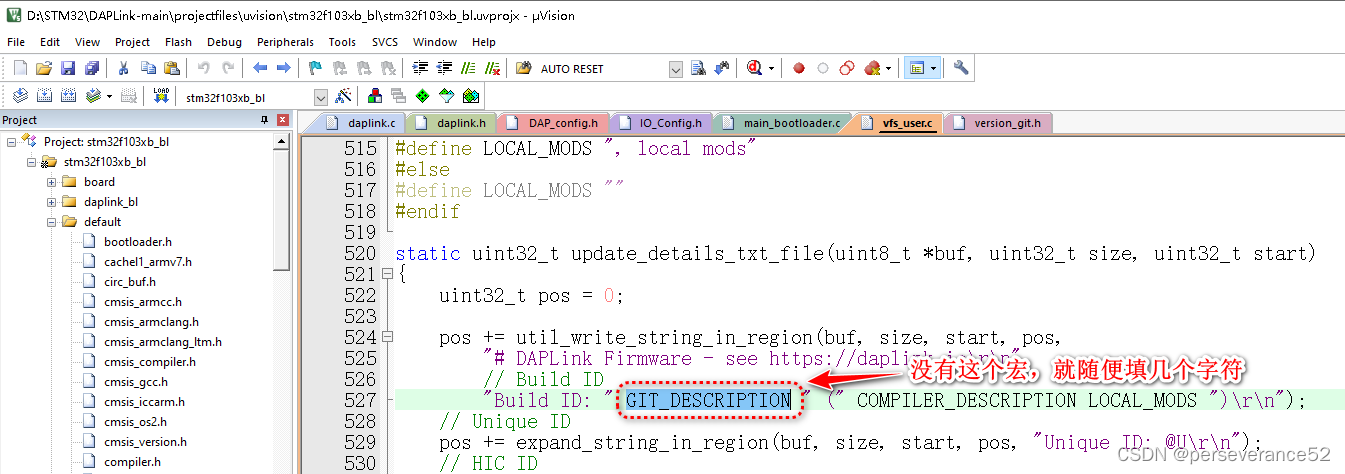
- 🔖使用合宙提供的源码工程,还需要拷贝DAPLink源码工程中的
version_git.h文件,或者修改对应的宏,否则会报错,找不到头文件。
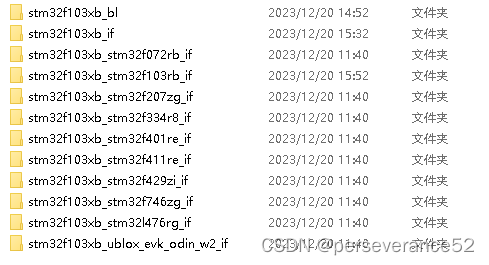
- 📓stm32其他型号制作,可以参考DAPLINK源码生成的Keil工程目录型号列表:
🈯需要使用到的CMD命令集合
python.exe -m pip install --upgrade pip  --升级pip命令

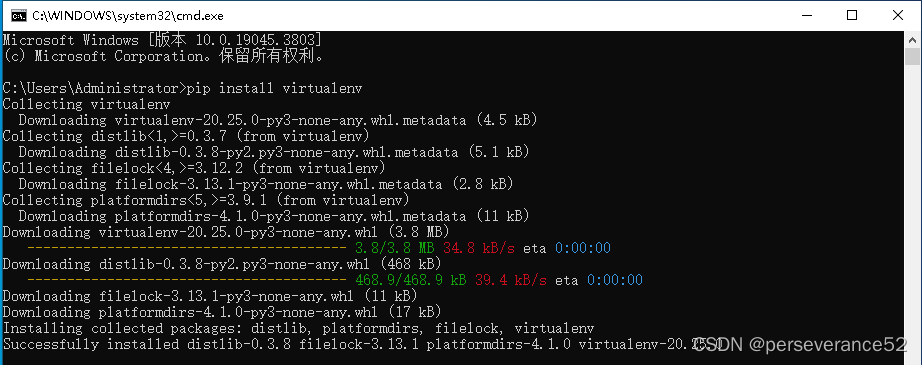
pip install virtualenv  安装虚拟环境

virtualenv venv	--创建虚拟环境

cd D:\STM32\DAPLink-main\venv	-- 进入虚拟环境文件夹

venv/Scripts/activate.bat		-- 执行激活虚拟环境

cd D:\STM32\DAPLink-main\		-- 返回主目录

pip install -r requirements.txt		-- 安装所需组件

progen generate -t uvision		-- 生成Keil工程列表

venv/Scripts/deactivate.bat		-- 退出虚拟环境
🛠固件编译前的环境搭建
- 🌿需要安装Python3,并且将Python路径添加到系统环境变量中。
- 📍Python下载地址:
https://www.python.org/getit/
-
🌿Windows环境下,
Python虚拟环境的搭建::pip install virtualenv安装虚拟环境
-
🌿在cmd命令提示符窗口内,通过cd命令进入到所下载下来的并解压的DAPLink源码文件夹内:
cd D:\STM32\DAPLink-main

-
🌿在
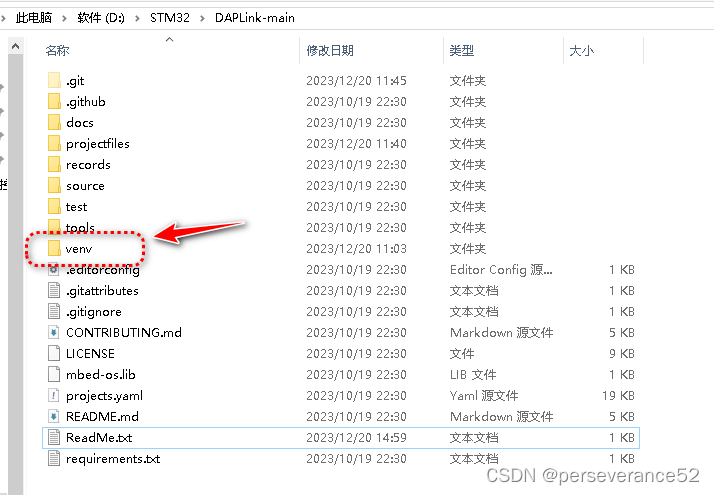
.\DAPLink-main源码所在文件夹内,创建虚拟环境:virtualenv venv,会随之创建一个名为venv文件夹。

- 🌿通过cd命令进入到
venv文件夹内:

- 🌿执行
.\Scripts\activate.bat命令.激活虚拟环境

?上面2个步骤可以合并,直接在
DAPLink-main源码所在文件位置,执行.venv\Scripts\activate.bat
- 🌿f返回源目录:
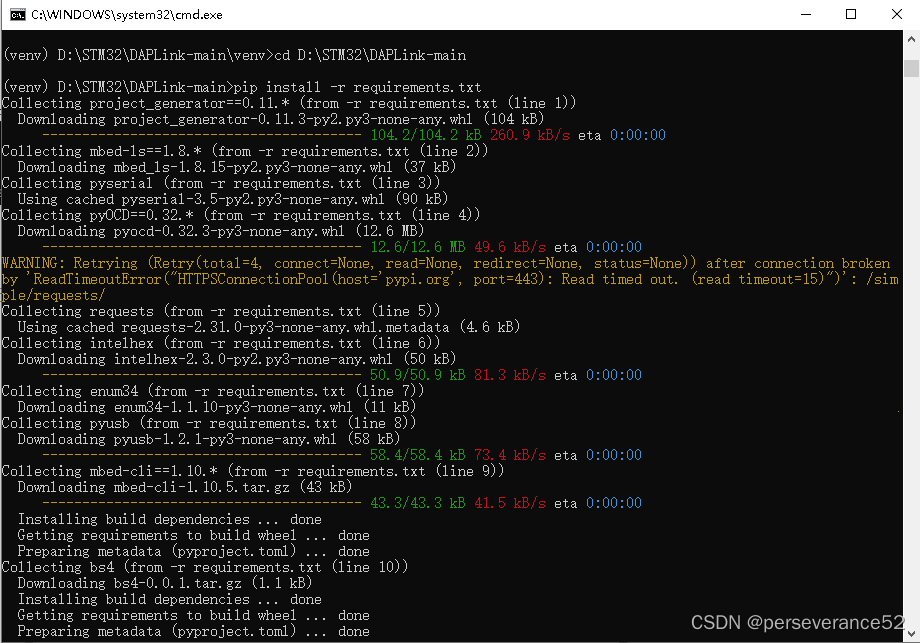
cd D:\STM32\DAPLink-main\;执行:pip install -r requirements.txt,安装所需组件。
- 🌿在
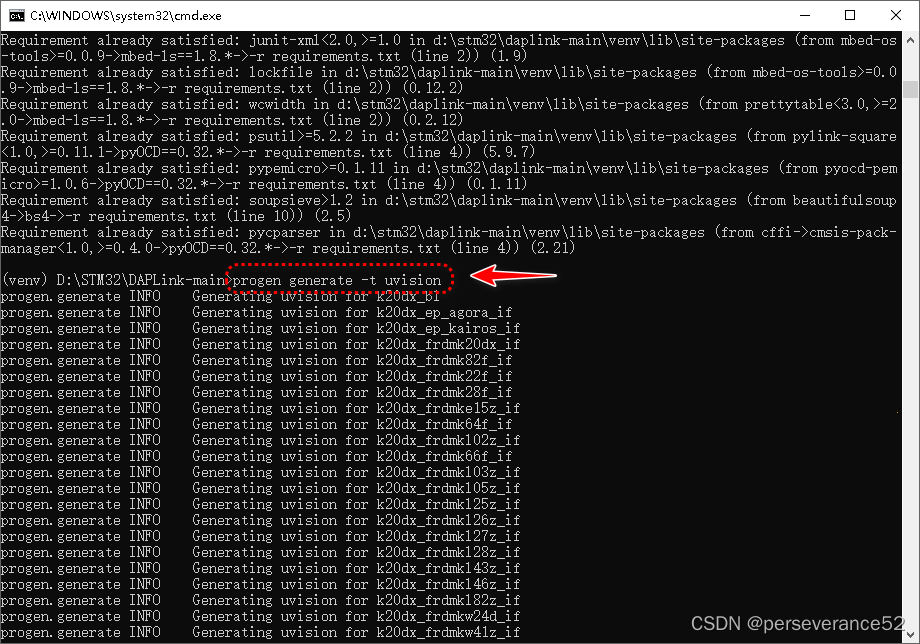
DAPLink-main目录下,执行progen generate -t uvision;生成Keil工程列表
- 🌿退出虚拟环境

- ?在
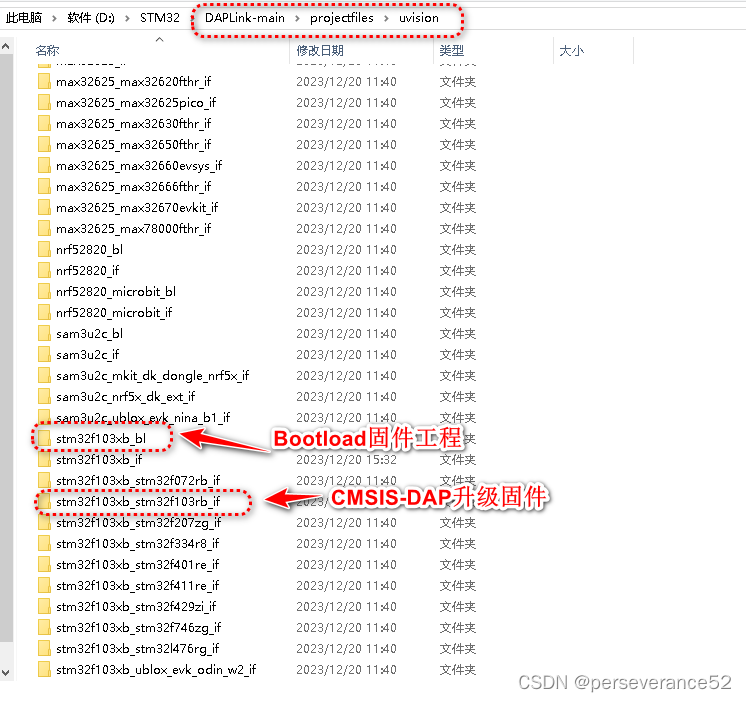
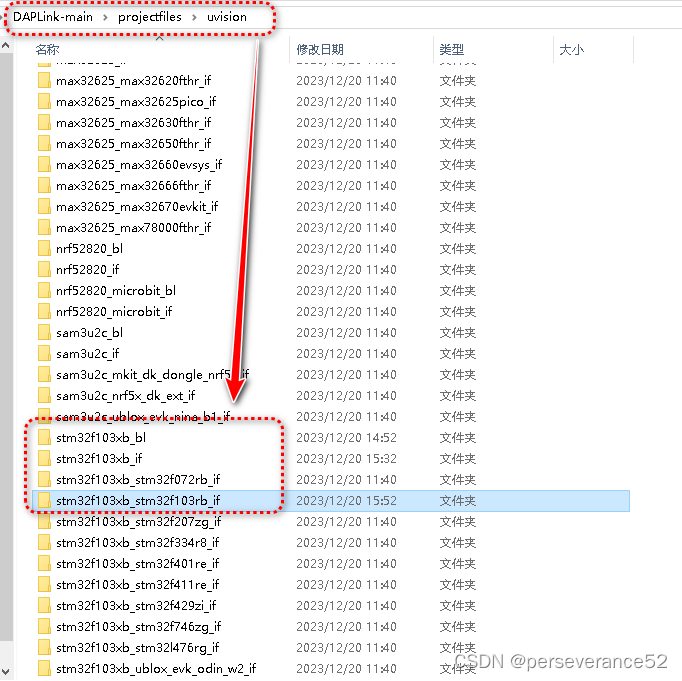
DAPLink-main\projectfiles\uvision路径下的得到下面的工程列表,我们只需要保留其中的2个工程:
- ?工程说明:
stm32f103xb_bl:Bootload固件,支持拖拽升级
stm32f103xb_stm32f103rb_if:实际实现dap功能的工程
- 📢烧录完成stm32f103xb_bl.Hex固件后,通过USB(P11,PA12)连接电脑,会出现一个64M的U盘,让后将
stm32f103xb_stm32f103rb_if工程生成的Hex文件拷贝到U盘中完成DAPLINK功能升级。
🔨工程编译
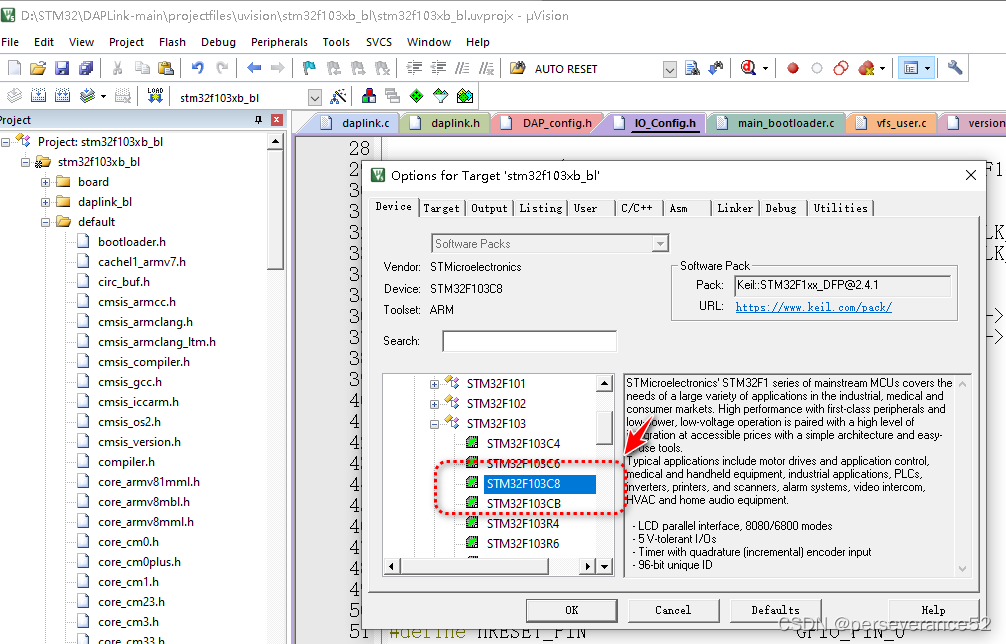
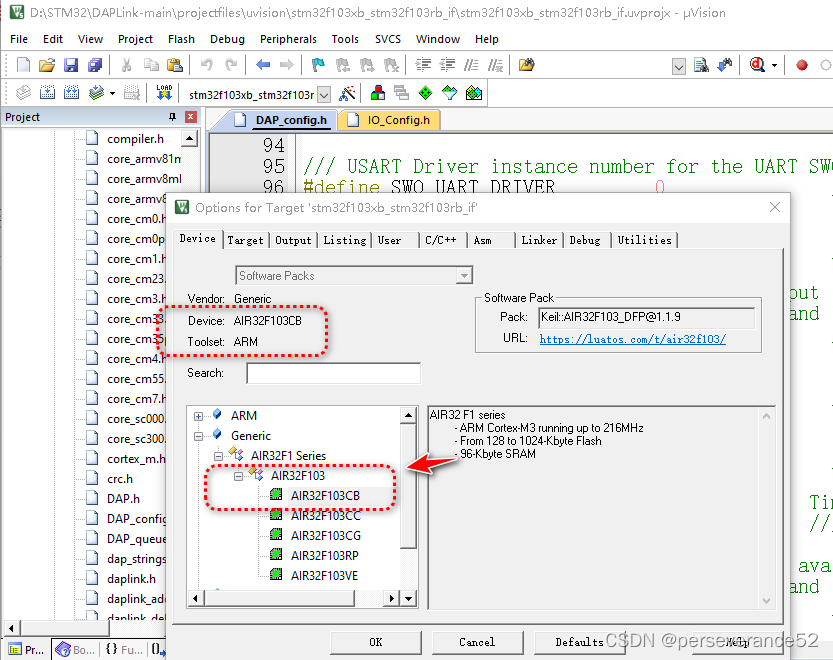
- 🔖以stmAir32F103c8t6为例,型号选择:?选择stm32/Air32F103C8t6作为对象都可以正常编译。
- 📢由于工程中的头文件路径依赖关系,工程目录结构不能随意移动。(如需拷贝,需要将
DAPLink-main目录全部拷贝)
- 🌿
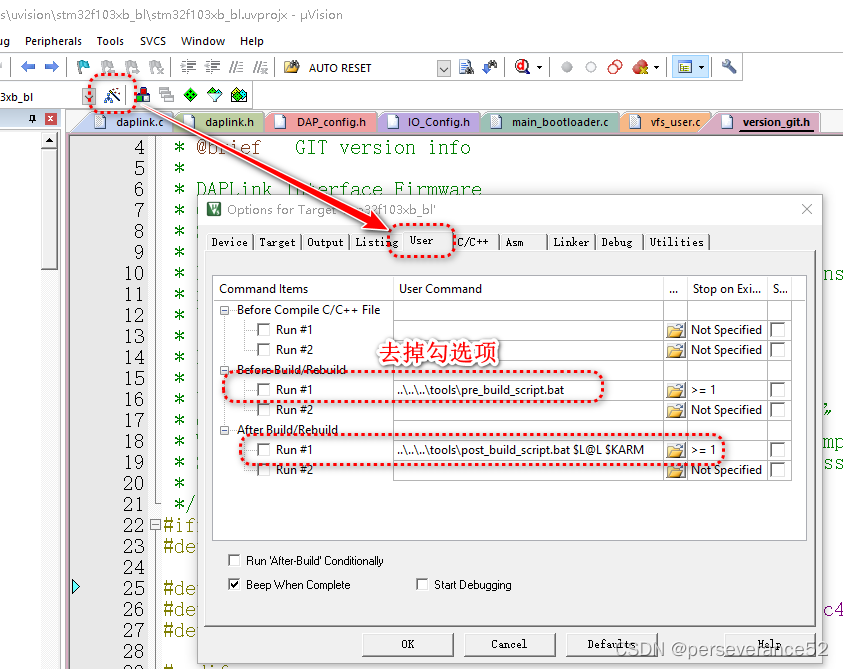
options for Target选项-User
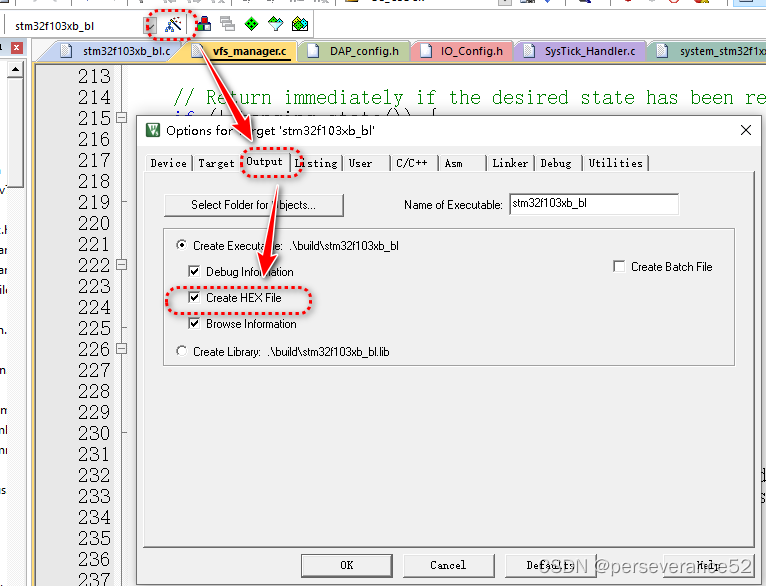
- 🌿勾选生成Hex文件
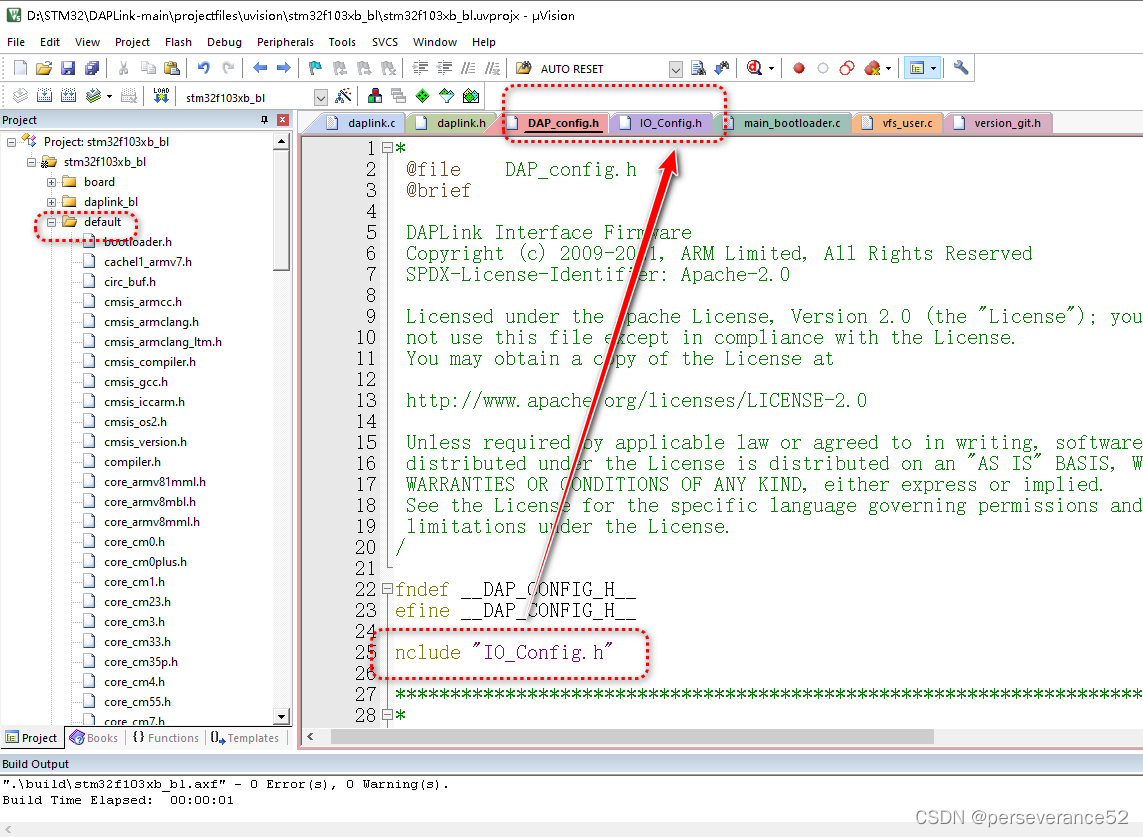
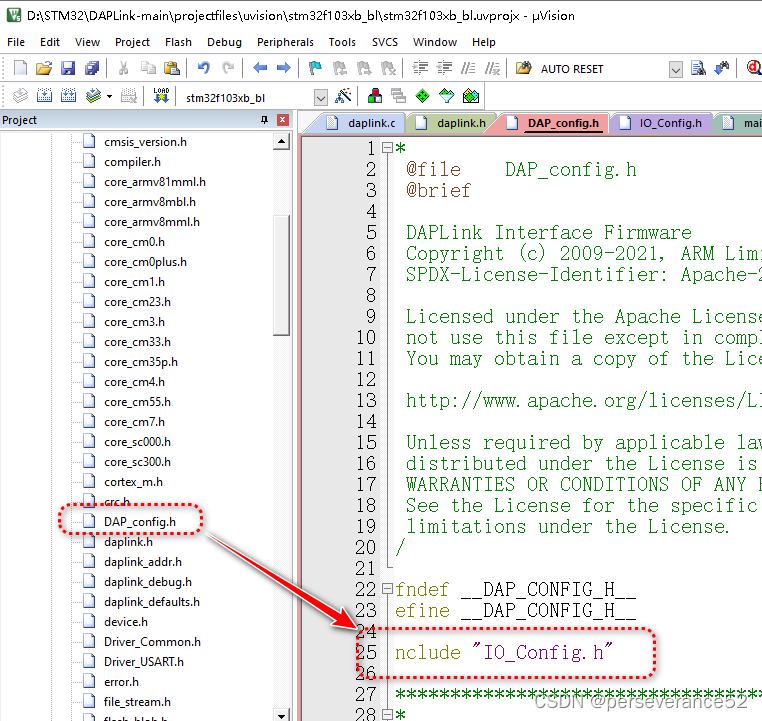
- 🌿相关引脚配置都在
IO_Config.h文件中:
/**
 * @file    IO_Config.h
 * @brief
 *
 * DAPLink Interface Firmware
 * Copyright (c) 2009-2016, ARM Limited, All Rights Reserved
 * SPDX-License-Identifier: Apache-2.0
 *
 * Licensed under the Apache License, Version 2.0 (the "License"); you may
 * not use this file except in compliance with the License.
 * You may obtain a copy of the License at
 *
 * http://www.apache.org/licenses/LICENSE-2.0
 *
 * Unless required by applicable law or agreed to in writing, software
 * distributed under the License is distributed on an "AS IS" BASIS, WITHOUT
 * WARRANTIES OR CONDITIONS OF ANY KIND, either express or implied.
 * See the License for the specific language governing permissions and
 * limitations under the License.
 */

#ifndef __IO_CONFIG_H__
#define __IO_CONFIG_H__

#include "stm32f1xx.h"
#include "compiler.h"
#include "daplink.h"

COMPILER_ASSERT(DAPLINK_HIC_ID == DAPLINK_HIC_ID_STM32F103XB);

//USB control pin
#define USB_CONNECT_PORT_ENABLE()    __HAL_RCC_GPIOA_CLK_ENABLE()
#define USB_CONNECT_PORT_DISABLE()   __HAL_RCC_GPIOA_CLK_DISABLE()
#define USB_CONNECT_PORT             GPIOA
#define USB_CONNECT_PIN              GPIO_PIN_15
#define USB_CONNECT_ON()             (USB_CONNECT_PORT->BSRR = USB_CONNECT_PIN)
#define USB_CONNECT_OFF()            (USB_CONNECT_PORT->BRR  = USB_CONNECT_PIN)

//Connected LED
#define CONNECTED_LED_PORT           GPIOB
#define CONNECTED_LED_PIN            GPIO_PIN_11
#define CONNECTED_LED_PIN_Bit        11

//When bootloader, disable the target port(not used)
#define POWER_EN_PIN_PORT            GPIOB
#define POWER_EN_PIN                 GPIO_PIN_15
#define POWER_EN_Bit                 15

// nRESET OUT Pin
#define nRESET_PIN_PORT              GPIOB
#define nRESET_PIN                   GPIO_PIN_0
#define nRESET_PIN_Bit               0

//SWD
#define SWCLK_TCK_PIN_PORT           GPIOB
#define SWCLK_TCK_PIN                GPIO_PIN_13
#define SWCLK_TCK_PIN_Bit            13

#define SWDIO_OUT_PIN_PORT           GPIOB
#define SWDIO_OUT_PIN                GPIO_PIN_14
#define SWDIO_OUT_PIN_Bit            14

#define SWDIO_IN_PIN_PORT            GPIOB
#define SWDIO_IN_PIN                 GPIO_PIN_12
#define SWDIO_IN_PIN_Bit             12

//JTAG
#define TDO_PIN_PORT                 GPIOA
#define TDO_PIN                      GPIO_PIN_10
#define TDO_PIN_Bit                  10

#define TDI_PIN_PORT                 GPIOA
#define TDI_PIN                      GPIO_PIN_9
#define TDI_PIN_Bit                  9

//LEDs
//USB status LED
#define RUNNING_LED_PORT             GPIOA
#define RUNNING_LED_PIN              GPIO_PIN_2
#define RUNNING_LED_Bit              2

#define PIN_HID_LED_PORT             GPIOA
#define PIN_HID_LED                  GPIO_PIN_6
#define PIN_HID_LED_Bit              6

#define PIN_CDC_LED_PORT             GPIOA
#define PIN_CDC_LED                  GPIO_PIN_10
#define PIN_CDC_LED_Bit              10

#define PIN_MSC_LED_PORT             GPIOA
#define PIN_MSC_LED                  GPIO_PIN_0
#define PIN_MSC_LED_Bit              0


#endif
📚72MHz主频STM32F103编译的固件
- 🏷由于源工程630M太多不方便分享。进提供相关固件。
📢烧录再啰嗦一遍:可通过STM32 ST-LINK Utility或者STM32CubeProgrammer软件烧录stm32f103xb_bl.Hex,Bootload程序。之后,就不需要以上工具了,再通过USB(PA11,PA12)连接电脑,将出现一个64M的U盘,将stm32f103xb_stm32f103rb_if.Hex文件拷贝到U盘中进行升级成DAPLINK。
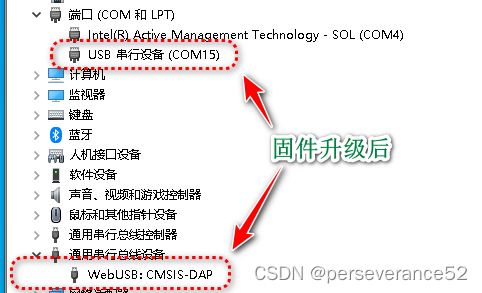
链接:https://pan.baidu.com/s/1NDvg_HMIuZ8lElKROrOsEg
提取码:gqq2
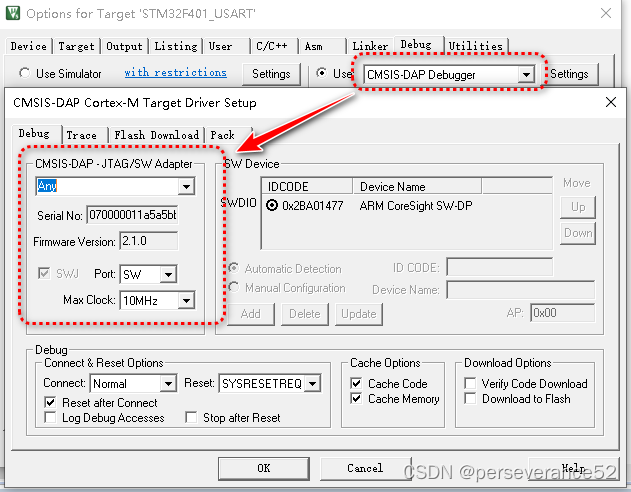
- 🔖Keil 选择DAPLINK烧录默认选项界面:
📘其他说明
- ?针对STM32F103制作DAPLINK,一定要注意,
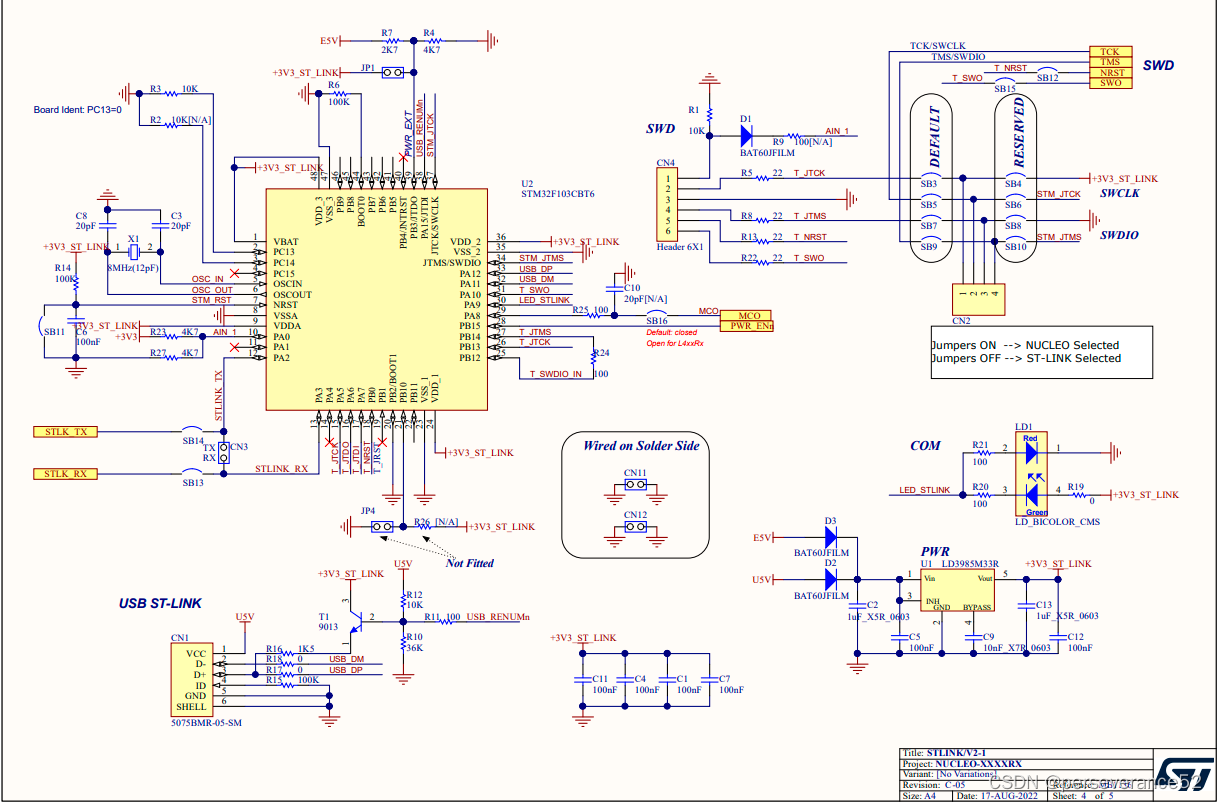
USB D+需要上拉一个1.5K的电阻,否则识别不到USB接口,STM32其他较新出的芯片,不需要此上拉电阻,这一点需要注意。

- 🍁ST-LINK原理图:
文章来源:https://blog.csdn.net/weixin_42880082/article/details/135110963
本文来自互联网用户投稿,该文观点仅代表作者本人,不代表本站立场。本站仅提供信息存储空间服务,不拥有所有权,不承担相关法律责任。 如若内容造成侵权/违法违规/事实不符,请联系我的编程经验分享网邮箱:chenni525@qq.com进行投诉反馈,一经查实,立即删除!
本文来自互联网用户投稿,该文观点仅代表作者本人,不代表本站立场。本站仅提供信息存储空间服务,不拥有所有权,不承担相关法律责任。 如若内容造成侵权/违法违规/事实不符,请联系我的编程经验分享网邮箱:chenni525@qq.com进行投诉反馈,一经查实,立即删除!
