idea快速搭建一个spring-cloud
发布时间:2024年01月11日
package com.example.consumer;

import org.springframework.boot.SpringApplication;
import org.springframework.boot.autoconfigure.SpringBootApplication;
import org.springframework.cloud.netflix.eureka.EnableEurekaClient;
import org.springframework.cloud.openfeign.EnableFeignClients;
import org.springframework.context.annotation.ComponentScan;
import org.springframework.stereotype.Component;
@SpringBootApplication

//扫描所有包
@ComponentScan("com.test")
//声明为注册服务
@EnableEurekaClient
//把调用注册子模块接口引入到Spring容器中(不加此注解会出现找不到@FeignClient修饰的接口)
@EnableFeignClients("com.test")//包路径解决启动类在别的包下问题

public class ConsumerApplication {

    public static void main(String[] args) {
        SpringApplication.run(ConsumerApplication.class, args);
    }

}
1、创建一个空的maven项目!
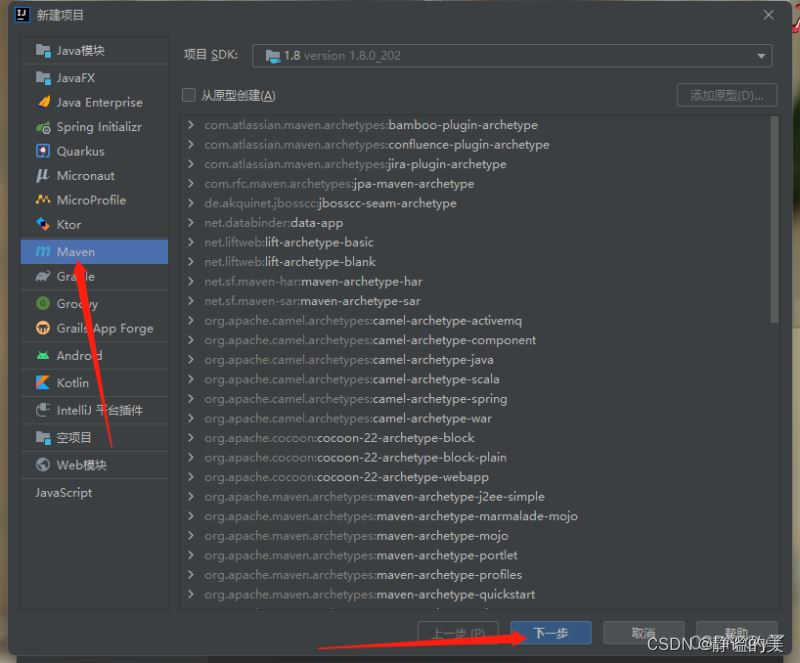
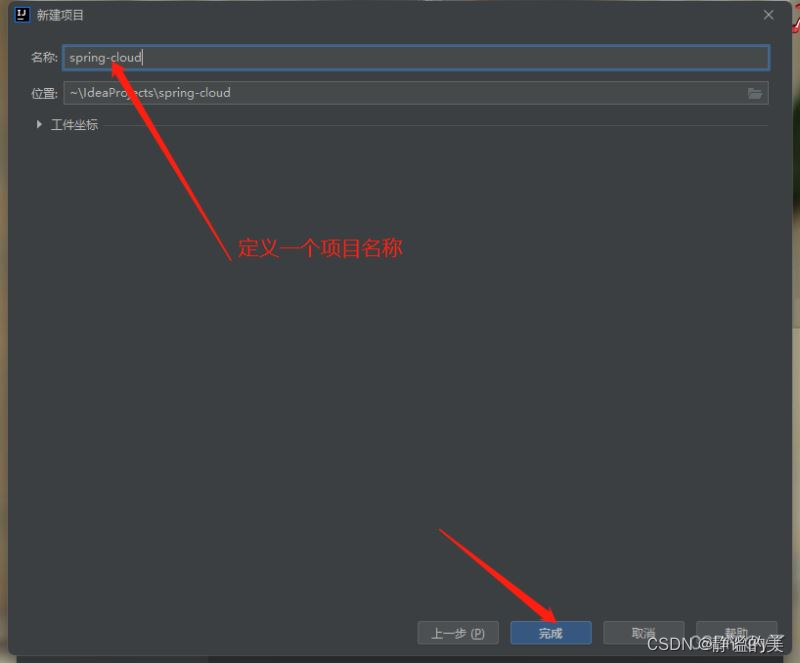
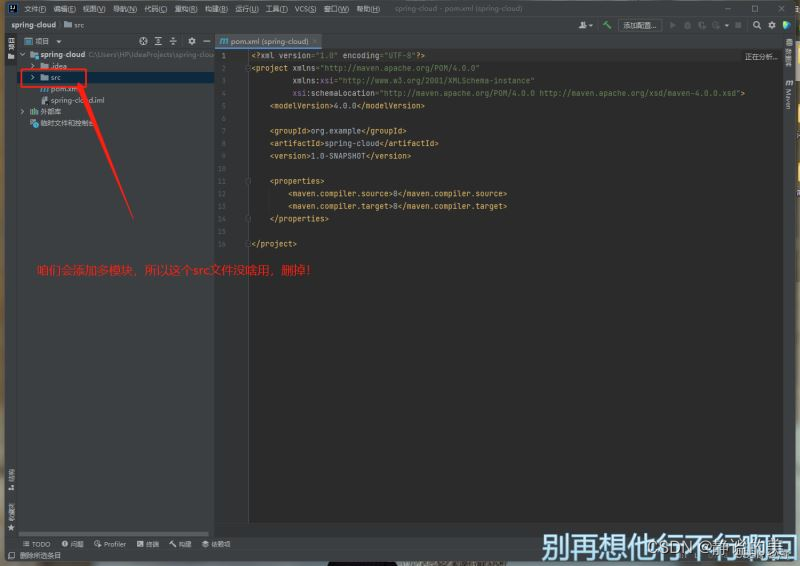
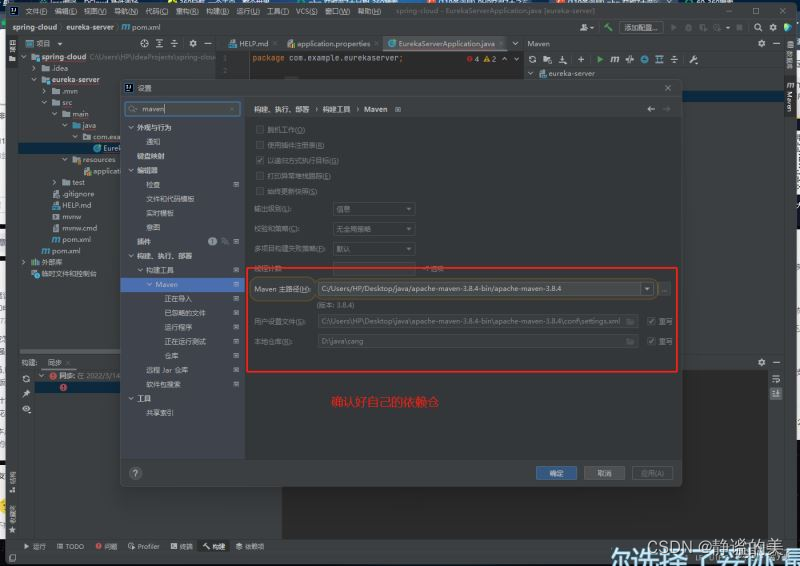
2、创建一个注册中心模块
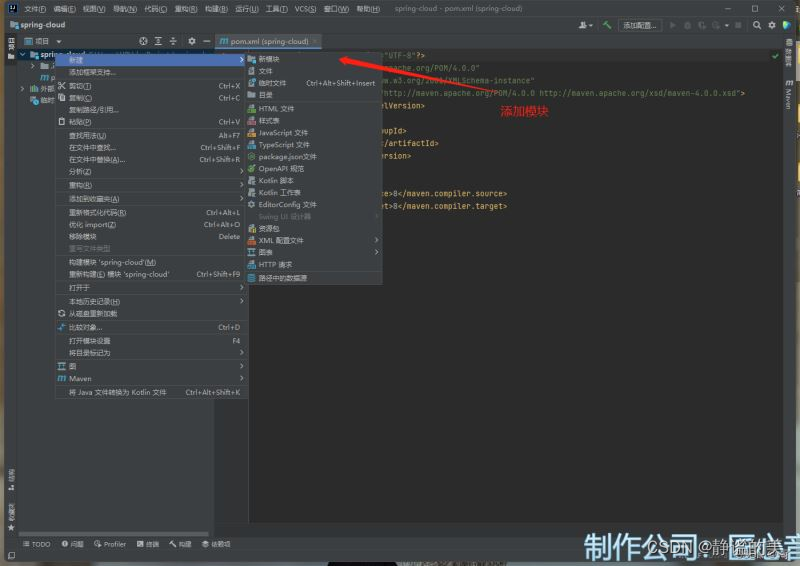
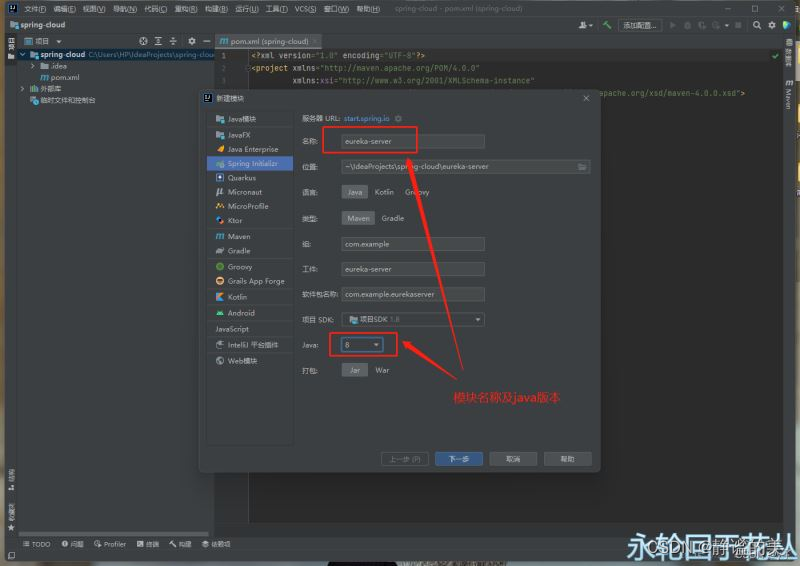
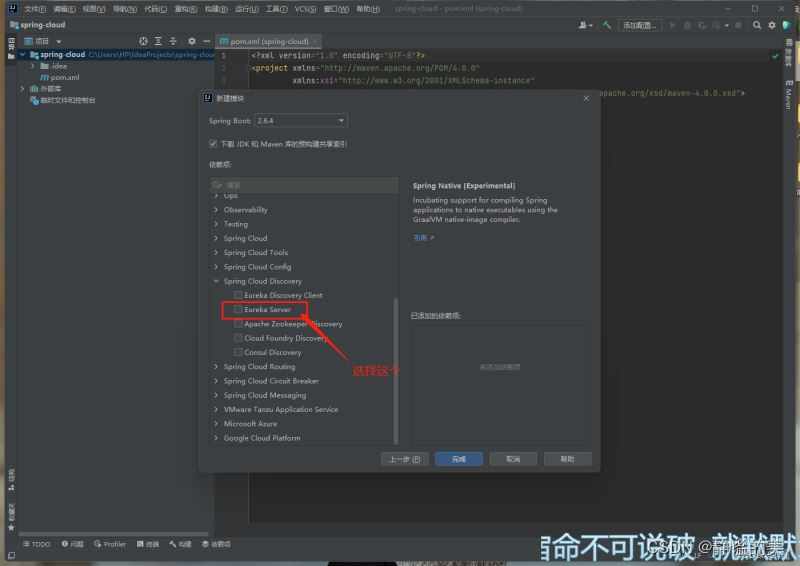
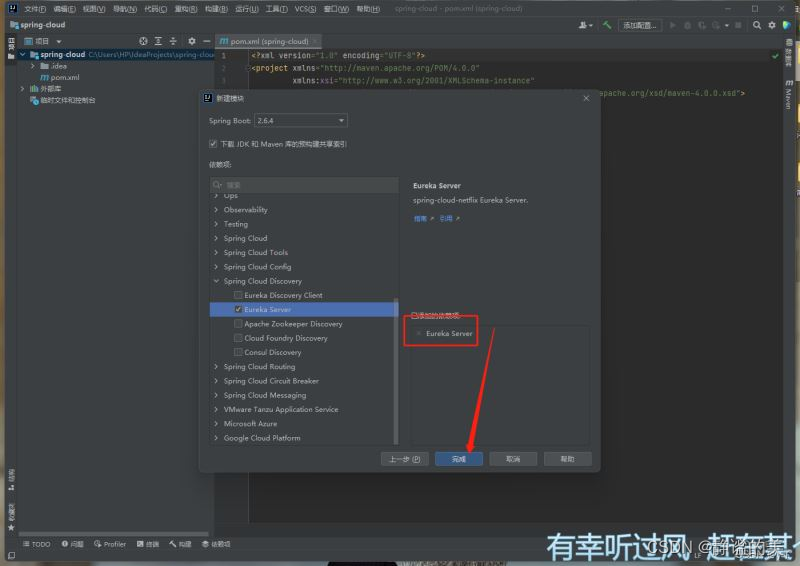
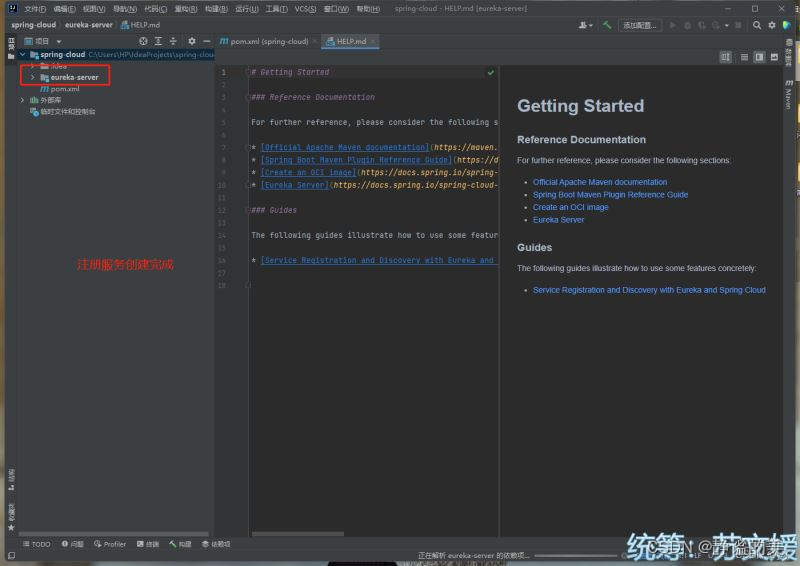
3、配置注册中心
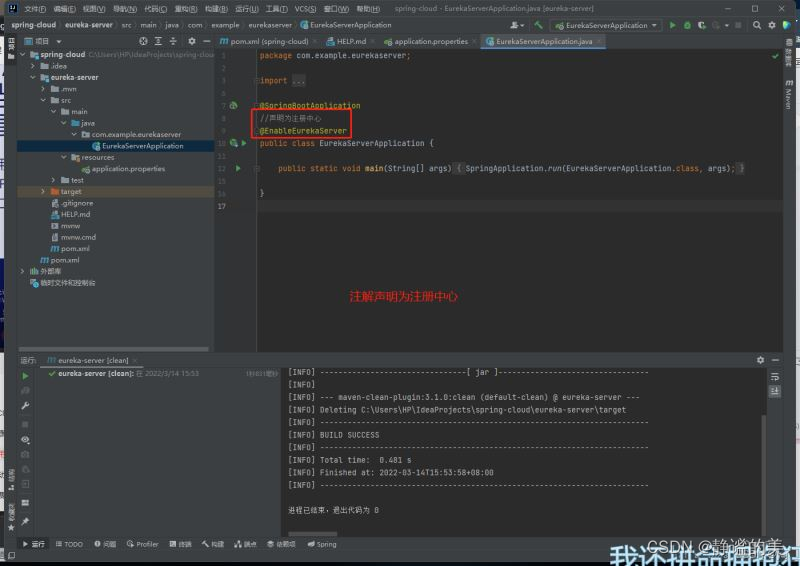
package com.example.eurekaserver;

import org.springframework.boot.SpringApplication;
import org.springframework.boot.autoconfigure.SpringBootApplication;
import org.springframework.cloud.netflix.eureka.server.EnableEurekaServer;

@SpringBootApplication
//声明为注册中心
@EnableEurekaServer
public class EurekaServerApplication {

    public static void main(String[] args) {
        SpringApplication.run(EurekaServerApplication.class, args);
    }

}
配置文件改用yml,配置如下:
server:
  #运行端口
  port: 8888
eureka:
  instance:
    #注册ip
    hostname: localhost
  client:
    #禁止自己当做服务注册
    register-with-eureka: false
    #屏蔽注册信息
    fetch-registry: false
    #注册url
    serviceUrl:
      defaultZone: http://${eureka.instance.hostname}:${server.port}/eureka/
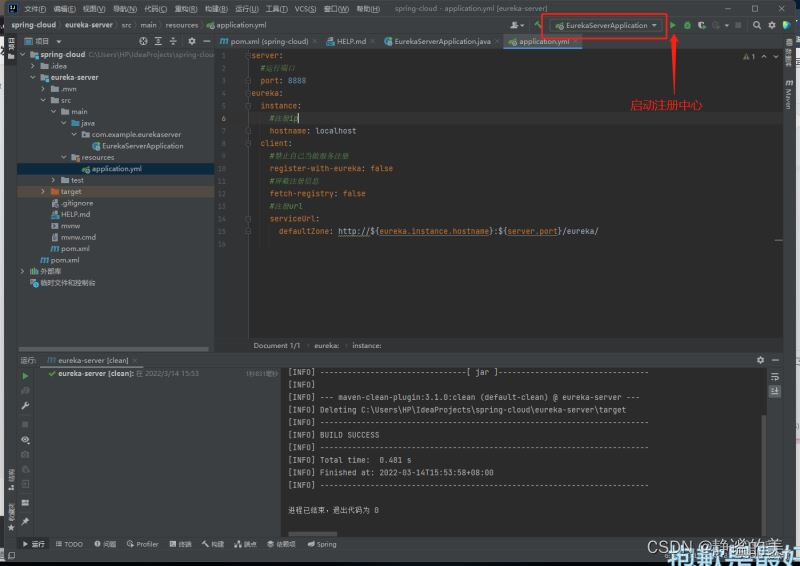
注意pom文件中springcloud与springboot的版本对应问题
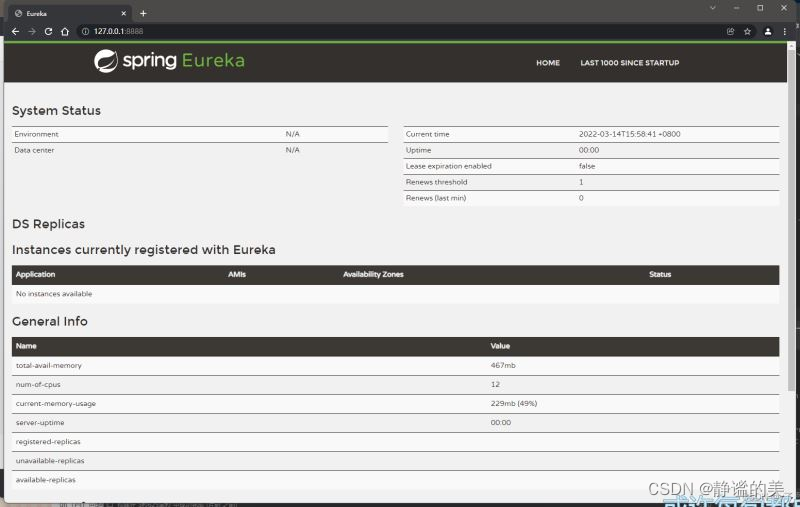
启动成功后,访问本地+端口即可看到注册中心页面,说明成功啦!
文章来源:https://blog.csdn.net/weixin_36998547/article/details/135534115
本文来自互联网用户投稿,该文观点仅代表作者本人,不代表本站立场。本站仅提供信息存储空间服务,不拥有所有权,不承担相关法律责任。 如若内容造成侵权/违法违规/事实不符,请联系我的编程经验分享网邮箱:chenni525@qq.com进行投诉反馈,一经查实,立即删除!
本文来自互联网用户投稿,该文观点仅代表作者本人,不代表本站立场。本站仅提供信息存储空间服务,不拥有所有权,不承担相关法律责任。 如若内容造成侵权/违法违规/事实不符,请联系我的编程经验分享网邮箱:chenni525@qq.com进行投诉反馈,一经查实,立即删除!
最新文章
- Python教程
- 深入理解 MySQL 中的 HAVING 关键字和聚合函数
- Qt之QChar编码(1)
- MyBatis入门基础篇
- 用Python脚本实现FFmpeg批量转换
- LlamaIndex的5种高级RAG方法
- 计算机网络传输层(期末、考研)
- HTML 页面布局案例及代码。
- vscode配置Todo Tree插件
- 有没有永久免费的云服务器推荐?
- 企业内训系统源码开发实战:搭建实践与经验分享
- python中[None, :]的用法
- 【ESP32双核运行Freertos及互斥量】
- Python武器库开发-武器库篇之子域名扫描器开发(四十一)
- Solidity-025 ExplicitConversion