@EnableXXX注解+@Import轻松实现SpringBoot的模块装配
文章目录

前言
最早我们开始学习或接触过 SSH 或者 SSM 的框架整合,大家应该还记得那些配置文件有多烦吧,又多又不好记真的很让人头大。在处理配置文件的同时,大家是否有想过:如果能有一种方式,可以使用很少的配置,甚至不配置就可以完成一个功能的装载,那岂不是省了很多事?
这个疑问在 SpringBoot 中得以解决,也就是我们常说的自动装配,而这个自动装配的核心技术就是模块装配 + 条件装配。
今天我们这里主要讲解模块装配,条件装配我们后续再讲解!
原生手动装配
通常我们使用 @Configuration + @Bean 注解组合,或者 @Component + @ComponentScan 注解组合,可以实现编程式 / 声明式的手动装配。这两种方式相信大家都肯定会了。
不过,我们思考一个问题:如果使用这两种方式,如果要注册的 Bean 很多,要么一个一个的 @Bean 编程式写,要么就得选好包进行组件扫描,而且这种情况还得每个类都标注好 @Component 或者它的衍生注解才行。面对数量很多的 Bean ,这种装配方式很明显会比较麻烦,需要有一个新的解决方案。
那就是我们接下来要讲的模块装配!
模块装配概述
SpringFramework 3.0 的发布,全面支持了注解驱动开发,随之而来的就是快速方便的模块装配。
模块通常就是一个功能单元,而模块装配就可以理解为把一个模块需要的核心功能组件都装配好,当然如果能有尽可能简便的方式那最好。
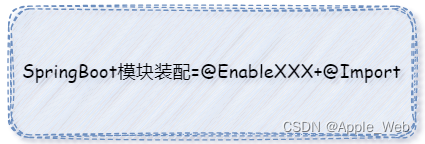
SpringFramework 中的模块装配,是在 3.1 之后引入大量 @EnableXXX 注解,来快速整合激活相对应的模块。
在 3.1.5 节中,它有介绍 @EnableXXX 注解的使用,并且它还举了不少例子,这里面不乏有咱可能熟悉的:
EnableTransactionManagement:开启注解事务驱动EnableWebMvc:激活 SpringWebMvcEnableAspectJAutoProxy:开启注解 AOP 编程EnableScheduling:开启调度功能(定时任务)
另外比如:我们常用的@SpringBootApplication注解中用于开启自动注入的@EnableAutoConfiguration,开启异步方法的@EnableAsync,开启将配置文件中的属性以bean的方式注入到IOC容器的@EnableConfigurationProperties等。
其实 @Enable*注解很简单,随便找一个注解,点进去一看就能恍然大悟,它的所有核心 都在@Import 注解当中。 所有真正核心的 是@Import注解,由它去加载它自己对应的配置类,然后启动他的功能。
比如我们上面的EnableAsync,它会将AsyncConfigurationSelector放入容器中,当Spring启动,会执行selectImports(AnnotationMetadata annotationMetadata)方法,在这个方法中我们做了某些处理,使得和 @Enable*搭配使用的注解生效。
...
@Import({AsyncConfigurationSelector.class})
public @interface EnableAsync {
    Class<? extends Annotation> annotation() default Annotation.class;

    boolean proxyTargetClass() default false;

    AdviceMode mode() default AdviceMode.PROXY;

    int order() default Integer.MAX_VALUE;
}
那有人会说@Import注解就可以了,还要Enable*注解干嘛,我直接使用@Import注解去加载就好了,这不是多此一举吗? 看看下面的好处就知道了
-
除了桥梁的作用,它还可以携带上一些参数:在解析处理这个 注解的时候,可以从这里拿到一些 自定义配置的参数,去做相关的操作。
-
启用这个功能可能需要更多的 类加载,还有要其它注解去配和,如果不将其包装到 @Enable*中,那对开发者来说,配置起来又相对麻烦了许多,将其包装到一起,只需要记住使用这一功能记住这个注解即可。极大的方面!!。
-
将功能做组建抽离开来,降低耦合性。
模块装配的四种方式
先记住使用模块装配的核心原则:自定义注解 + @Import 导入组件。

准备工作
声明自定义注解
我们自定义一个注解用来是否允许来进行日志记录
@Documented
@Target({ElementType.TYPE})
@Retention(RetentionPolicy.RUNTIME)
@Inherited
public @interface EnableLog {

}
模块装配需要一个最核心的注解是 @Import ,它要标注在 @EnableLog 上。不过这个 @Import 中需要传入 value 值,点开看一眼它的源码吧:
@Target(ElementType.TYPE)
@Retention(RetentionPolicy.RUNTIME)
@Documented
public @interface Import {

	/**
	 * {@link Configuration @Configuration}, {@link ImportSelector},
	 * {@link ImportBeanDefinitionRegistrar}, or regular component classes to import.
	 */
	Class<?>[] value();
}
文档注释已经写得非常明白了:它可以导入配置类、ImportSelector 的实现类,ImportBeanDefinitionRegistrar 的实现类,或者普通类。咱这里先来快速上手,所以我们先选择使用普通类导入。
导入普通类
注意只有在Spring 4.2之后,
@Import可以直接指定实体类,加载这个类定义到context中。
注意我们的MyLog是没有任何注解的
@Documented
@Retention(RetentionPolicy.RUNTIME)
@Target(ElementType.TYPE)
@Import(MyLog.class)
public @interface EnableLog {

}

public calss MyLog{...}
这样就代表,如果标注了 @EnableLog 注解,就会触发 @Import 的效果,向容器中导入一个 MyLog 类型的 Bean 。
如何进行生效?
在使用自定义的Enable注解需要搭配Spring原生的 @Configuration 进行使用,单纯只有@EnableLog是不行的
如果是SpringBoot项目,可以直接放在@SpringBootApplication注解的类上面,有人会问为什么放在这里可以呢?原因就是 @SpringBootConfiguration注解上面配置了 @Configuration 注解。@SpringBootApplication就相当于一个@Configuration注解,所以我们自定义的Enable注解可以直接放在@SpringBootApplication,当然也可以自定义一个用@Configuration修饰的类上面。
下面的例子都需要这个MyLogConfiguration 配置类,后面就不进行赘述了。
@Configuration
@EnableLog
public class MyLogConfiguration {

}
经过这样,运行发现我们的spring容器中已经有了MyLog类
public class LogApplication {

    public static void main(String[] args) throws Exception {
        AnnotationConfigApplicationContext ctx = new AnnotationConfigApplicationContext(MyLogConfiguration.class);
        Boss boss = ctx.getBean(MyLog.class);
        System.out.println(boss);
    }
}
导入配置类
如果需要直接导入一些现有的配置类,使用 @Import 也可以直接加载进来。
@Configuration
public class LogBeanConfiguration {

    @Bean
    public MyLog myLog() {
        return new MyLog();
    }

    @Bean
    public LogUtil logUtil() {
        return new LogUtil();
    }

}
然后只需要在 @EnableTavern 的 @Import 中把这个配置类加上即可:
@Documented
@Retention(RetentionPolicy.RUNTIME)
@Target(ElementType.TYPE)
@Import(MyLog.class,LogBeanConfiguration.class)
public @interface EnableLog {

}
运行发现,我们容器打印出两个MyLog类:,LogBeanConfiguration 配置类也被注册到 IOC 容器成为一个 Bean 了。
    public static void main(String[] args) throws Exception {
        AnnotationConfigApplicationContext ctx = new AnnotationConfigApplicationContext(MyLogConfiguration.class);
        Stream.of(ctx.getBeanDefinitionNames()).forEach(System.out::println);
        System.out.println("--------------------------");
        Map<String, MyLog> myLogs = ctx.getBeansOfType(MyLog.class);
        myLogs.forEach((name, myLog) -> System.out.println(myLog));
    }
导入ImportSelector
注意,我们可能还会看到DeferredImportSelector这个注解,这个注解其实是继承了ImportSelector
他们算是一类接口,只是执行的时间不同而已。看Deferred这个单词意思就知道了,Deferred只是进行延迟了。
我们的 ImportSelector 可以导入普通类和配置类:
注意,
selectImports方法的返回值是一个 String 类型的数组,它这样设计的目的是什么呢?咱来看看 selectImports 方法的文档注释:根据导入的
@Configuration类的AnnotationMetadata选择并返回要导入的类的类名。也就是可以根据AnnotationMetadata注解条件在进行匹配
public class MyLogImportSelector implements ImportSelector {

    @Override
    public String[] selectImports(AnnotationMetadata importingClassMetadata) {
        return new String[] {MyLog.class.getName(), LogBeanConfiguration.class.getName()};
    }
}
@Documented
@Retention(RetentionPolicy.RUNTIME)
@Target(ElementType.TYPE)
@Import(MyLog.class,LogBeanConfiguration.class,MyLogImportSelector.class)
public @interface EnableLog {

}
运行后我们会发现,有4个MyLog.class类,MyLog.class一个,LogBeanConfiguration.class一个,MyLogImportSelector.class两个
导入ImportBeanDefinitionRegistrar
如果说 ImportSelector 更像声明式导入的话,那 ImportBeanDefinitionRegistrar 就可以解释为编程式向 IOC 容器中导入 Bean 。不过由于它导入的实际是 BeanDefinition ( Bean 的定义信息)。我们对 ImportBeanDefinitionRegistrar 有一个快速的使用入门即可。
简单解释下,这个 registerBeanDefinition 方法传入的两个参数,第一个参数是 Bean 的名称(id),第二个参数中传入的 RootBeanDefinition 要指定 Bean 的字节码( .class )。
public class MyLogRegistrar implements ImportBeanDefinitionRegistrar {

    @Override
    public void registerBeanDefinitions(AnnotationMetadata metadata, BeanDefinitionRegistry registry) {
        registry.registerBeanDefinition("myLog", new RootBeanDefinition(MyLog.class));
    }
}
@Documented
@Retention(RetentionPolicy.RUNTIME)
@Target(ElementType.TYPE)
@Import(MyLog.class,LogBeanConfiguration.class,MyLogImportSelector.class,MyLogRegistrar.class)
public @interface EnableLog {

}
运行后我们会发现,有5个MyLog.class类,MyLog.class一个,LogBeanConfiguration.class一个,MyLogImportSelector.class两个
注意这里
MyLogRegistrar本身没有注册到 IOC 容器中。
总结
- Enable类型的注解从Spring原生的和自己拓展的来看,相当于一个开关。增加这个注解就开启了一个功能,需要搭配其他的注解来使用,例如:
@EnableAsync搭配@Async注解,@EnableTransactionManagement搭配@Transactional注解使用 - Enable类型注解生效需要搭配
@Configuration注解 - Enable类型注解的实现需要搭配注解
@Import导入,可以导入普通类、配置类,而更高级一点的功能实现需要实现DeferredImportSelector、ImportSelector、ImportBeanDefinitionRegistrar三个接口中一个。
TODO后续–条件装配
通过模块装配,咱可以通过一个注解,一次性导入指定场景中需要的组件和配置。那么只靠模块装配的内容,就可以把这些装配都考虑到位吗?
比如只要配置类中声明了 @Bean 注解的方法,那这个方法的返回值就一定会被注册到 IOC 容器成为一个 Bean 。但是有时候我们需要根据某些条件进行判断呢?这就需要我们的条件装配了,具体篇幅有限,后续在进行讲解
本文来自互联网用户投稿,该文观点仅代表作者本人,不代表本站立场。本站仅提供信息存储空间服务,不拥有所有权,不承担相关法律责任。 如若内容造成侵权/违法违规/事实不符,请联系我的编程经验分享网邮箱:chenni525@qq.com进行投诉反馈,一经查实,立即删除!
- Python教程
- 深入理解 MySQL 中的 HAVING 关键字和聚合函数
- Qt之QChar编码(1)
- MyBatis入门基础篇
- 用Python脚本实现FFmpeg批量转换
- 树莓派变身高效VPN:PiVPN设置教程
- 物联网协议Coap之C#基于Mozi的CoapServer实现解析
- 普中STM32-PZ6806L 使用FlyMcu串口烧录程序
- pve8.1版本安装及环境初始化过程记录
- pytorch01:概念、张量操作、线性回归与逻辑回归
- modbus tcp通讯
- 游戏录屏工具大揭秘,哪一款才是你的菜?
- 软件项目验收计划书
- 三叠云协同型SRM,供应链管理的卓越之道
- Windows10安装Hadoop3.1.3环境