Nginx 主动检查 被动检查
被动检查
proxy_next_upstream

http {
	upstrean httpget {
	//max_fail=5,失败5词,直接下线 down,
	//fail_timeout=10s, 10s之后  重新上线 up
	//fail_timeout=10s,  max_fail=5,5次失败在10s内,下线,
   		server IP:80 max_fails=5 fail_timeout=10s;
   		server IP:90;
   }
	server {
		listen 80;
		server_name:xxxx;
		localion / {
			proxy_next_upstream error timeout;
			proxy_next_upstream_timeout 15s;
			proxy_next_upstream_tries 5;
			proxy_pass http://httpget;
			root html;
		}
	}
}
nginx被动健康检查的缺陷
(1)Nginx只有当有访问时后,才发起对后端节点探测。
(2)如果本次请求中,节点正好出现故障,Nginx依然将请求转交给故障的节点,然后再转交给健康的节点处理。所以不会影响到这次请求的正常进行。但是会影响效率,因为多了一次转发。
(3)自带模块无法做到预警。
主动检查
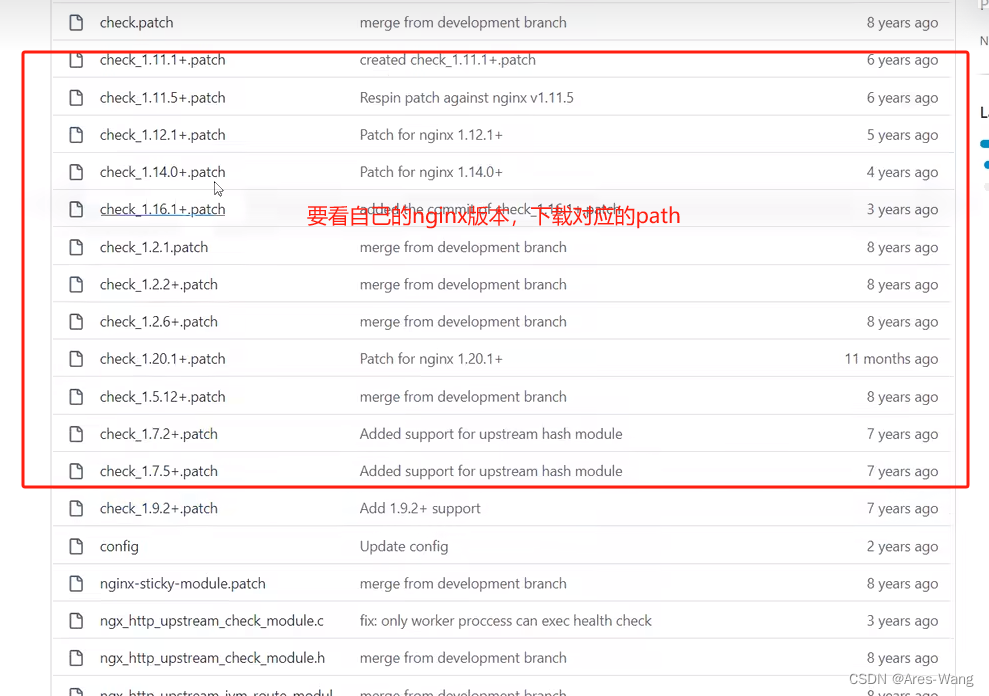
下载地址 https://github.com/yaoweibin/nginx_upstream_check_module


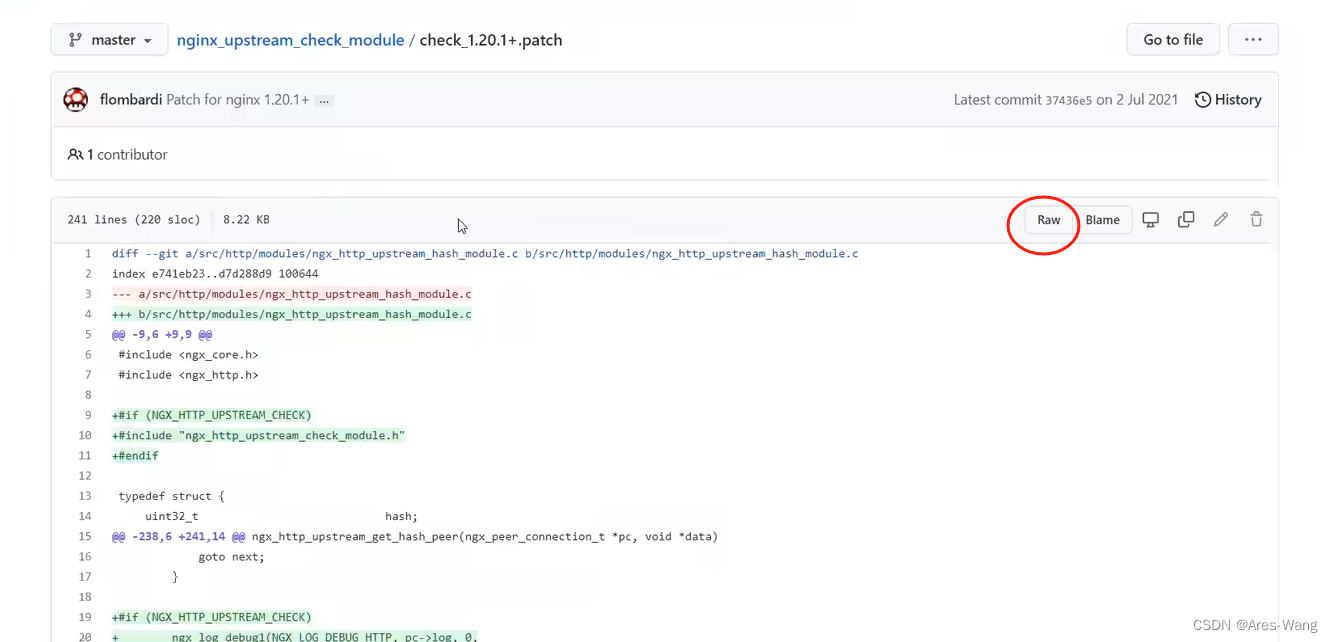
raw之后,复制里面的内容,
在nginx中 vim path
在nginx的解压文件的目录下,执行path
path -p1 > /xxx 上面的path路径


./configure --prefixe=/usr/local/nginx --add-module=/xx nginx_upstream_check_module 解压文件
make
make install

指定配置文件启动(如果不用默认的配置文件)
nginx -c /path/to/nginx.conf
nginx主动健康检查
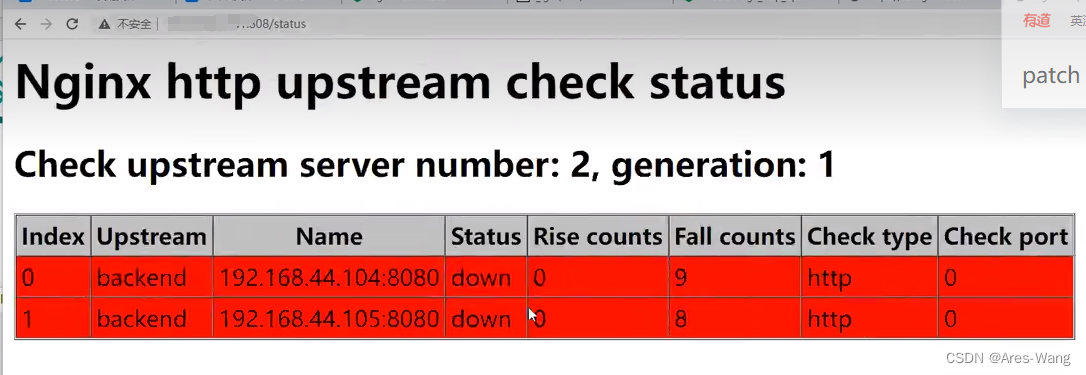
(1)区别于nginx自带的非主动式的心跳检测,淘宝开发的tengine自带了一个提供主动式后端服务器心跳检测模块,若健康检查包类型为http,在开启健康检查功能后,nginx会根据设置的间隔向指定的后端服务器端口发送健康检查包,并根据期望的HTTP回复状态码来判断服务是否健康。
(2)后端真实节点不可用,则请求不会转发到故障节点
(3)故障节点恢复后,请求正常转发
  http {
        upstream cluster {
            # simple round-robin
            server 192.168.0.1:80;
            server 192.168.0.2:80;
            check interval=5000 rise=1 fall=3 timeout=4000;
            #check interval=3000 rise=2 fall=5 timeout=1000 type=ssl_hello;
            #check interval=3000 rise=2 fall=5 timeout=1000 type=http;
            #check_http_send "HEAD / HTTP/1.0\r\n\r\n";
            #check_http_expect_alive http_2xx http_3xx;
        }
        server {
            listen 80;
            location / {
                proxy_pass http://cluster;
            }

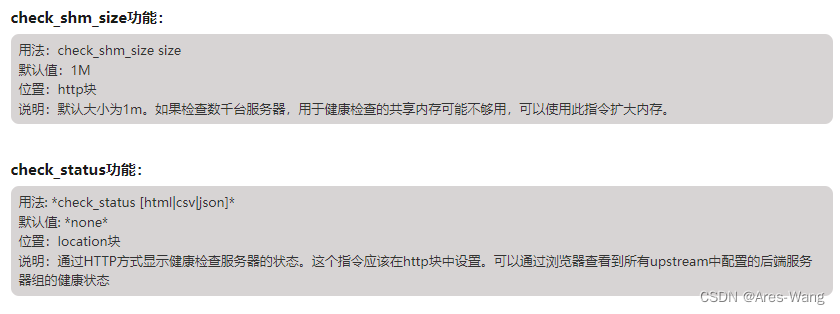
            location /status {
                check_status;
                access_log   off;
                #allow SOME.IP.ADD.RESS;
                #deny all;
           }
        }
    }
check功能
interval: 向后端发送的健康检查包的间隔,单位为毫秒
rsie: 如果连续成功次数达到rise_count,服务器就被认为是up
fall: 如果连续失败次数达到fall_count,服务器就被认为是down
timeout: 后端健康请求的超时时间,单位为毫秒
type: 健康检查包的类型,支持tcp、ssl_hello、http、mysql、ajp
用法: check interval=milliseconds [fall=count] [rise=count] [timeout=milliseconds] [default_down=true|false] [type=tcp|http|ssl_hello|mysql|ajp] [port=check_port]
默认值: 如果没有配置参数,默认值是:interval=30000 fall=5 rise=2 timeout=1000 default_down=true type=tcp
位置:upstream块
#port: 指定后端服务器的检查端口。你可以指定不同于真实服务的后端服务器的端口,比如后端提供的是443端口的应用,你可以去检查80端口的状态来判断后端健康状况。默认是0,表示跟后端server提供真实服务的端口一样。
check_http_send 功能
用法:check_http_send “HEAD /ierp/ HTTP/1.0\r\n\r\n”
默认值: “GET / HTTP/1.0\r\n\r\n”
位置:upstream块
说明:http://IP:8080/做健康检测,但有问题的是,我们的服务不一定都是/结尾,有时需要加后缀才能访问到资源。比如,如果不在后端tomcat配置上下文路径那么(test.war)正常访问路径就是http://IP:8080/test,对于非根访问上述配置健康检查就一定都是error状态。
check_http_send字段 HEAD后面的 / 就是路径的配置,与其对应的正确能被识别到的地址为"HEAD /ierp/checkk8shealth HTTP/1.0\r\n\r\n",/后面可以为项目中的某个url只要能请求到就可以
check_http_expect_alive功能:
用法: check_http_expect_alive [ http_2xx | http_3xx | http_4xx | http_5xx ]
默认值: http_2xx | http_3xx
位置:upstream块
说明:这些状态码表示上游服务器的http响应是正常的,后端是活的。
check_keepalive_requests功能:
用法: check_keepalive_requests num
默认值: check_keepalive_requests 1
位置:upstream块
说明:该指令指定在一个连接上发送的请求数,默认值1表示nginx在收到请求后肯定会关闭连接。
check_fastcgi_param功能:
用法:check_fastcgi_params parameter value ,如,默认指令是这样的:
check_fastcgi_param “REQUEST_METHOD” “GET”;
check_fastcgi_param “REQUEST_URI” “/”;
check_fastcgi_param “SCRIPT_FILENAME” “index.php”;
位置:upstream块
说明:如果设置检查类型为fastcgi,则检查函数将发送这个fastcgi报头来检查上游服务器。

本文来自互联网用户投稿,该文观点仅代表作者本人,不代表本站立场。本站仅提供信息存储空间服务,不拥有所有权,不承担相关法律责任。 如若内容造成侵权/违法违规/事实不符,请联系我的编程经验分享网邮箱:chenni525@qq.com进行投诉反馈,一经查实,立即删除!
- Python教程
- 深入理解 MySQL 中的 HAVING 关键字和聚合函数
- Qt之QChar编码(1)
- MyBatis入门基础篇
- 用Python脚本实现FFmpeg批量转换
- grep笔记240103
- js添加、删除、替换、插入元素的方法
- 宠物空气净化器哪个品牌高质量?猫用空气净化器五大品牌推荐
- 人工智能应用在哪些领域?
- 实训4---硬件部分---点灯实验--按键控制灯实验--uart串口实验
- 腾讯AILabC++开发日常实习一面
- Flink实时电商数仓之DWS层
- MIT_线性代数笔记:第 23 讲 微分方程和 exp(At)
- 代码随想录Day.31 | 455. 分发饼干、376. 摆动序列、53. 最大子序和
- Java中Pattern、Matcher使用过程中的内存泄漏风险