flask搞个简单登录界面
发布时间:2023年12月18日
登录界面
直接放上login.html模板:
<!DOCTYPE html>
<html lang="en">
<head>
    <meta charset="UTF-8">
    <meta name="viewport" content="width=device-width, initial-scale=1.0">
    <title>Login Page</title>
    <style>
        body {
            font-family: Arial, sans-serif;
            background-color: #f4f4f4;
            margin: 0;
            padding: 0;
            display: flex;
            align-items: center;
            justify-content: center;
            height: 100vh;
        }

        .login-container {
            background-color: #fff;
            padding: 20px;
            border-radius: 8px;
            box-shadow: 0 0 10px rgba(0, 0, 0, 0.1);
        }

        .form-group {
            margin-bottom: 15px;
        }

        .form-group label {
            display: block;
            margin-bottom: 8px;
            font-weight: bold;
        }

        .form-group input {
            width: 100%;
            padding: 8px;
            box-sizing: border-box;
            border: 1px solid #ccc;
            border-radius: 4px;
        }

        .form-group button {
            padding: 10px;
            background-color: #007bff;
            color: #fff;
            border: none;
            border-radius: 4px;
            cursor: pointer;
        }
        /* 设置动图的样式和位置 */
        .animated-image {
            /* 宽度和高度可以根据需要调整 */
            width: 200px;
            height: 200px;
            /* 位置属性可以控制动图的位置 */
            position: absolute; /* 或者使用其他位置属性,如 relative、fixed 等 */
            top: 50px; /* 调整 top、right、bottom 和 left 属性来定位动图 */
            left: 100px;
        }
    </style>
</head>
<body>
    <!-- 使用 img 标签嵌入动图 -->
    <img src="{{ url_for('static', filename='huaji.gif') }}" alt="欢迎" class="animated-image">

    <div class="login-container">
        <h2>Login</h2>
        <form action="/login" method="post">
            <div class="form-group">
                <label for="username">Username:</label>
                <input type="text" id="username" name="username" required>
            </div>
            <div class="form-group">
                <label for="password">Password:</label>
                <input type="password" id="password" name="password" required>
            </div>
            <div class="form-group">
                <button type="submit">Login</button>
            </div>
        </form>
    </div>

</body>
</html>
<img src="{{ url_for('static', filename='huaji.gif') }}" alt="欢迎" class="animated-image">
让HTML显示gif文件,在flask中,{{ url_for('static', filename='huaji.gif') }}这个命令可以抓到 static文件夹下的huaji.gif文件
cclass="animated-image" 表示用上面规定的格式
即:
       /* 设置动图的样式和位置 */
        .animated-image {
            /* 宽度和高度可以根据需要调整 */
            width: 200px;
            height: 200px;
            /* 位置属性可以控制动图的位置 */
            position: absolute; /* 或者使用其他位置属性,如 relative、fixed 等 */
            top: 50px; /* 调整 top、right、bottom 和 left 属性来定位动图 */
            left: 100px;
        }
脚本这块:
from flask import request, Flask, render_template

# 实例化
app = Flask(__name__)
# 这里是主页面,即第一步显示的网页,有一个对话框和搜索按钮
@app.route('/')
def mainweb():
    return render_template('login.html')

# 设定第二步的跳转网页,methods 设定请求类型,这里可以指定一种类型,就不用判断了。主要是类型不同,获取结果的方式不同
@app.route('/login', methods=['POST'])
def login():
    # post 类型抓取对话框内的内容
    username = request.form.get("username", "")
    passwd = request.form.get("password", "")
    return render_template("result.html", result=f"欢迎{username},你的密码是:{passwd}")

if __name__ == '__main__':
    app.run(host="0.0.0.0", port=5000)
主要mainweb函数直接调用login.html
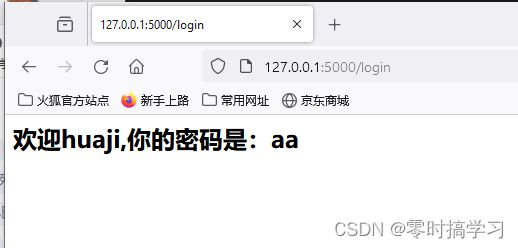
随后函数内 return跳转到 函数login中,然后就可以处理用户输入的用户名和密码。我这里是直接把用户名密码打印到网页上,以表示我读到了
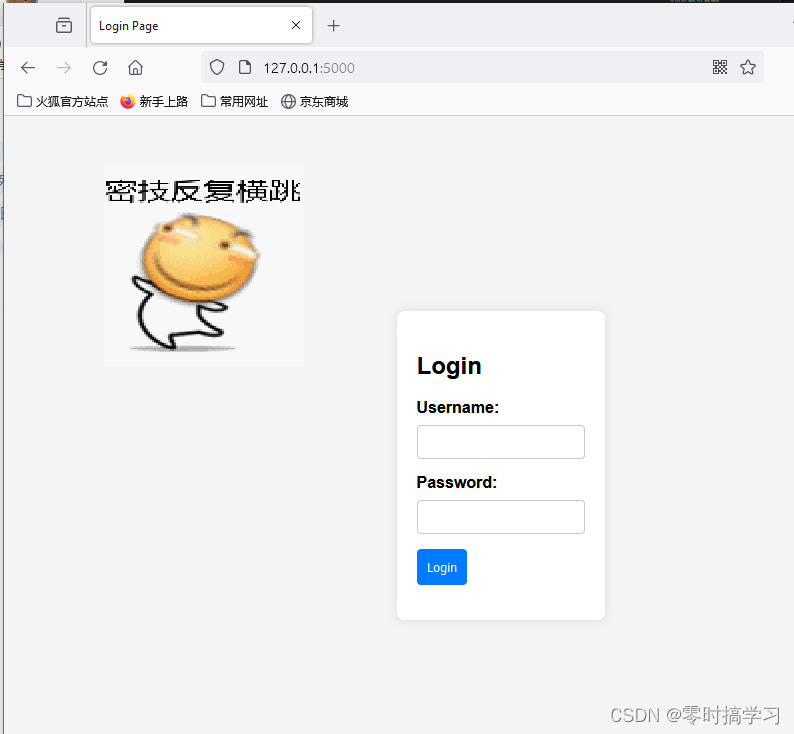
看下效果:
直接执行python

浏览器访问网页:

输入用户名密码以后:

以上就是一个简单登录界面的基本框架
包含显示以及读取用户在网页上输入的用户名与密码…再甲乙完善就成了一个完整的登录验证网页
文章来源:https://blog.csdn.net/weixin_44517278/article/details/135072843
本文来自互联网用户投稿,该文观点仅代表作者本人,不代表本站立场。本站仅提供信息存储空间服务,不拥有所有权,不承担相关法律责任。 如若内容造成侵权/违法违规/事实不符,请联系我的编程经验分享网邮箱:chenni525@qq.com进行投诉反馈,一经查实,立即删除!
本文来自互联网用户投稿,该文观点仅代表作者本人,不代表本站立场。本站仅提供信息存储空间服务,不拥有所有权,不承担相关法律责任。 如若内容造成侵权/违法违规/事实不符,请联系我的编程经验分享网邮箱:chenni525@qq.com进行投诉反馈,一经查实,立即删除!
最新文章
- Python教程
- 深入理解 MySQL 中的 HAVING 关键字和聚合函数
- Qt之QChar编码(1)
- MyBatis入门基础篇
- 用Python脚本实现FFmpeg批量转换
- Verilog HDL数据类型
- SpringBoot 中实现订单30分钟自动取消的策略
- 指法练习软件TT
- WTN6系列语音芯片:PWM与DAC音频输出在PCB设计中的优势
- 【面试突击】并发编程、线程池面试实战
- 基于SpringBoot+Vue药品管理系统
- 解惑:测试圈网红工具 Jmeter 到底难在哪里
- C++ vector的模拟实现
- 接口可以继承另一个接口吗?Java的本地方法是什么?
- 【Verilog】期末复习——设计带进位输入和输出的8位全加器,包括测试模块