【 YOLOv5】目标检测 YOLOv5 开源代码项目调试与讲解实战(2)-如何利用yolov5进行预测
如何利用yolov5进行预测
- yolov5项目的简单描述
- 不用命令行,使用pycharm运行
- main函数部分
- 运行程序来看一下 **detect.py**
- 一些参数说明
- --weights'default='yolov5s.pt', **指定权重网络模型**yolov5s/5m ,可以自行更改
- 另一种下载文件的方法
- '--source', default='data/images' 给网络指定输入
- --img-size', type=int, default=640, help='inference size (pixels)')
- '--conf-thres', type=float, default=0.25, help='object confidence threshold')
- '--iou-thres', type=float, default=0.45, help='IOU threshold for NMS')
- '--device', default='', help='cuda device, i.e. 0 or 0,1,2,3 or cpu')
- '--view-img', action='store_true', help='display results')
- '--save-txt', action='store_true', help='save results to *.txt')
- '--save-conf', action='store_true', help='save confidences in --save-txt labels')
- '--nosave', action='store_true', help='do not save images/videos')
- '--classes', nargs='+', type=int, help='filter by class: --class 0, or --class 0 2 3')
- '--agnostic-nms', action='store_true', help='class-agnostic NMS')
- '--augment', action='store_true', help='augmented inference')
- '--update', action='store_true', help='update all models')
- '--project', default='runs/detect', help='save results to project/name')
- '--name', default='exp', help='save results to project/name')
- '--exist-ok', action='store_true', help='existing project/name ok, do not increment')
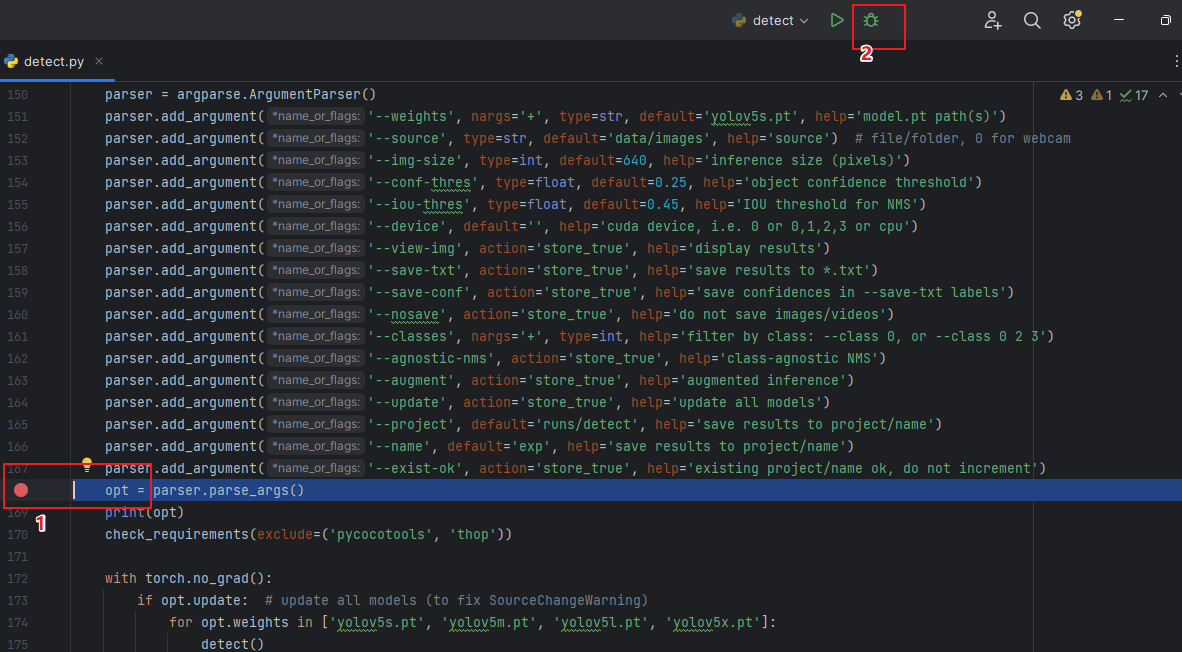
- 点一个断点,再点击debug
yolov5项目的简单描述
模型对比图

n->s->m->l->x
模型依次变复杂,可以按衣服尺码来理解
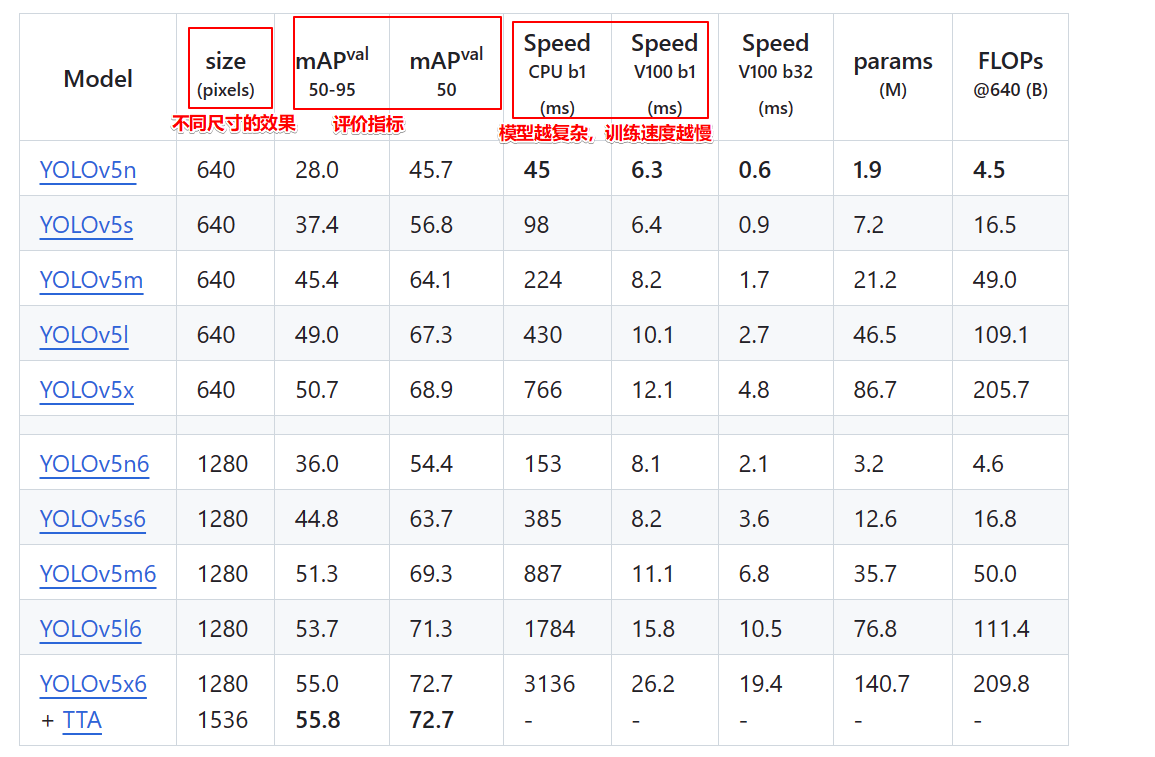
需要的包

作者的教程
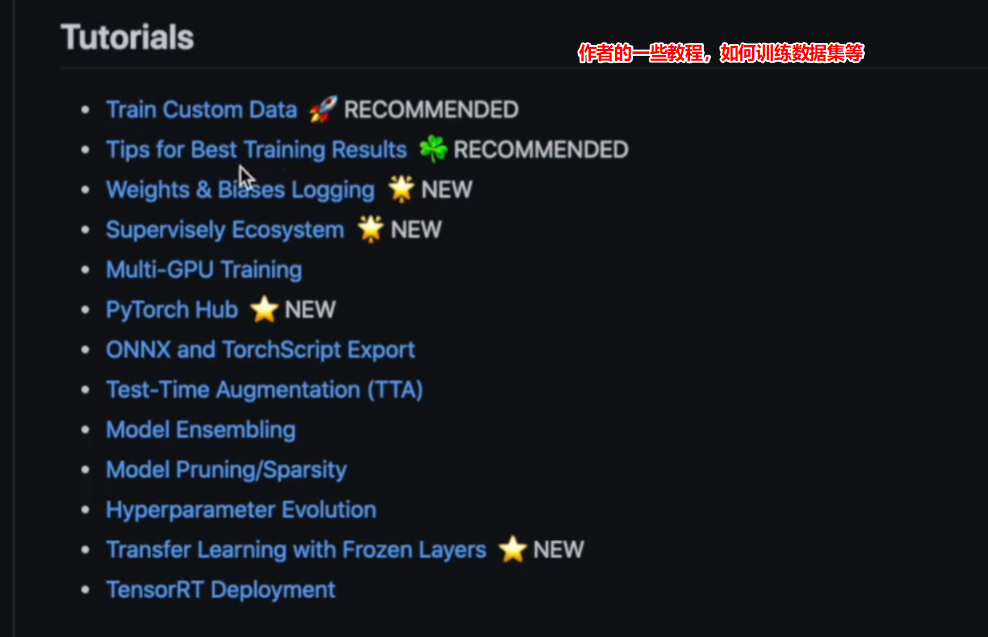
环境

inference
利用已经训练好的网络模型,进行预测
下载不同的模型,同时运行结果可以保存在文件夹下
除了使用右键点击运行,也可以使用命令行运行
source 是参数,后面的值可以赋值给该参数,如果要运行,需要给该网络指定一个输入,图片,视频,文件夹,模糊方式(匹配所有.就.jpg结尾的文件),链接(youtube视频),rtsp传输协议(实现摄像头实时检测)

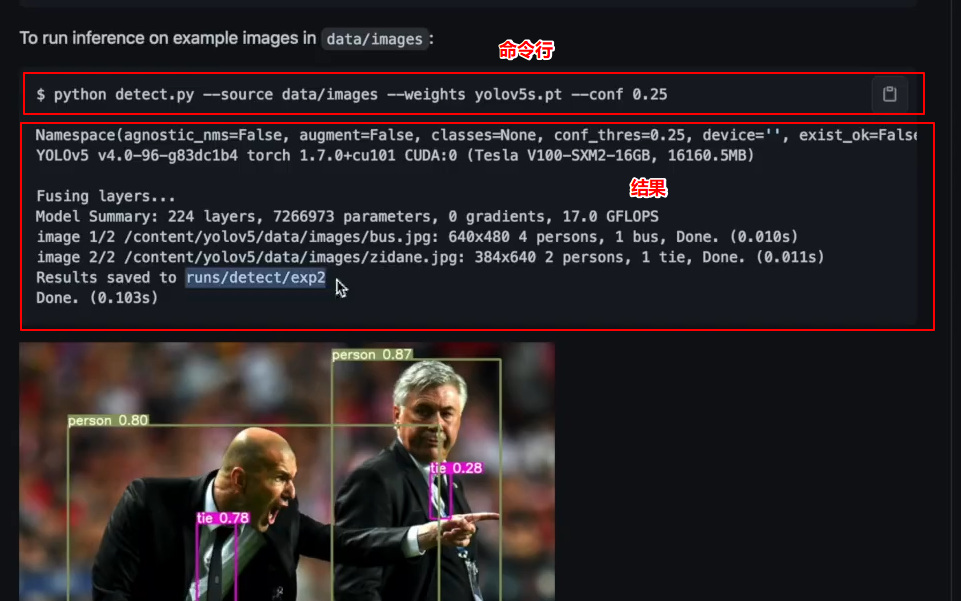
不用命令行,使用pycharm运行
main函数部分
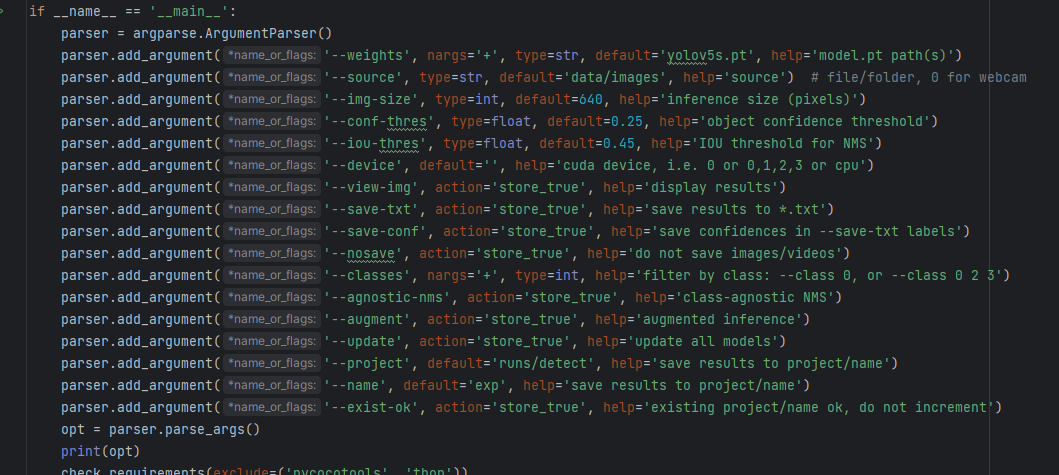
给命令行创建参数
weights 权重,默认字符串型,有默认值5s
source 默认字符串型,有默认值
运行程序来看一下 detect.py
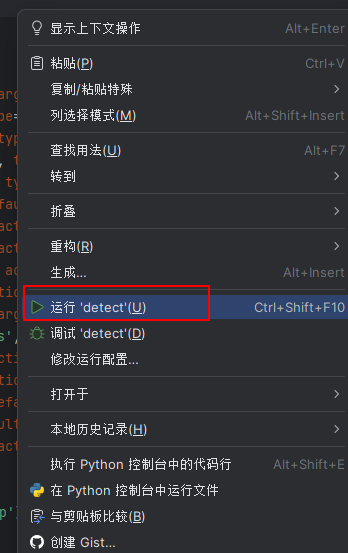

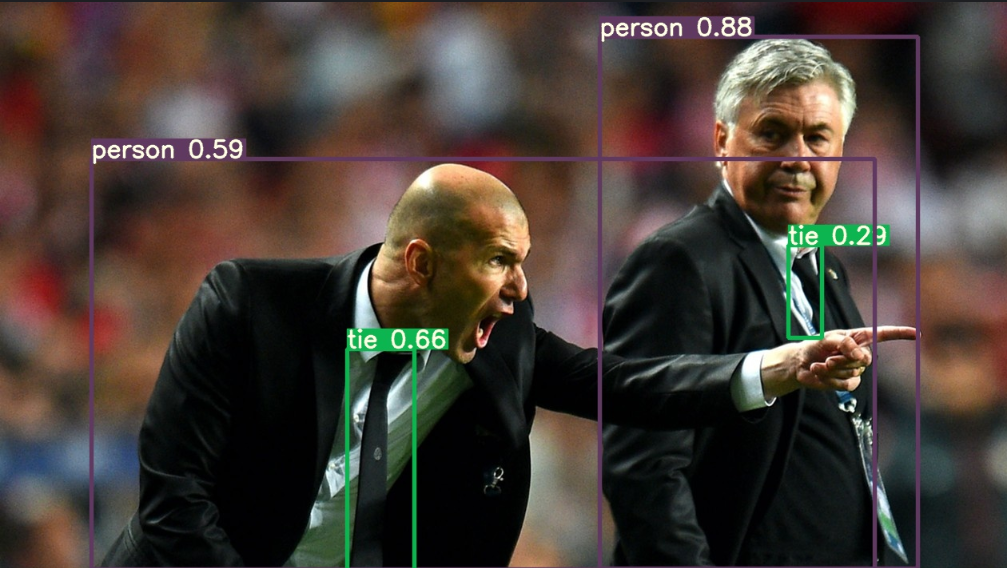
运行时会自动下载yolov5s.pt,成功运行如图


跑代码时遇到的一些问题,可以参考我的其他博客
一些参数说明
–weights’default=‘yolov5s.pt’, 指定权重网络模型yolov5s/5m ,可以自行更改
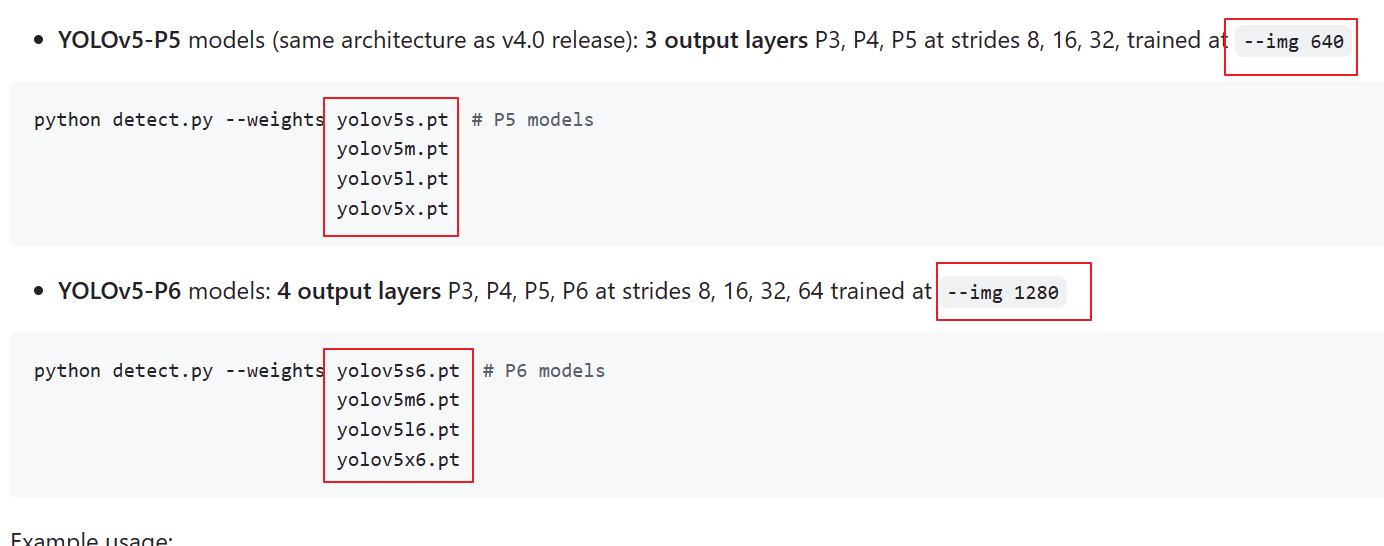
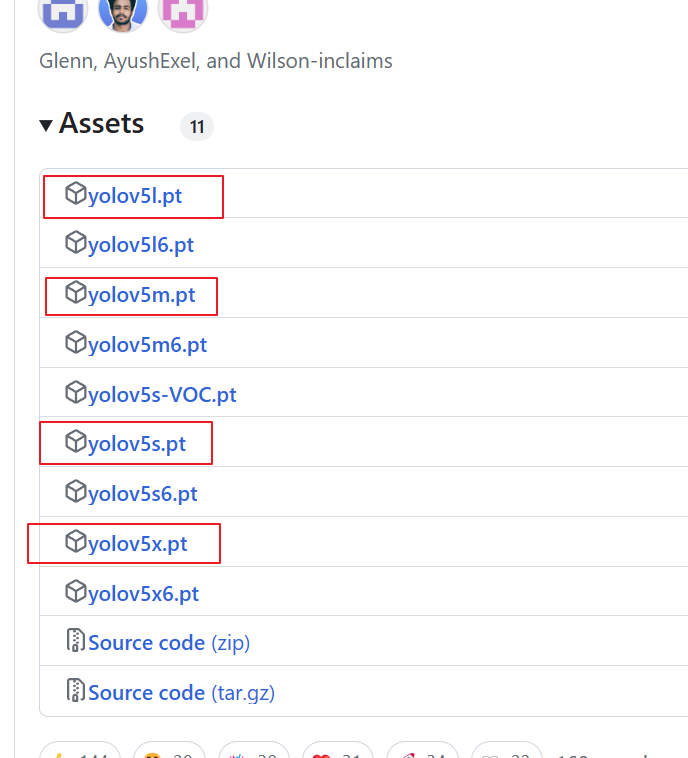
这里可以先下载好
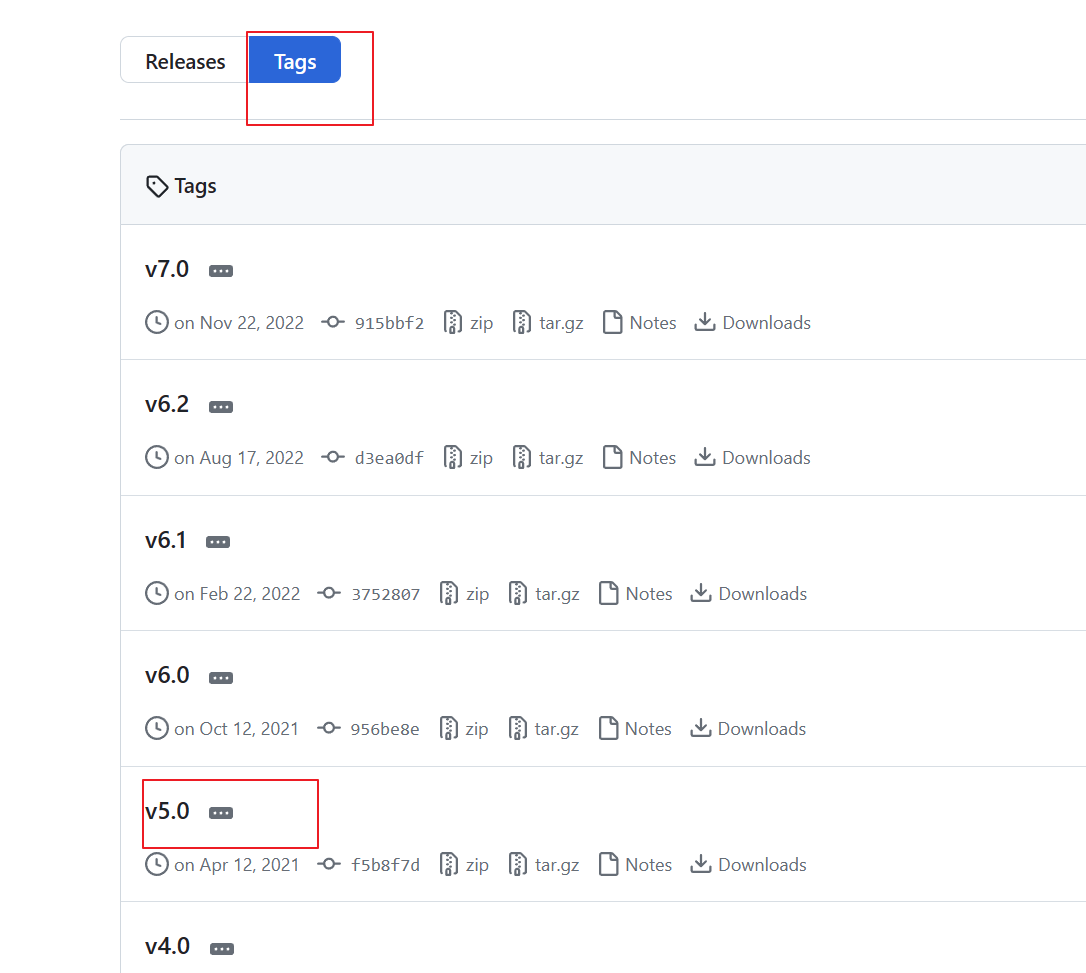
https://github.com/ultralytics/yolov5/releases/download/v5.0/yolov5s.pt
https://github.com/ultralytics/yolov5/releases/download/v5.0/yolov5m.pt
https://github.com/ultralytics/yolov5/releases/download/v5.0/yolov5l.pt
https://github.com/ultralytics/yolov5/releases/download/v5.0/yolov5x.pt
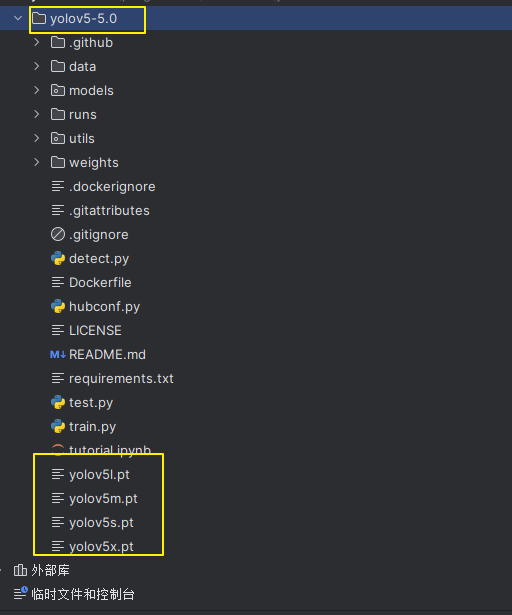
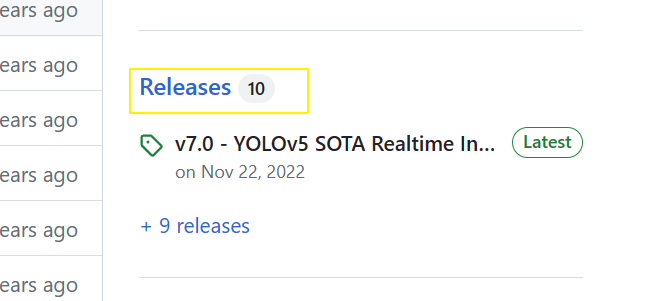
另一种下载文件的方法
‘–source’, default=‘data/images’ 给网络指定输入
这里我们可以尝试自己新输入一些图片,保存至此路径下
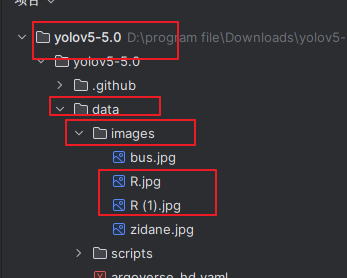
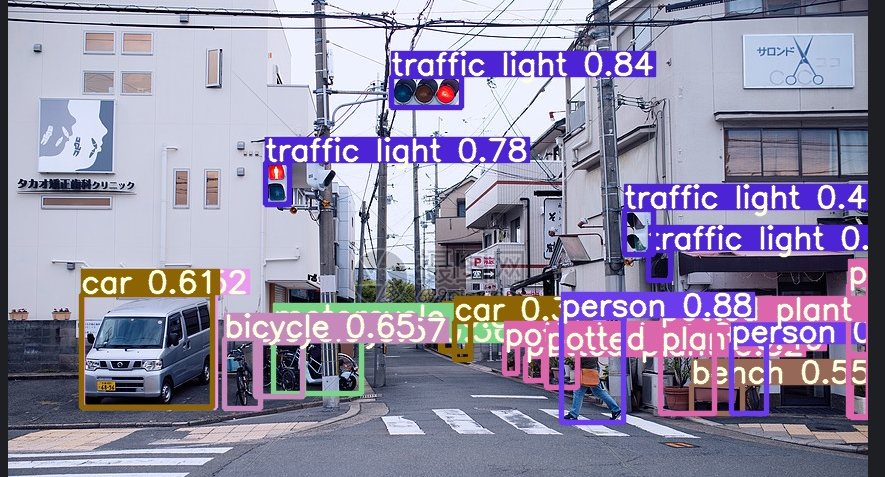
这里也可以只指定一张图片
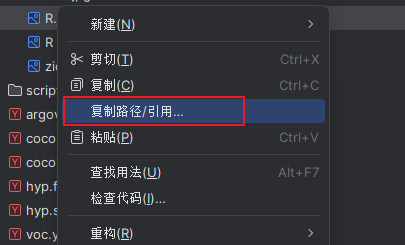


这里也可以检测视频
首先新建一个目录

粘贴视频到此目录下

更换下路径

检测是提取一帧一帧开始检测

检测完成打开文件夹
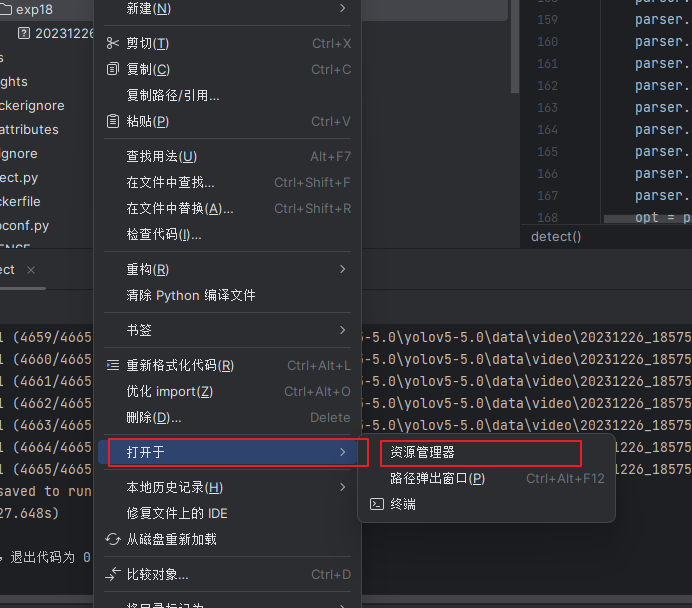
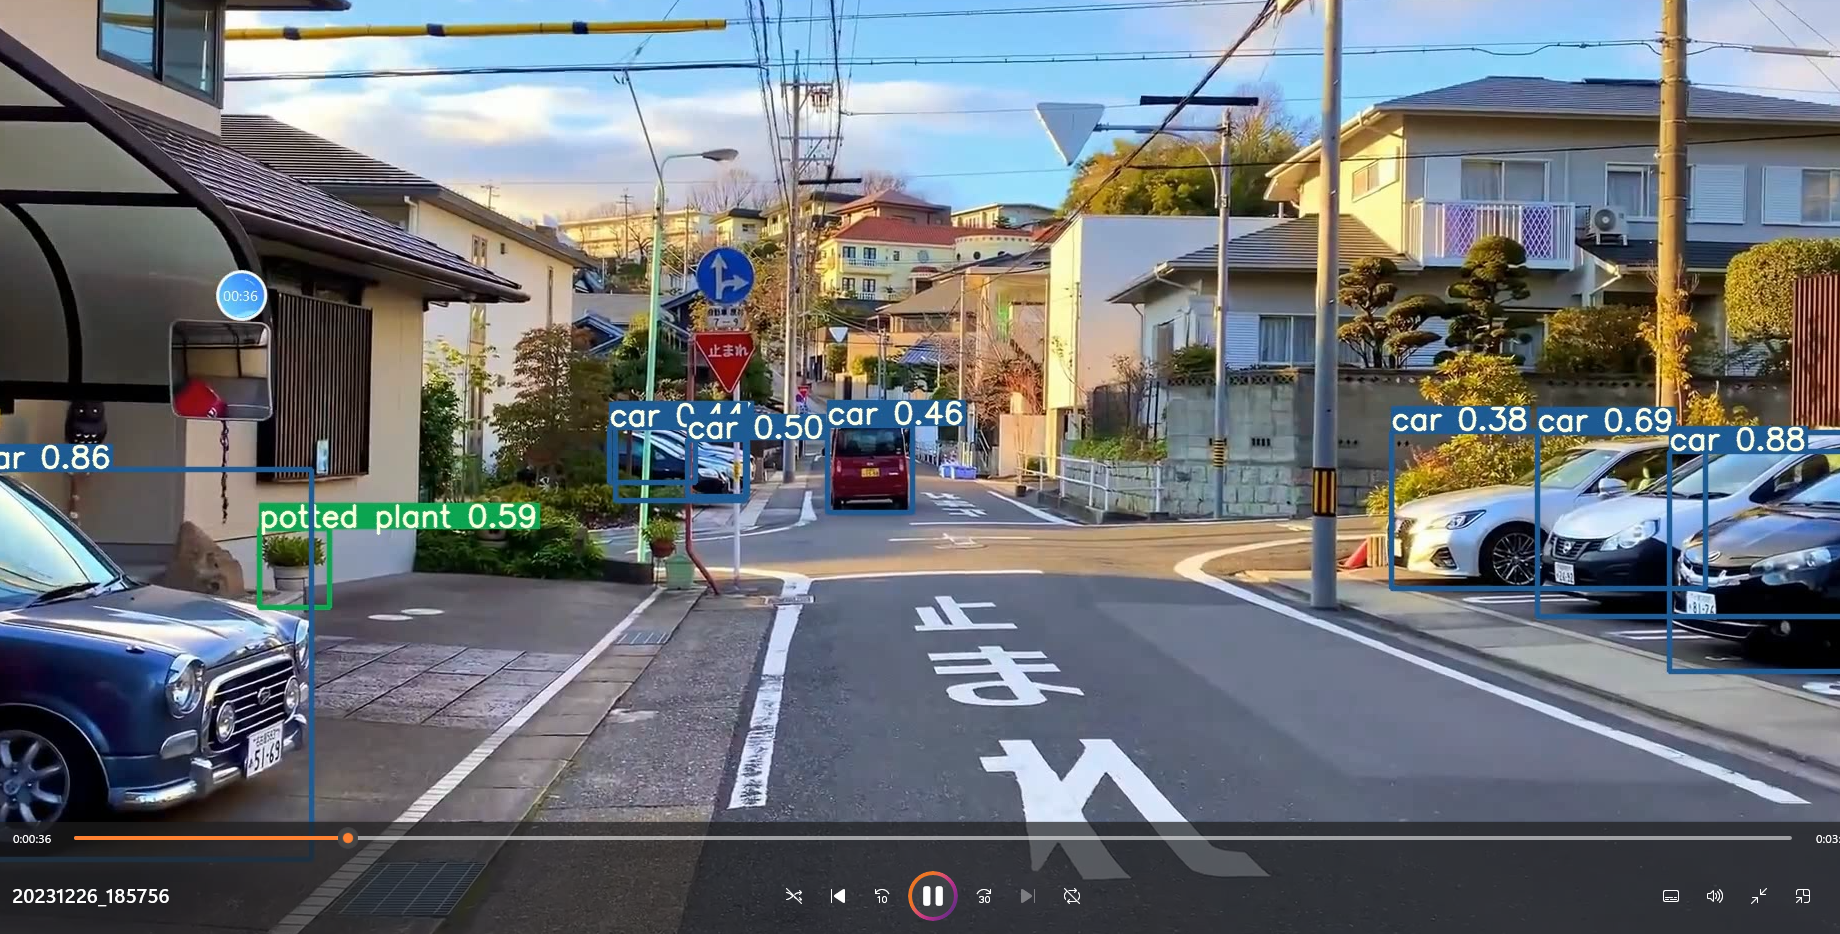
效果如图
–img-size’, type=int, default=640, help=‘inference size (pixels)’)
640,图形大小指的是在训练过程中把尺寸进行缩放,然后再放大
输入输出图片尺寸保持不变
最好与训练网络匹配
‘–conf-thres’, type=float, default=0.25, help=‘object confidence threshold’)
只有置信度大于0.25时,我们才相信这是一个目标
‘–iou-thres’, type=float, default=0.45, help=‘IOU threshold for NMS’)
iou置信度
nms:non maximum suppression
圈出的不同区域,多个区域指定同一个目标,选择出最优的一个框,使用iou方式
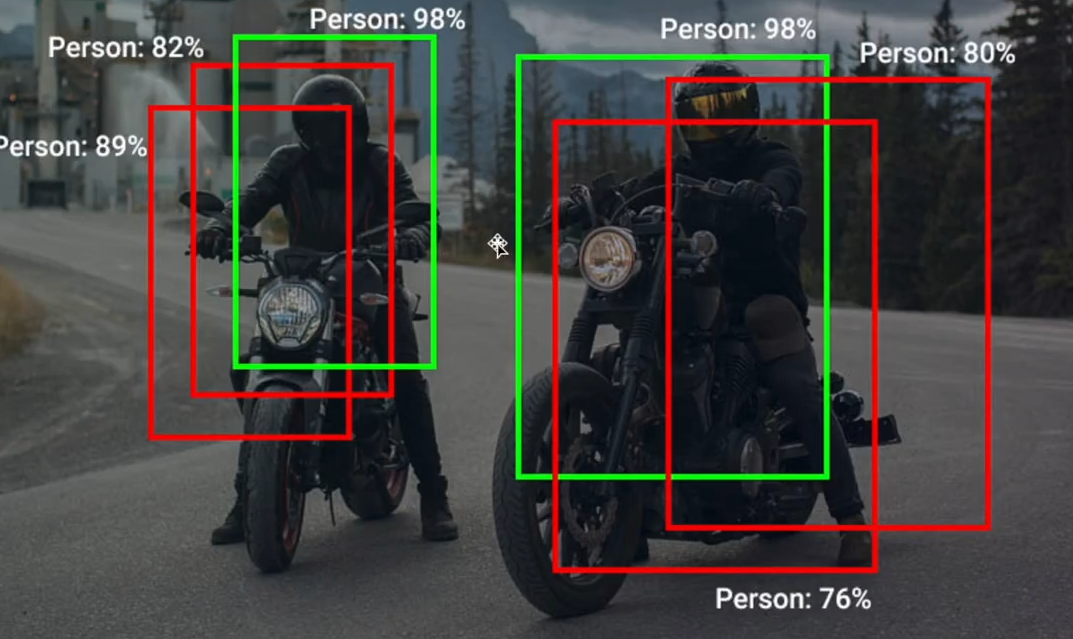
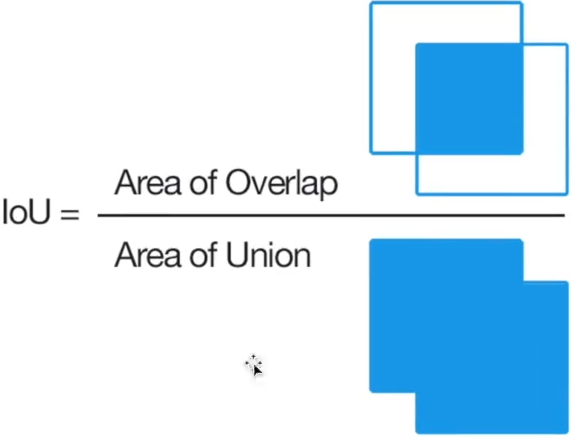
iou方式:intersection over union
交集与并集相除

iou大于阈值,在多个框中选一个框

代表完全重合才合并
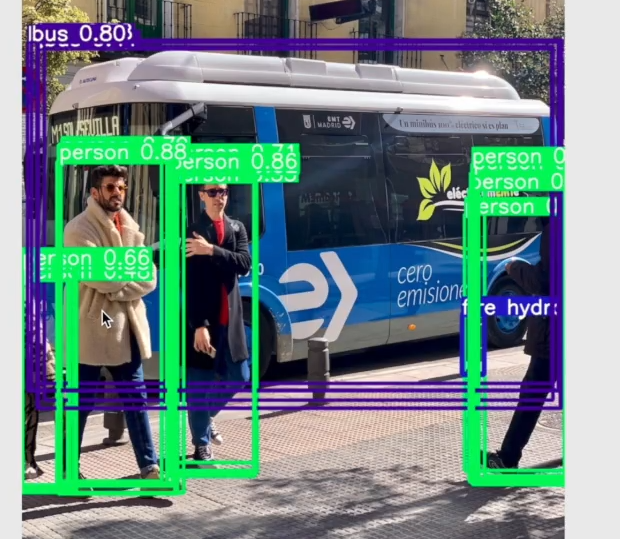

有交集就合并
‘–device’, default=‘’, help=‘cuda device, i.e. 0 or 0,1,2,3 or cpu’)
设备cuda/cpu
‘–view-img’, action=‘store_true’, help=‘display results’)
只要指定了这个参数,就变成ture
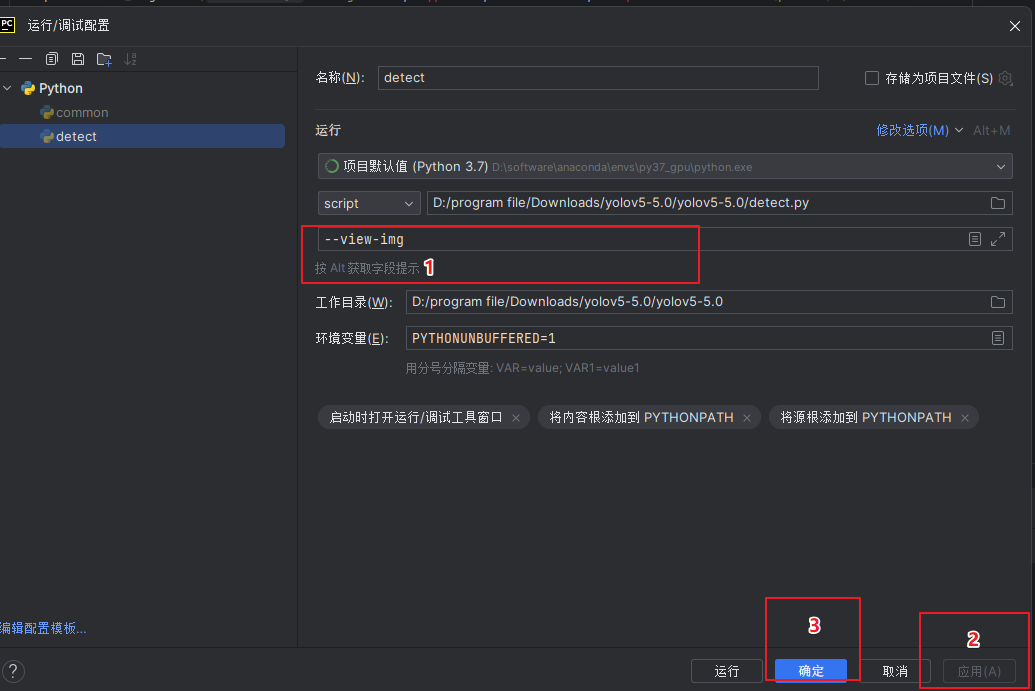
通过命令行的方式运行,先切换路径

这个是设置参数

设置属性
平时一般不用命令行输入参数,去设置属性
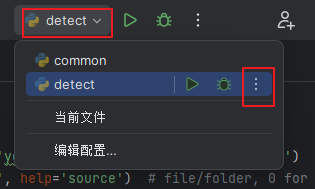
‘–save-txt’, action=‘store_true’, help=‘save results to *.txt’)
保存为txt,

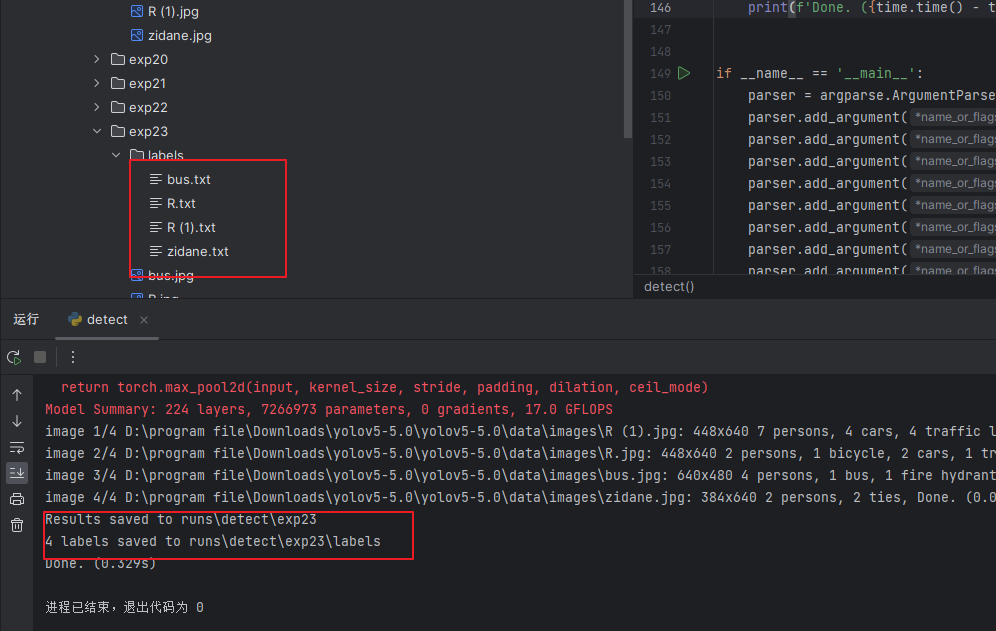
‘–save-conf’, action=‘store_true’, help=‘save confidences in --save-txt labels’)
保存置信度
‘–nosave’, action=‘store_true’, help=‘do not save images/videos’)
不要保存图片和视频
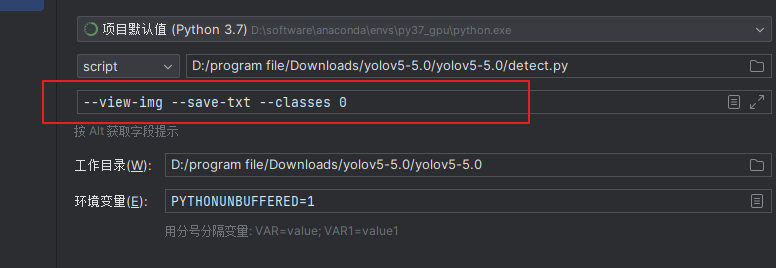
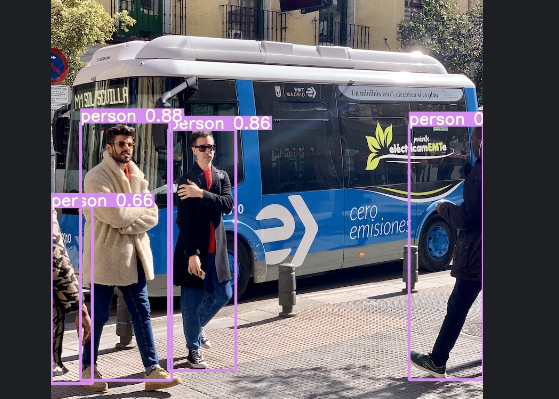
‘–classes’, nargs=‘+’, type=int, help=‘filter by class: --class 0, or --class 0 2 3’)
可以给class进行多次赋值,这里如果只想看人,可以给class设置为0
‘–agnostic-nms’, action=‘store_true’, help=‘class-agnostic NMS’)
增强的nms
‘–augment’, action=‘store_true’, help=‘augmented inference’)
也是增强的检测
‘–update’, action=‘store_true’, help=‘update all models’)
把网络模型中不必要的部分去掉,只保留预测需要用到的东西
‘–project’, default=‘runs/detect’, help=‘save results to project/name’)
把我们的结果保存到什么位置
‘–name’, default=‘exp’, help=‘save results to project/name’)
保存的名字
‘–exist-ok’, action=‘store_true’, help=‘existing project/name ok, do not increment’)
在原来的文件夹中新设一个文件夹
点一个断点,再点击debug
参数最终都会放到opt中
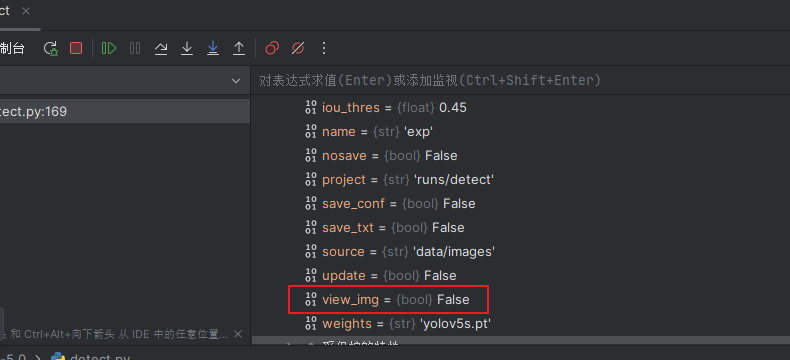
再往下运行一下

可以看到各个变量的值
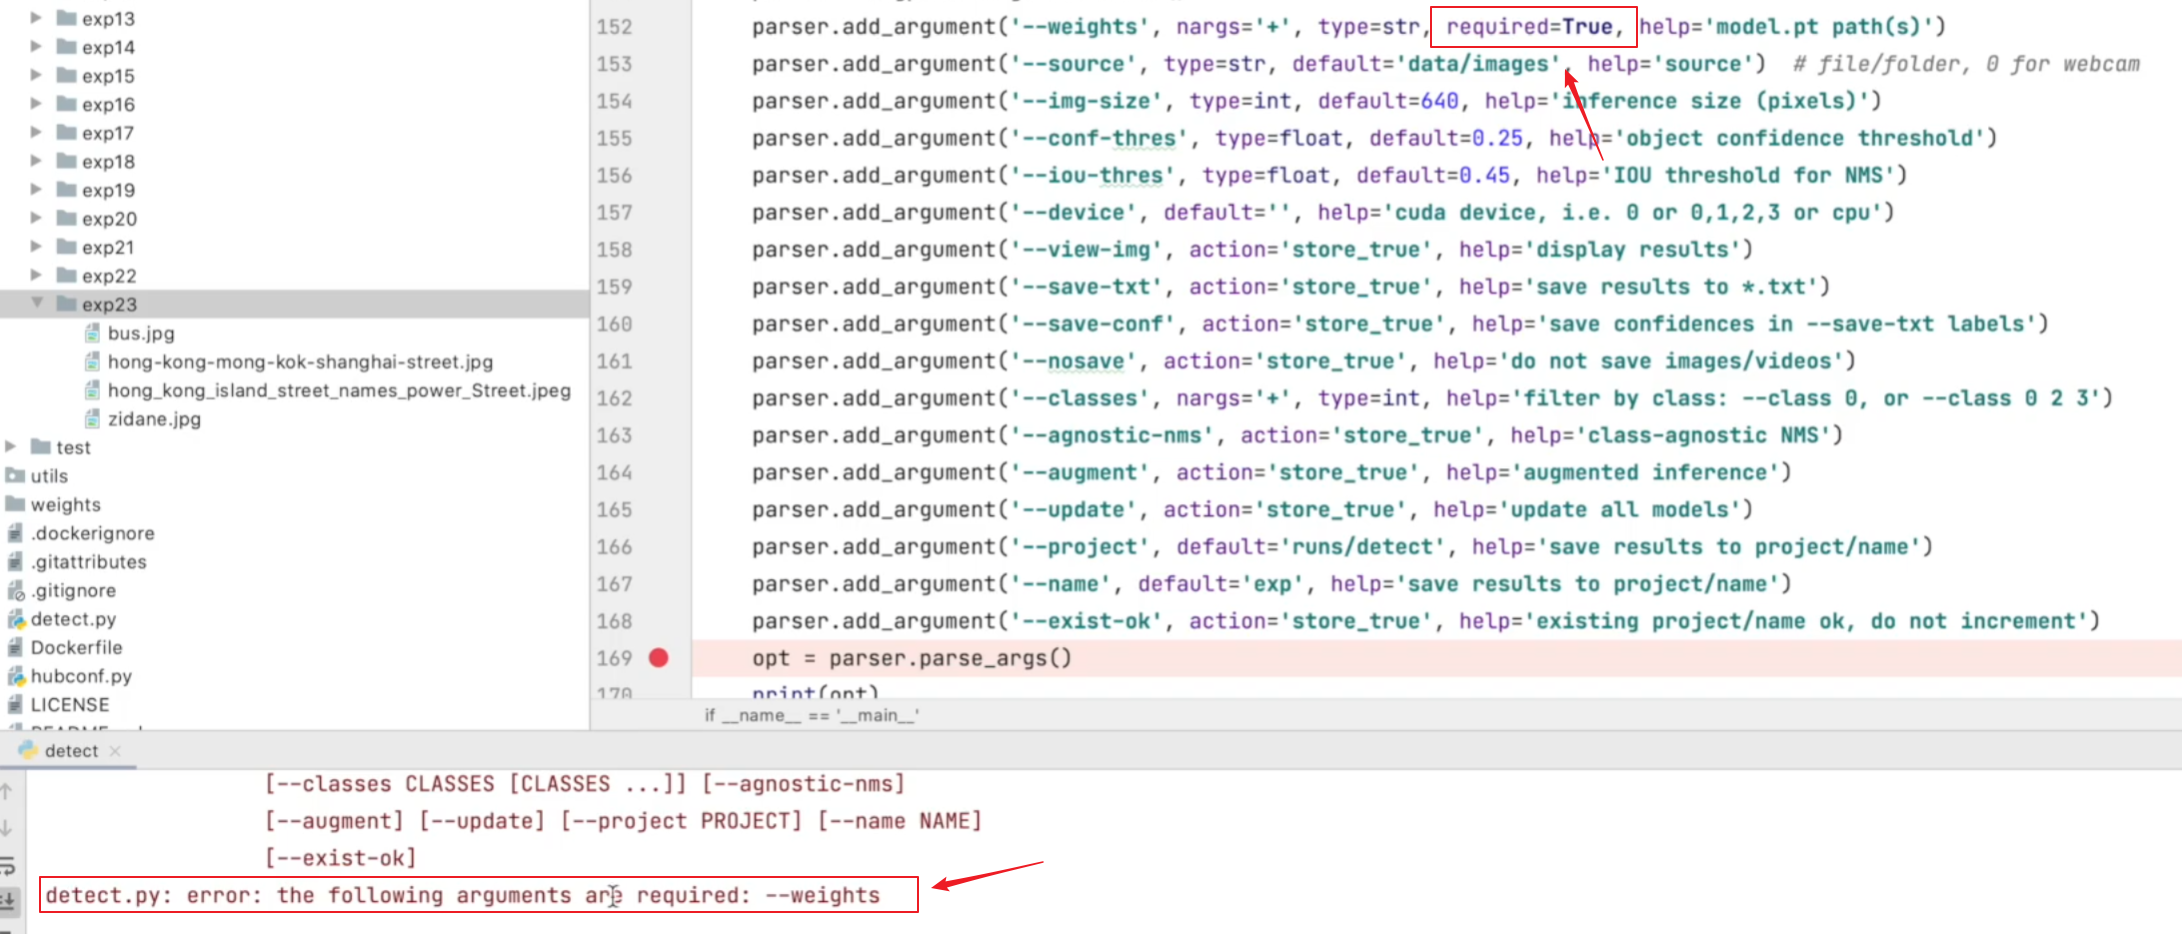
有的人代码不写default,直接写required,会出现报错,必须加参数,这种情况可以删除required加default
本文来自互联网用户投稿,该文观点仅代表作者本人,不代表本站立场。本站仅提供信息存储空间服务,不拥有所有权,不承担相关法律责任。 如若内容造成侵权/违法违规/事实不符,请联系我的编程经验分享网邮箱:chenni525@qq.com进行投诉反馈,一经查实,立即删除!
- Python教程
- 深入理解 MySQL 中的 HAVING 关键字和聚合函数
- Qt之QChar编码(1)
- MyBatis入门基础篇
- 用Python脚本实现FFmpeg批量转换
- 【保姆级教程】PAI x EasyPhoto,节日氛围AI写真生成
- leetcode:136只出现一次的数字(详解),又名找到单身狗
- 明渠流量监测站的优势
- Java面试题及答案汇总来啦!快来领取
- 轮播图的制作
- 算法设计:欧几里德算法求最大公约数问题
- 【计算机算法设计与分析】九宫格问题/三阶幻方问题(C++_回溯法)
- torch.solve已弃用,如何改为torch.linalg.solve?
- OpenCV 安装概述
- 丢失的数字